AI and the auteur: using neural networks as artistic tools

Topics

One day while surfing in Bali, I became aquainted with this genius artist by the name of Gleb Solntsev. As we began to talk, he asked me what I did for a living, and when I told him about machine learning, his eyes lit up. Consequently, Gleb proposed a sort-of joint project for the two of us: we’d teach a neural network to create art in his style.
From the outset, it was clear that this task would either be incredibly simple or impossibly difficult. The thing is, while it’s true that there are already tons of apps capable of performing the kind of style transfer we had in mind, when an artist really has their own style, we need to properly consider and implement all the idiosyncrasies that come with that style. Hence, if we were to do this according to our standards, this process would consist of so much more than simply transferring colors and palette choices or drawing a couple of brush strokes in a similar manner as the original artist.

An example work displaying Gleb Solntsev’s characteristic style
We decided to christen our undertaking the SunGaz project, a name formed by combining the last names of the artist Gleb Solntsev, and Martian Engineer Alex Gaziev. This venture would turn out to be a complex, although nevertheless, exciting project.
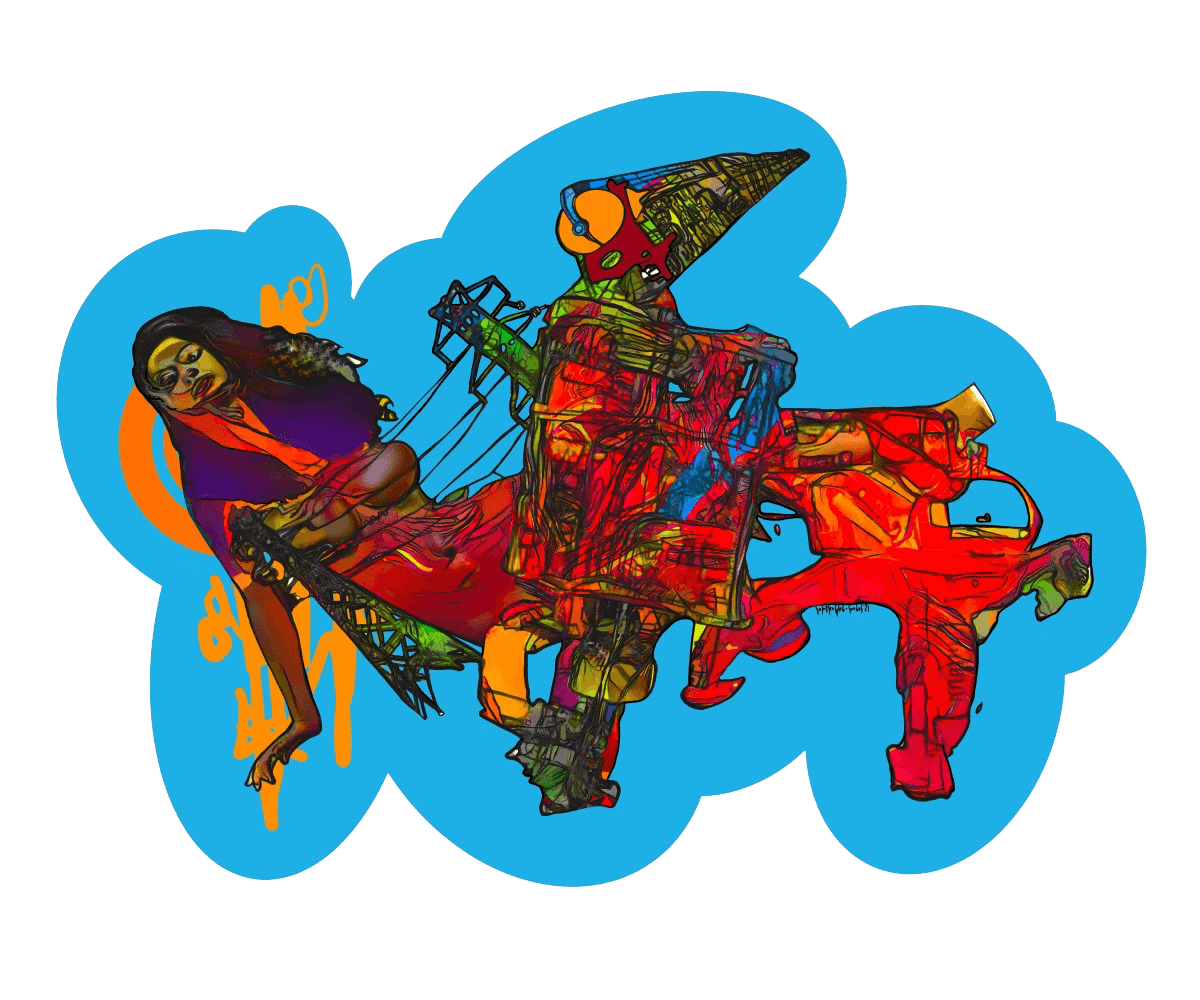
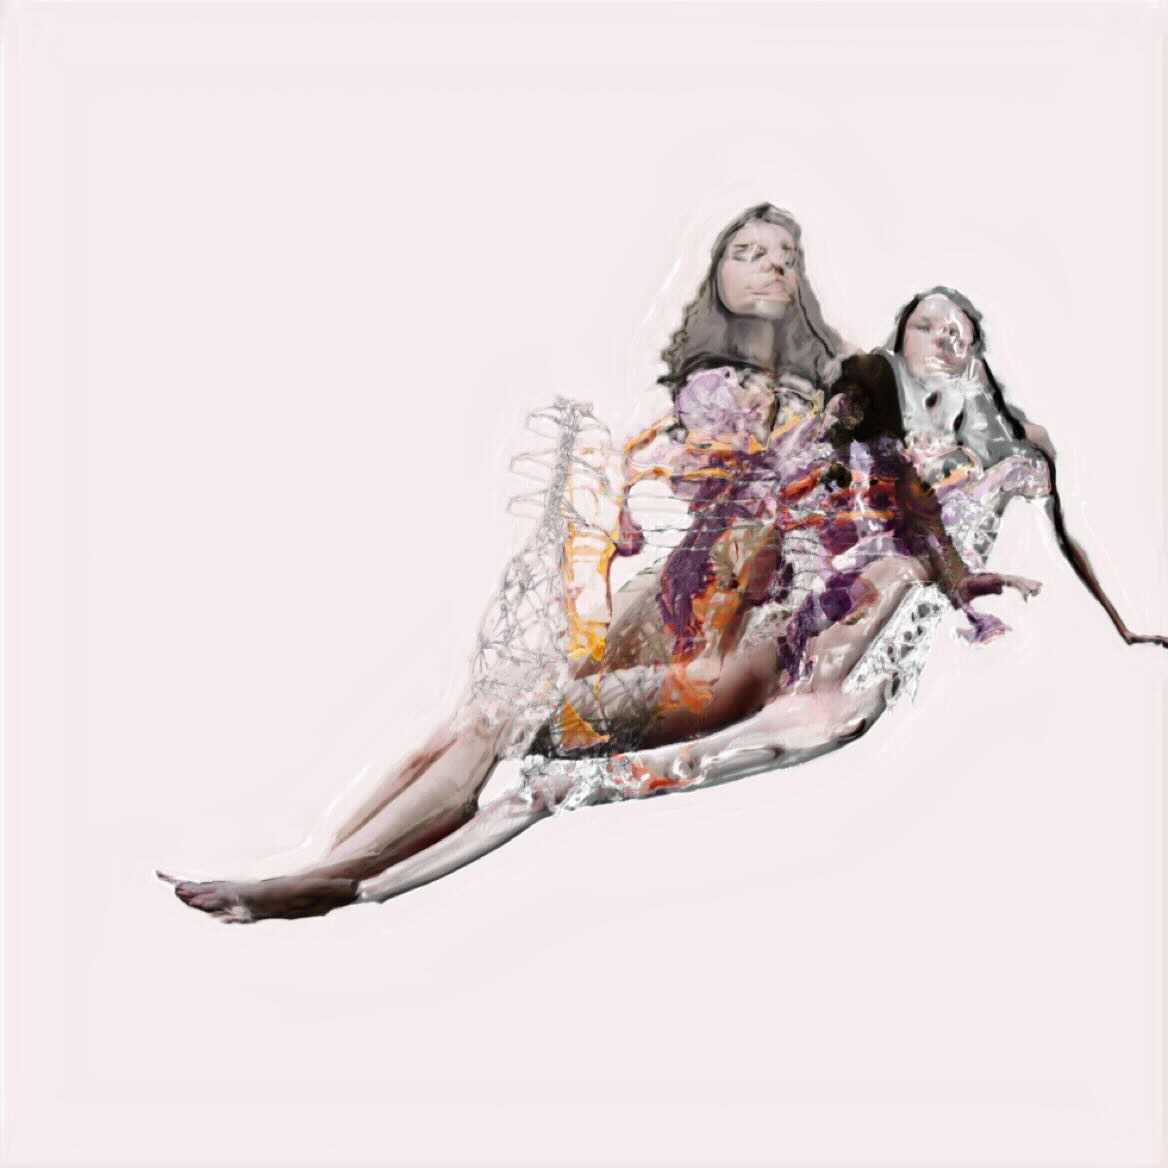
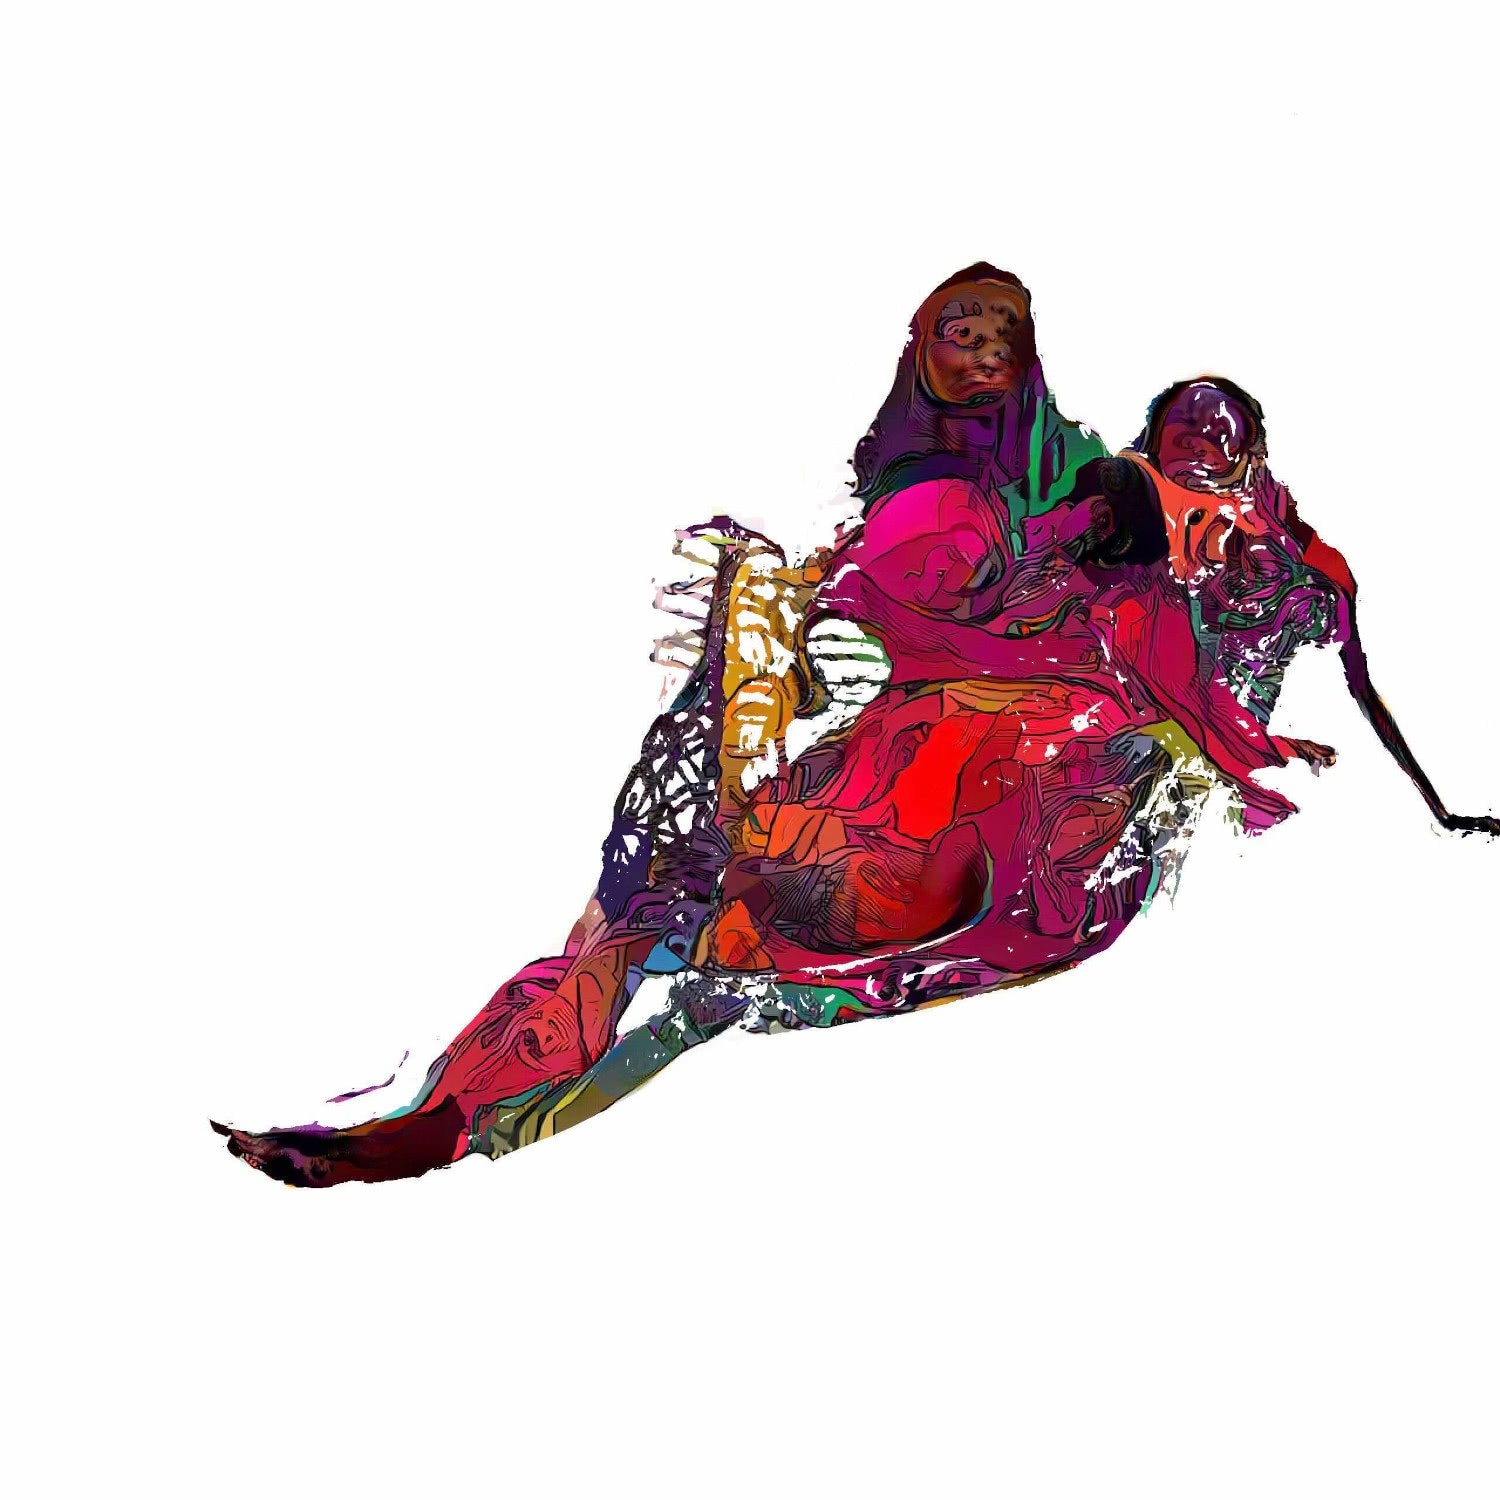
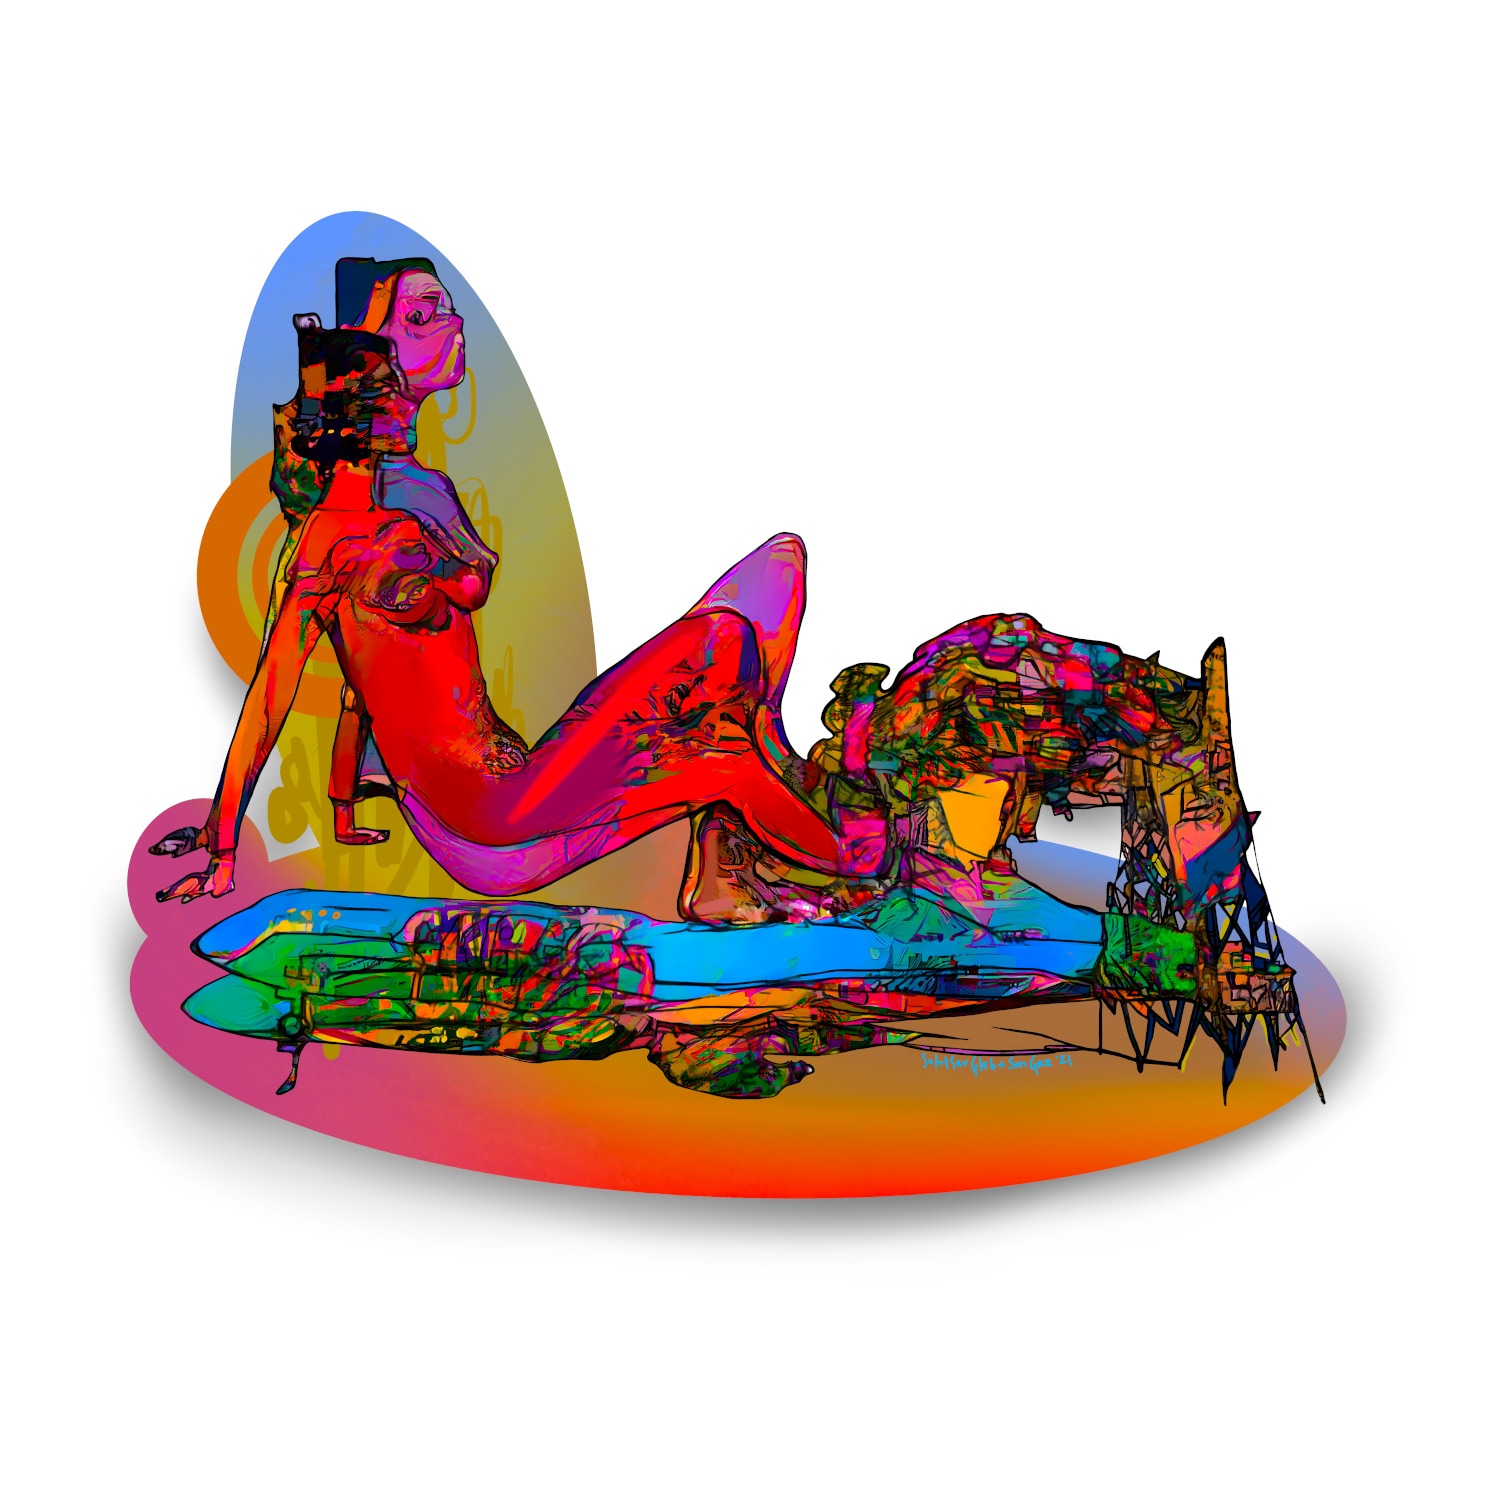
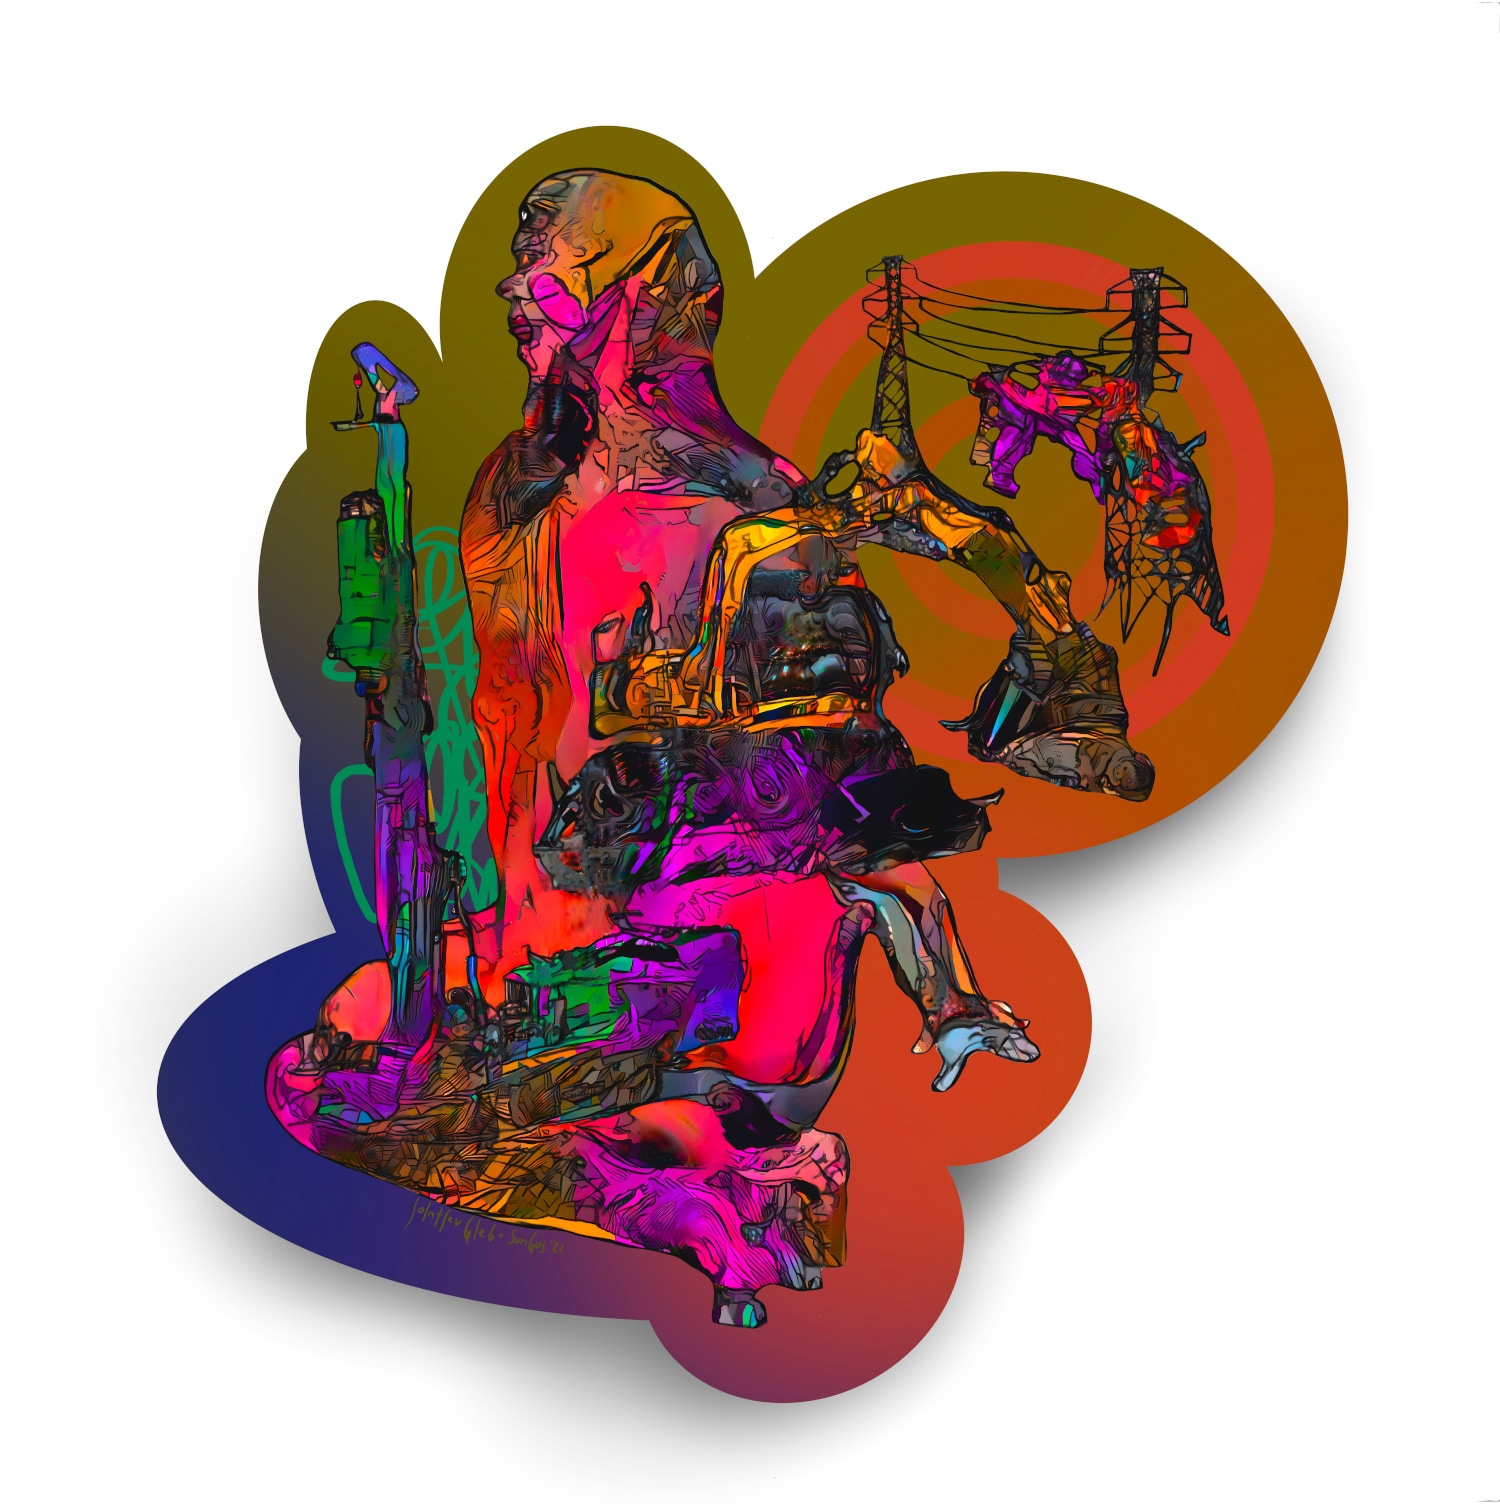
Ultimately, in order to achieve our desired results, we would end up training several neural networks, and writing a number of auxiliary algorithms. And of course, along the way, we’d also have the pleasure of immersing ourselves in the deeper neural experience we’d found ourselves in. But before jumping into further detail about the process itself, let’s take a look at one of the finished pieces below:


One of our final works
So how did we get there? Since this was such a long journey, to better examine each part of the process, let’s break it down into steps. We’ll start, logically enough, with the concept itself.
Step 1: Concept
In the art world, everything starts with the concept. Gleb’s concept was centered around images of the female form as it was suppressed by the brutal, masculine objects which were born as a result of the industrial revolution. These objects included things like wires, beams, construction equipment, industrial transportation, and so on. He aimed to illustrate a fundamental struggle for equality by contrasting the organic nature of the feminine form alongside the rigid, functional machines which would act as stand-ins for a male-dominated society. His task was impartially revealing the struggle between these two through the lens of the male artist.
Our project was to be a continuation of Gleb’s series which he had “manually” painted. These works had been exhibited at the Gogol Center in Moscow (and are now on exhibition in Dubai). There were 15 works in total, all of them detailed, UV-printed on plexiglass, and 120 cm in length on the larger side of the pieces.

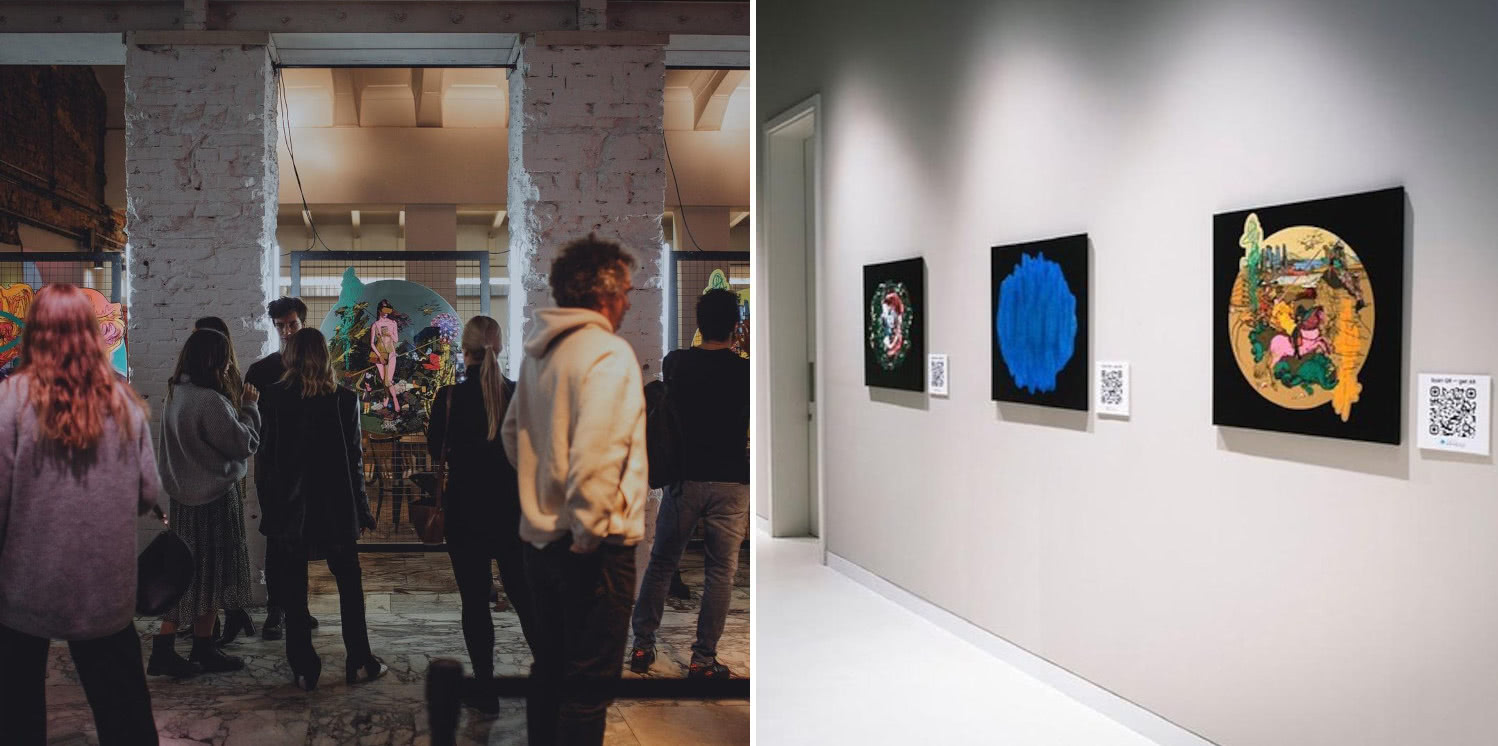
Some of Gleb Solntsev’s works on display
His suggestion for our project was to create more “neuro-pictures” like those works. Our eventual objective was to create art which possessed Gleb’s unique style while using the help of a machine. This would mean the finished results would feature objects placed using a classic dynamic compositional scheme—supporting lines and a main object located at the focal point where the lines intersect and an auxiliary object also present inside the frame. Further, the neuro-pictures would need to illustrate an interaction between the two conceptual subjects, as described earlier, while also adding his glitches, signature colors, lines, and trademark graphics.
Step 2: References
References are the items that most artists or illustrators start with when creating a work. For example, Francis Bacon’s workshop was full of newspaper clippings and illustrations from books, where he’d highlight the images and lines that inspired him.

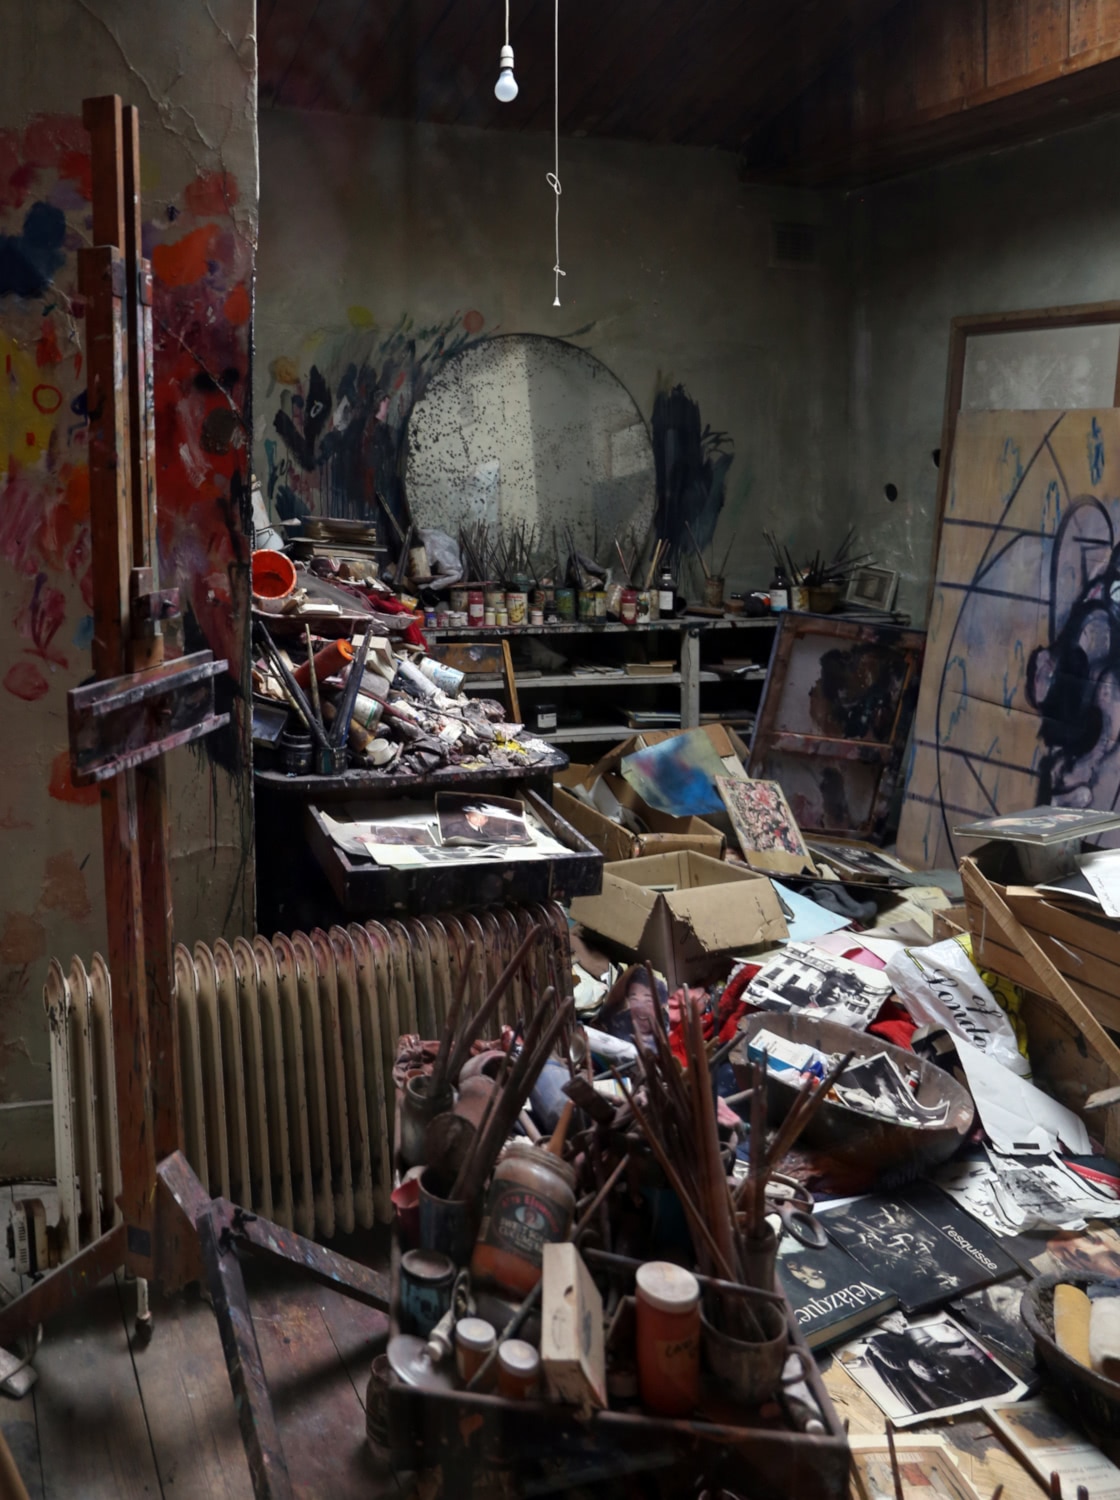
Francis Bacon’s studio (Source)
For our project, we needed images of women as well as the objects which would stand in for the “masculine” machines. Gleb sent me a few pictures, and after some time, we were able to populate our reference library. We choose appropriate images from relevant sites and then we took the time to meticulously crop the necessary objects. This was due to the fact that using an automatic cropping method would mean any remaining image background would produce too much “noise” when working with glitches.
Step 3: Maps of interest
After gathering our references, it was time to work on the composition itself. As previously mentioned, we used a classic dynamic compositional scheme, with supporting lines and a focal area at the intersection of those lines. The main objects would be placed in the focal center, while supporting objects and additional details were placed on the second (and sometimes on the third) diagonal lines.

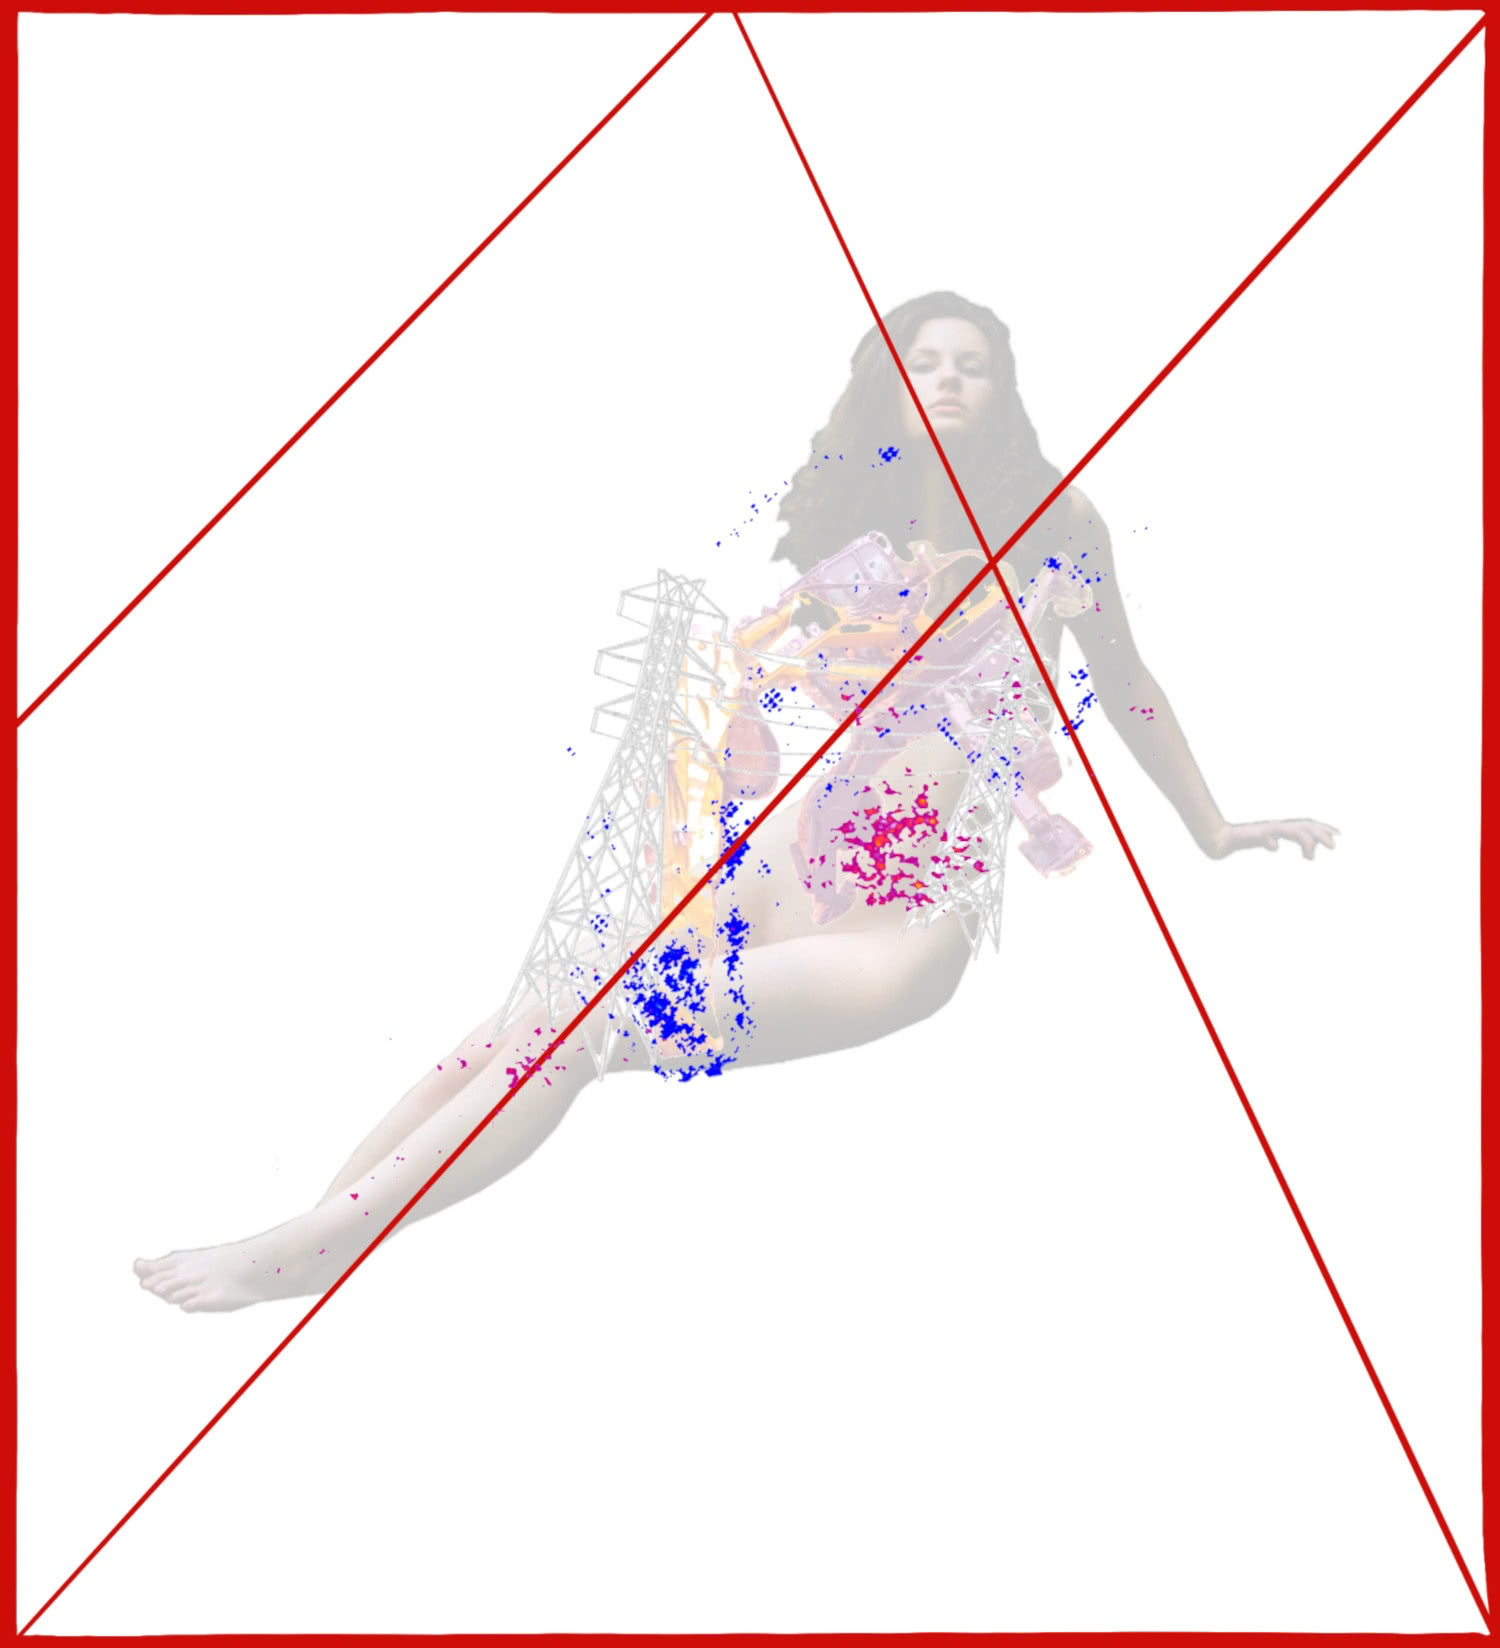
The compositional scheme we worked with for our project
This turned out to be one of the most complex steps of the process. While it was technically possible, randomly placing objects next to each other was too unpredictable, definitely did not look pleasant, and therefore, was somewhat pointless.
Prior to bringing a neural network into the mix, we ended up with trying a solution that involved a lot of code, and with results which saw everything was placed in the center, margins from the edges, and with up to 10 auxiliary objects in the frame. The pictures had a pretty uniform appearance. We wanted this process to be smarter: things should automatically rotate, turn, and resize in order to fit the scheme.
To that end, I adopted a rather old, well-known approach for neural networks analysis—Saliency. Via ImageNet, we obtained a model trained to classify 21,000 different object classes. Everything was laid out, from simple concepts like “mug”, “pen”, “hole” to NSFW images.
Saliency works like this: we find the spots the neural network looked at in the original picture while it was classifying the image. This is because we need to understand exactly how the network determined the object’s classification. To do this, we took into account all the operations applied to that picture while it was going through the network—in other words, we accumulated the gradient. Each operation was kept in the states of the vectors and tensors. We got an response, took the loss function from it (we checked how wrong it was to take the reciprocal derivative). The process could be described as pushing the response with the gradients back into the neural network from the finished state and getting back a very familiar picture, but this time we’re getting an image which is a map of pixels showing the spots where the network had focused during classification. The pixels that didn’t affect the decision were thrown out. This advanced approach works great for classifiers analysis (although it may perform worse with other tasks).

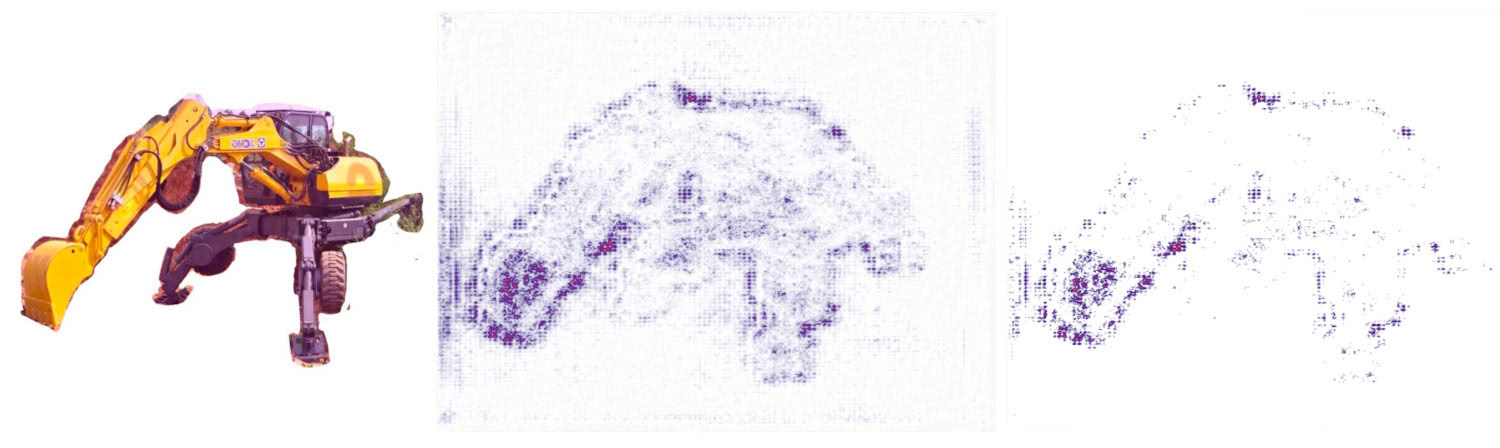
We received an image with a map showing exactly where the network had been focused
In addition to using the pre-trained ImageNet model for industrial objects, I decided to use a separate NSFW classifier for images of the female body because it had been specifically trained on that type of data. Interestingly, upon comparing the two networks, the results turned out to be quite different: ImageNet and the NSFW model marked some pictures as we thought they would determine them, but some of the results were rather controversial, to say the least. Perhaps, it was because the former model hadn’t classified many objects of this type.

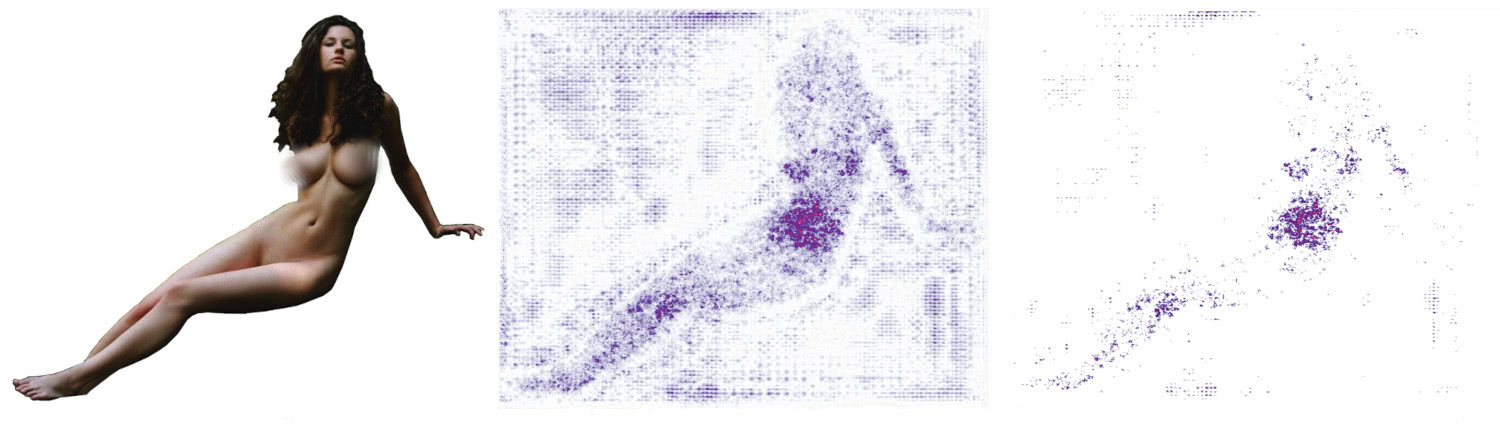
An example map of interest with NSFW material. Source photographer: Stefan Soell
As seen in the two examples above, after analyzing the reference pictures, we ended up with two maps of interest.
Step 4: Composition
After obtaining a map of interest from an analyzed and classified object, we’d then find use the map to find where the object optimally matched our compositional scheme.
Imagine our compositional scheme as a matrix made up almost entirely of 0s, but the exception is that there are 1s where the lines on the scheme are located. Now, let’s also think of the heatmap showing points of interest as a matrix of 0s (except here the map’s detected pixels have values ranging from 0 to 1). We overlaid both images, and then multiplied them pixel by pixel. By doing this we could find the maximum areas where one of our pictures overlapped with the compositional scheme.
So, how could we optimize the picture position regarding the scheme? That’s easy enough to answer—by moving it. The problem was this: in order to try and achieve a more artistic and natural flow, all of our pictures had been augmented to achieve maximum randomness. To do this, for instance, we used resizing, scaling, or we flipped the images. We used more powerful augmentations for additional objects, and as a result, every time I rotated the picture, it was processed in the classifier a little bit differently. This meant a map of interest could change as the network might have decided to highlight different places.
And, let’s note that while, so far, we’ve just been talking about the first object, we were really after the interaction between two objects. Therefore, it was also necessary to look at the second object on the scheme and find the position of the second and first object in conjunction. For this, I took the sum of the pixel weights at the intersections and added them.
In the end, I was able to place the objects in a way so that the most notable parts of both objects would be located at an interesting intersection on the compositional scheme. We strove to do this as much as possible, but it didn’t always happen. Further, the process was difficult because we had to track and check all the steps and positions. Still, eventually, we managed to organize this process in a fast and efficient manner.
There was also another challenge: some objects were not completely cropped. In these cases, we had to crop them pixel by pixel, taking care to clean up any white backgrounds that weren’t really transparent. To simplify and speed up this operation, I wrote some code to perform smart image blending using the PyMatting library.
Let’s explain this a bit more: here, as an input, we’d take an image with a manually cropped background (perhaps with a white background or some artifacts of the cropped background). There could also be leftover white color present inside the object itself, for example, some white color in the spaces between wires, car windows, and so on. We wanted all of these leftovers to be transparent.
An object is morphologically created from this threshold in the form of a large shape. This is the primary mask, and it was suitable for our needs in around 50% of the cases. With the help of the Skimage library, this was quite easy to do. After that, I strongly shifted the threshold so as to not be so close to the white color, and then drew the pixels that possessed a probability indicating the mask should be applied.
The PyMatting library uses a neural network to create a transition from the object’s pixels to the background using an alpha channel. This library calculates an alpha-matting layer on a mask. The network takes a picture with a white background, and clips everything except for the color white. This is done according to a certain threshold so that various transitions in the grayscale remain.


An alpha layer mask for the PyMatting library
In this way, the neural network inside the PyMatting library has been trained to obtain alpha-matting. It looks at the painted pixels and tries to select where the alpha is and isn’t by comparing the mask with the original image. With this comparison, it makes an alpha layer. This works effectively since the objects naturally overlap each other. Of course, we could still crop something later if necessary, but as is, this operation generally leaves an interesting artistic touch on the pictures.


Examples of composed objects
With a fast-working solution in place, we were able to generate thousands of properly composed images per hour.
Step 5: SloMo glitch
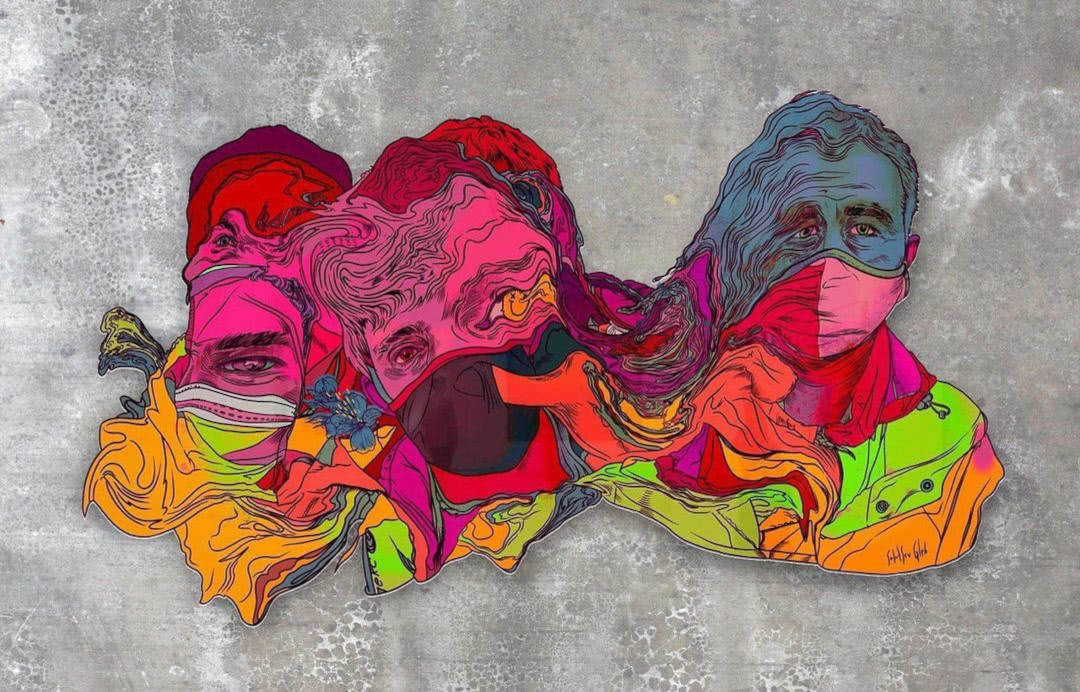
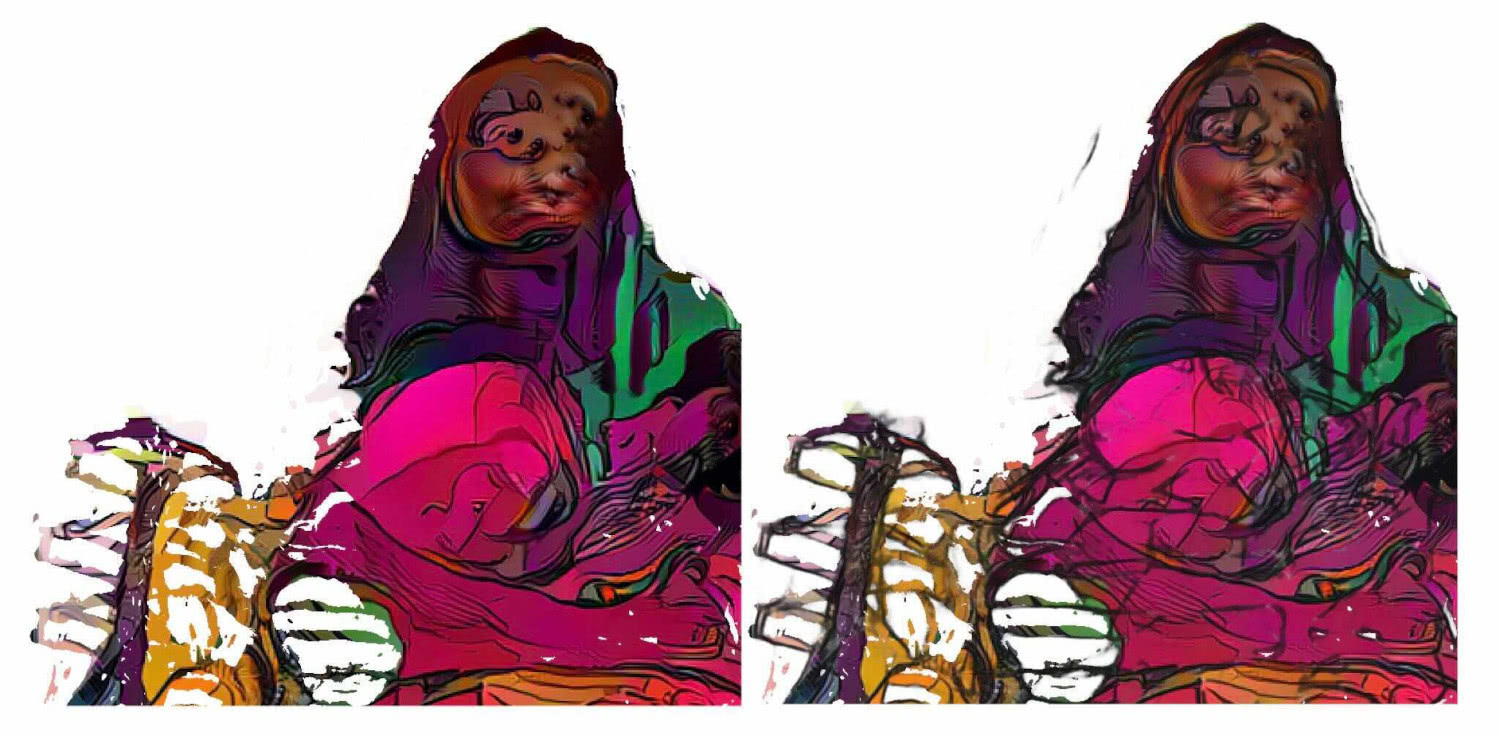
Following this, it was time for us to work with glitches. This kind of technique has often been featured in Gleb’s work. As an example of this technique—and to get an idea of his style in general—here’s a piece he produced before we ever began working together on this project:

The glitch technique in action
This piece, “Two Volodya” features two recognizable faces flowing into each other. To achieve this effect, Gleb made use of the Glitch Library. For our own project, we wanted to apply similar effects. However, we didn’t want to use well-known libraries to achieve this because the effects from these can be quite recognizable. (Nevertheless, I still tried out some libraries, but I didn’t really like any of them.) Thankfully, I came across a scientific paper describing the UGly-Net tool for neural networks.


The UGly-Net interface
This tool is based on the U-Net neural network used for binary segmentation. You can pass it a picture as input, and with the output, you’ll get a mask which will vary depending on what it was trained to find—this might be a boot, a machine, or a tumor on a medical scan. By running the picture through all the layers of the neural network (each circle in the image above represents a layer), it analyzes each pixel and decides whether to paint it into a mask or not.
It’s interesting to note how the tool works with the intermediate (encoder) layers. A picture’s resolution is gradually decreased, but the number of channels increases. So, if initially, an image has three RGB channels, it will be increased to 32, then 64, 128, 254, to 512 channels—still higher numbers of channels are possible if you need to perform a deeper analysis or if the initial image is high-res. The original 640x640 pixel resolution drops to 320x320 and so forth, and we get a large channel-by-channel vector. Thus, we can take the information from the picture and encode it into the desired vector. Then we decode it back, only this time with the objective of drawing a mask.
UGly-Net uses two U-Net networks and is based on a similar architecture as the Super SloMo neural network. The “duplication” of networks in Super SloMo helps to draw intermediate frames in the video. This means if you have a video of 15 frames per second, using this library, you can increase the number of frames per second to 60 (or more).
SloMo finishes drawing all the pixel and light movements for the intermediate frame. The UGly-Net engineers built a visual editor to add modifications to the input for each network layer. For our purposes, this allowed us to obtain impressive effects in intermediate frames and it also expanded the field for experimentation and creativity.
As there was no available code for UGly-Net, I implemented it on my own. I took the SloMo network architecture (specifically, the weights to generate SloMo and change the picture). Though, even after implementing the code, because I didn’t have any second frames as required, I couldn’t get one picture naturally flowing into another. To achieve this, I decided to modify the picture and create a second frame by using simple geometrical and color augmentations. Like so:

Creating a second frame to work with UGly-net
Once we had our two frames, they were then sent to the neural network to create a smooth flow from one picture to another. We could have taken the resultant intermediate frame as a basis, but it was even more interesting to force this network to “mutate”, “suffer”, and “hallucinate” in order to get the desired result.
I wrote many monkey patches for each layer to perform different operations on the input signals. Operations and layers were randomly selected. Sometimes they were summed. Sometimes, only one worked. In the end, images were able to be generated very quickly by using this approach.

An image produced by through Gaziev’s implementation of UGly-Net
Although we already liked the results at this stage, they didn’t exactly fit the concept and style of the artist’s previous work. So, after we generated a lot of glitches, we started selecting them for further processing.
Step 6: Selection
Because colorization would be so time consuming, we needed to narrow down the number of images we were working with, and to do so, we again utilized neural networks. After trying several options, I chose the NIMA (neuroimage model for aesthetics) network for aesthetic image analysis. The authors trained this network on public domain social network photos based on photo ratings/likes. Using this information, they tried to rank the picture and predict whether or not an image would be popular. We figured this would suit our needs.
That being said, once I finished training the network, I tried to evaluate our own images with it, and our tastes didn’t match, so to speak. Therefore, it was time for man and machine to collaborate. This means, essentially, I had to work manually at this stage.
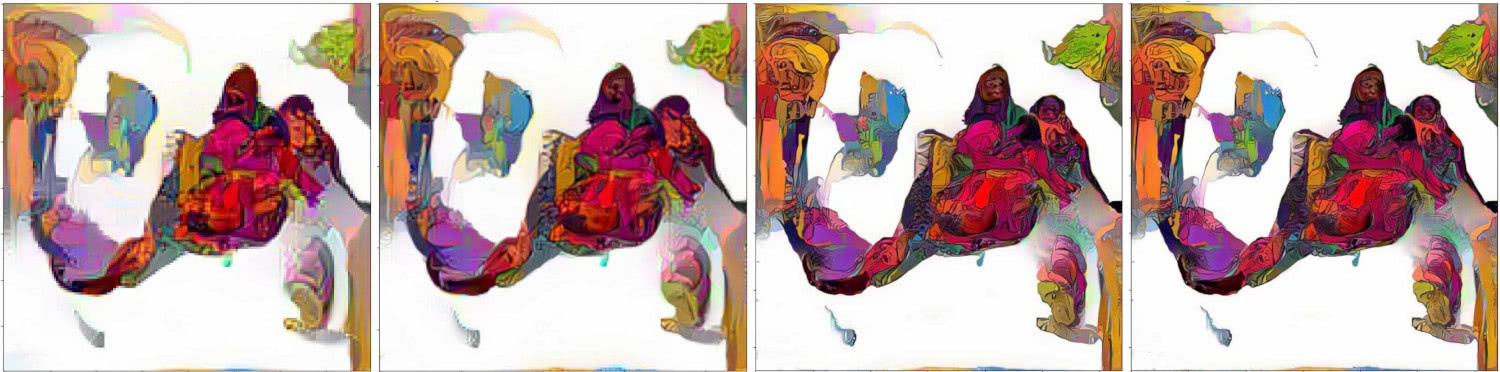
To illustrate the task, we generated 7000 images in one of the glitch folders. From these, we then generated 10 variants of each composition, plus we recorded the modifications for each layer of the network (this was done to debug it later and analyze which operations didn’t produce suitable output).

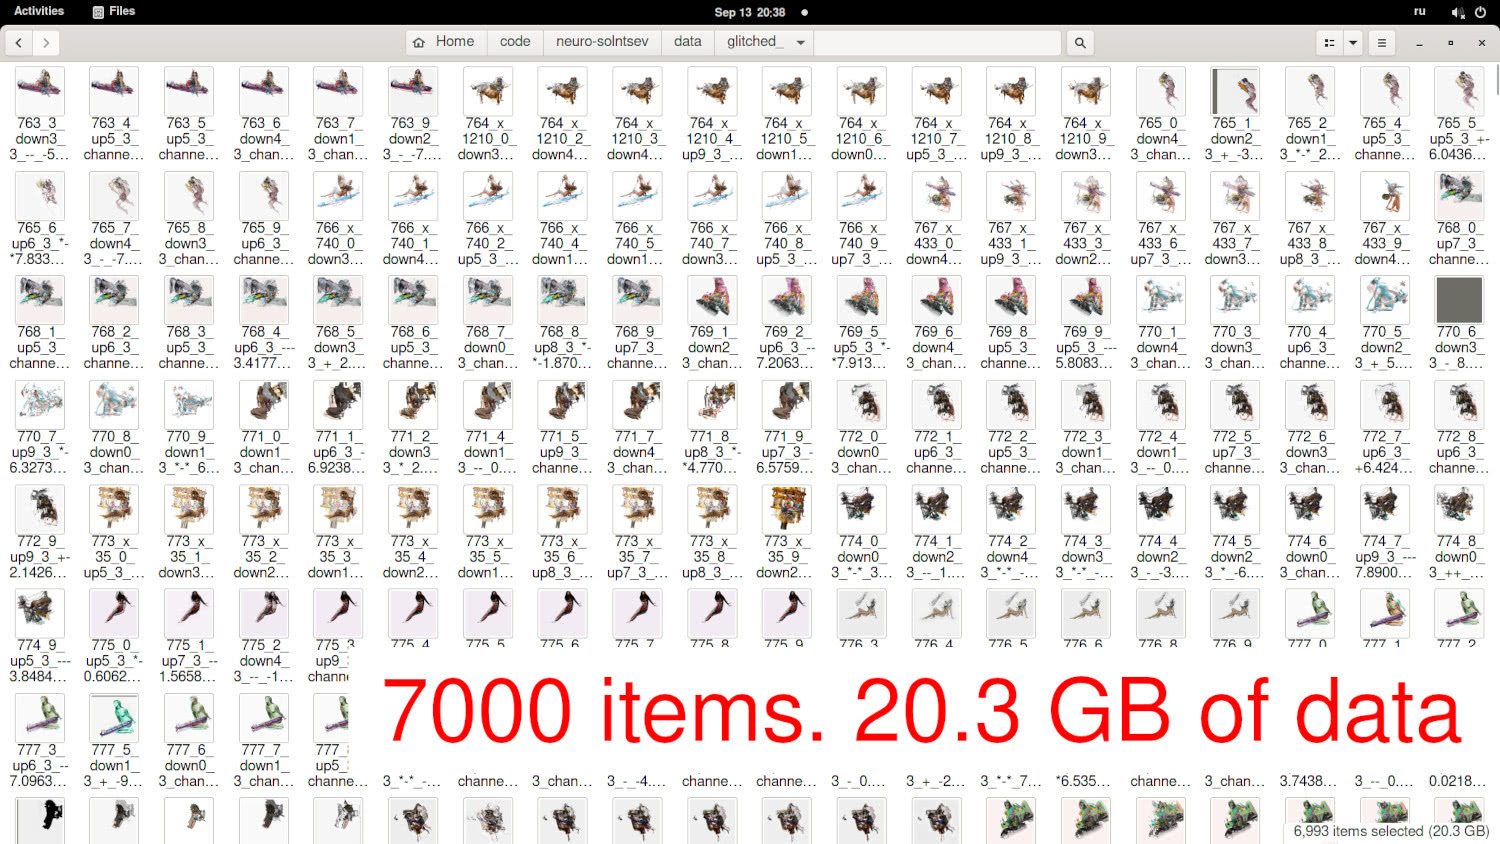
Showing off a folder with composed objects
Each folder was approximately 20GB, and I had dozens. We had to sort through all of them. Gleb arrived in St. Petersburg, we sat down in front of a huge screen in a rented conference room, I connected my server, and we spent hours generating and looking at glitches.
Step 7: Coloring
Now it was time to apply the artist’s preferred color scheme. For reference, here are some fully-colorized examples of his work which he created prior to our project:

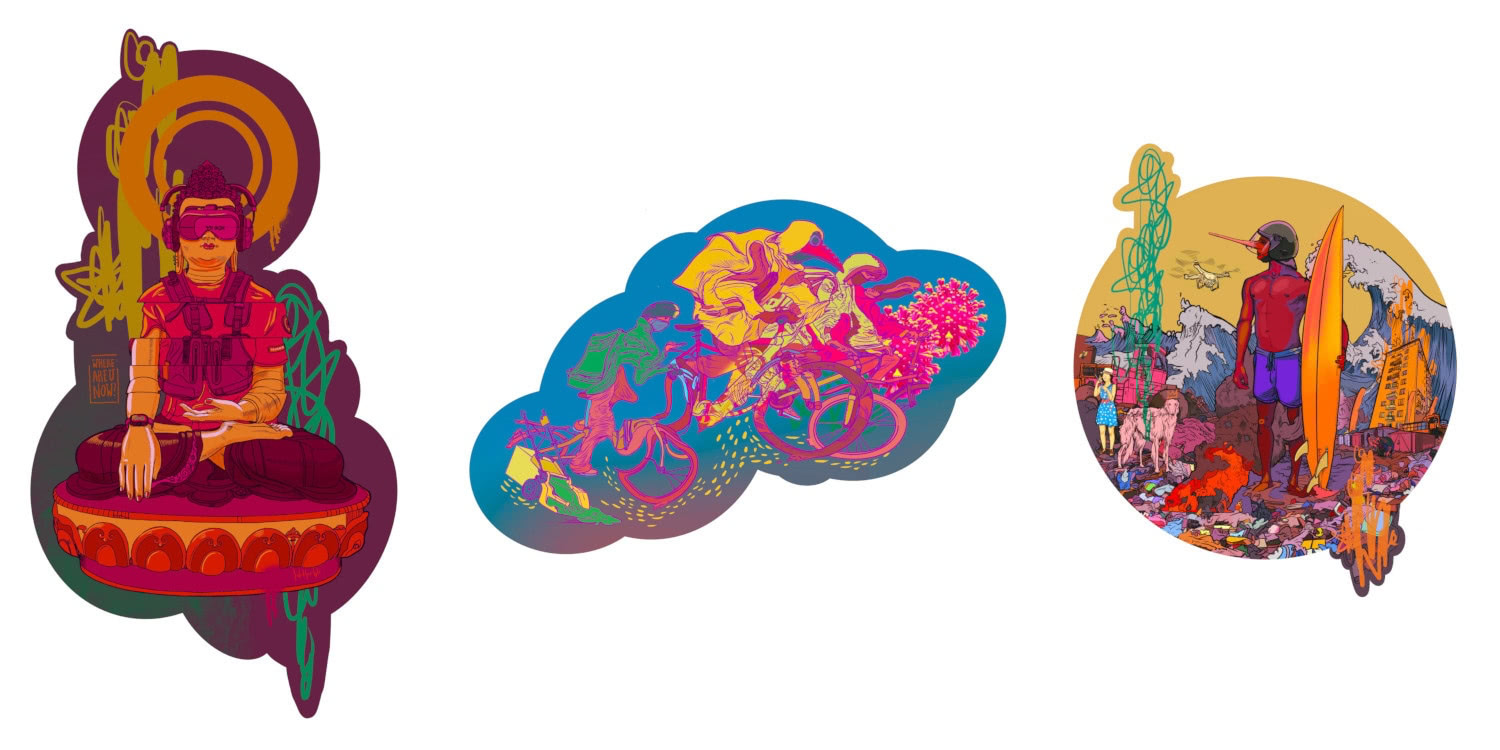
A selection of original, ‘manual’ works by Gleb
To perform coloring, I looked at Leon Gatys’ work related to neural algorithms and artistic style and a smart implementation of style transfer from 2020. This code was so flexible that it was the only stage of the entire process where I didn’t have to write any on my own (except for some wrapping scripts for working faster in multi-threaded mode).
This tool allows us to customize the reference style transfer on the picture for coloring. The program works in a multiscale mode, it learns fast at each resolution, and it allows us to modify how the reference images will be weighted. Here’s how it works: we take the target file (like any glitched image) and start coloring. The network takes the picture we want to colorize and a random number of original images (Gleb’s pictures, in this case).
The neural network reduces both the image we want to color and the reference image to 128x128 pixels and begins illustration on a broad scale. Our network allows us to highlight style and content components. The network constantly compares what is happening with what is needed. When we’ve colored the 128x128 image, we double the size and use it as the target for the next iteration.

A collage illustrating the steps of the colorization process
This is a semi-generative approach: we train the network by comparing it with the result we need and we constantly modify the output to bring the image closer to the desired styles. This is quite fast when working with small images and the network reduces the reference image to 128x128 pixels and begins illustration on a broad scale.The picture is then enlarged and details begin to be drawn. At that point, the pace begins to slow down since the network starts to require video card power at closer to 100%. The neural network iterates 500 times during each scaling and brings the style and the content components closer to the target reference pictures. Content analysis of the target image helps determine where the objects and their components are and what we need to include as an important detail. Additionally, styling components allow us to understand how similar objects were painted in the past and how color spots were used.
At low resolutions, it’s difficult to scrutinize details because we start with a very small image on a white background. When we reduce and compress a picture, we end up with changes even in pixels that don’t contain any information. And, in general, generative networks are quite fond of fantasizing. Every pixel can be a starting point to draw whatever they want.
Next, we removed any unnecessary pixels from the glitches. To do that, with the help of the LAB format, I wrote a lot of code to compare colors by their closeness to each other. Everything close to a white color was turned off, and only pixels which passed a certain threshold were allowed to remain.

A cropped object after colorization
In the end, we got the cropped images we wanted, but not all of them were good. Some of them kept their framing, but due to insufficient resolution, there were ragged edges where the lines were broken—so we lost some of the object’s volume, as well as some other details.
Step 8: Finishing the lines
The next step was finishing the lines to be drawn on the glitches to further emphasize their details. I tried several methods, including applying the standard Canny Edge detection based on the gradient difference, but we had too many lines with the same thickness, without alpha channels, or some other issue which prevented a smooth implementation. Finally, I found the DexiNed neural network which is capable of drawing contours and components which are easily discernible to viewers. Although we had to remove transitions according to a certain threshold, we were able to get alpha matting with translucent lines.

Detail lines obtained from a glitch with help of DexiNed
We ended up with good masks featuring lines which we could then overlay on the cropped pictures, moving one step closer to our final goal.
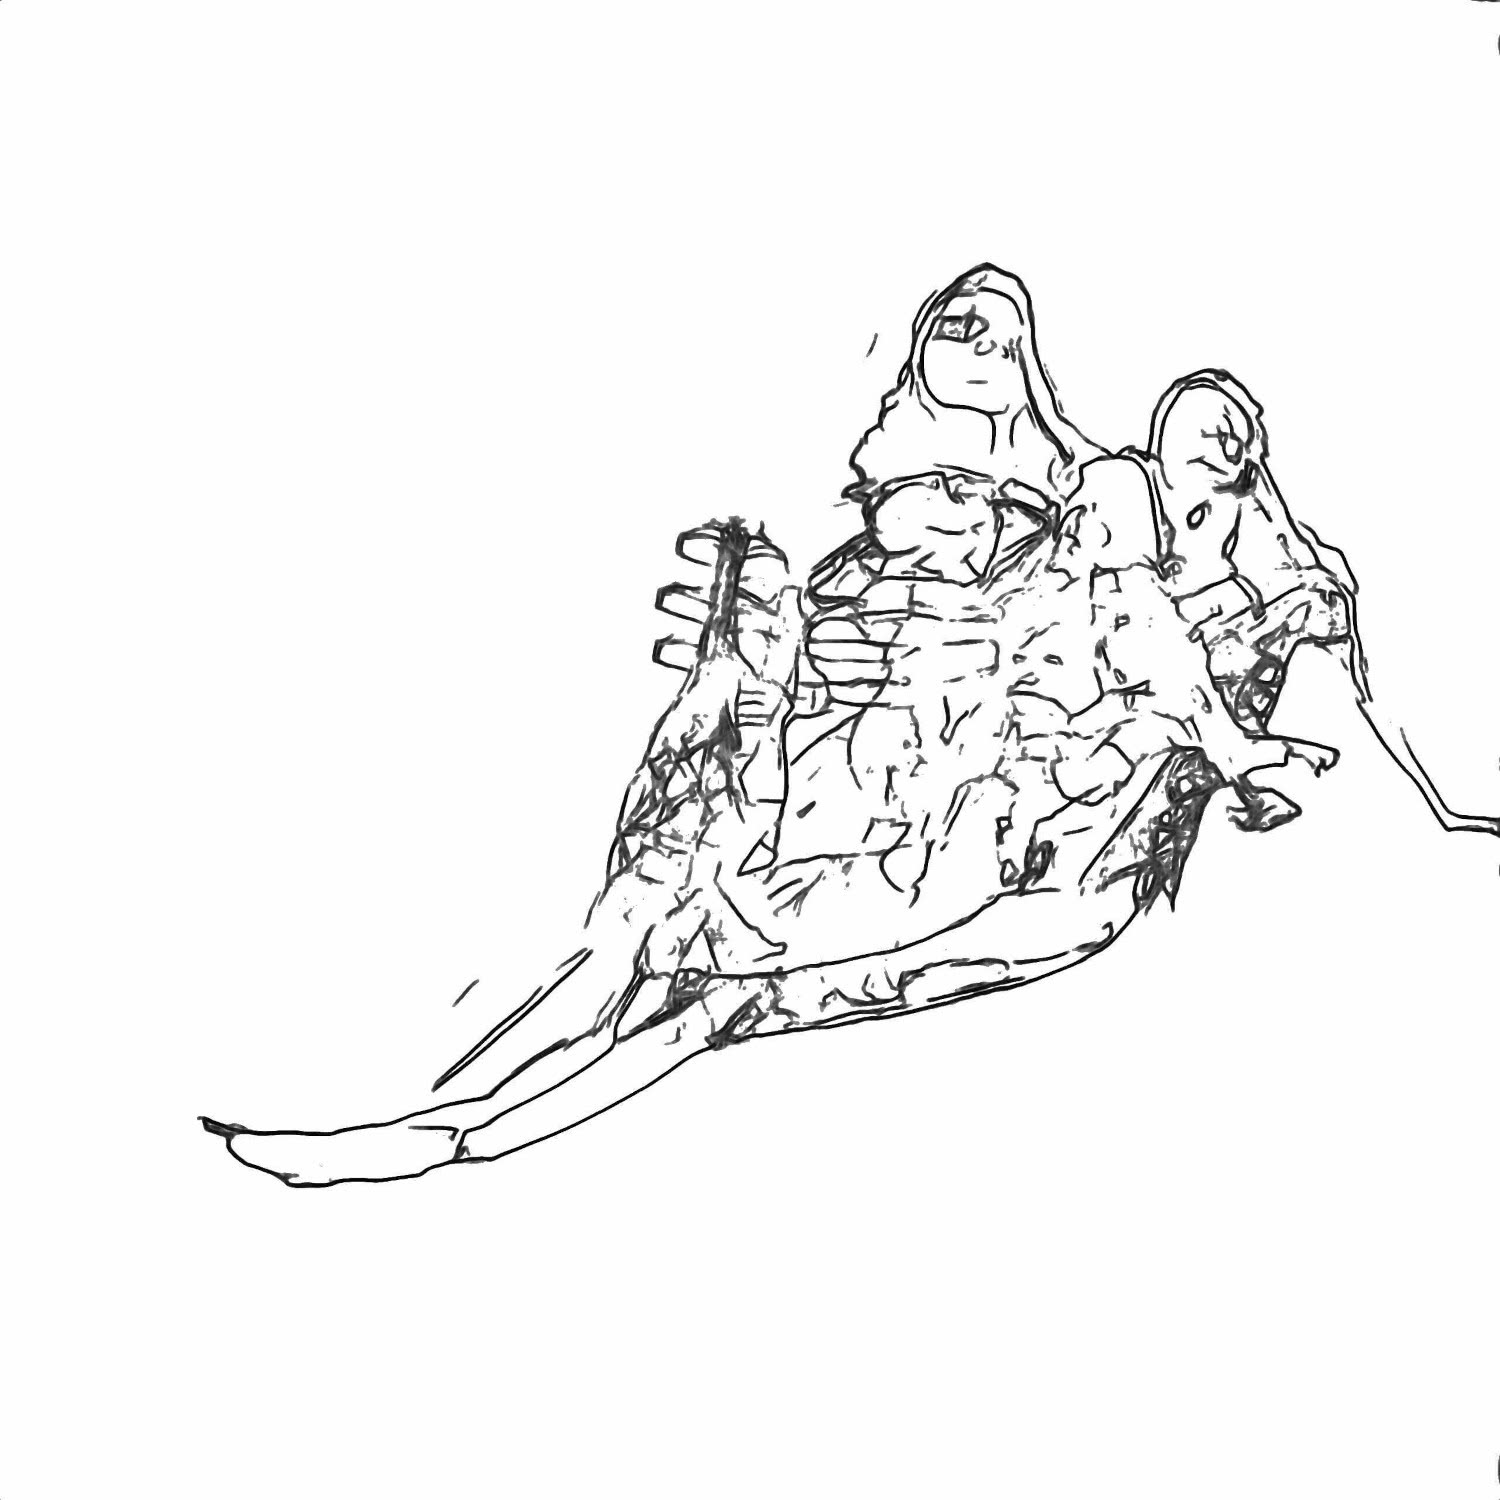
A mask of lines to be overlaid on the picture
Here’s a look at the colorized image with the lines applied:

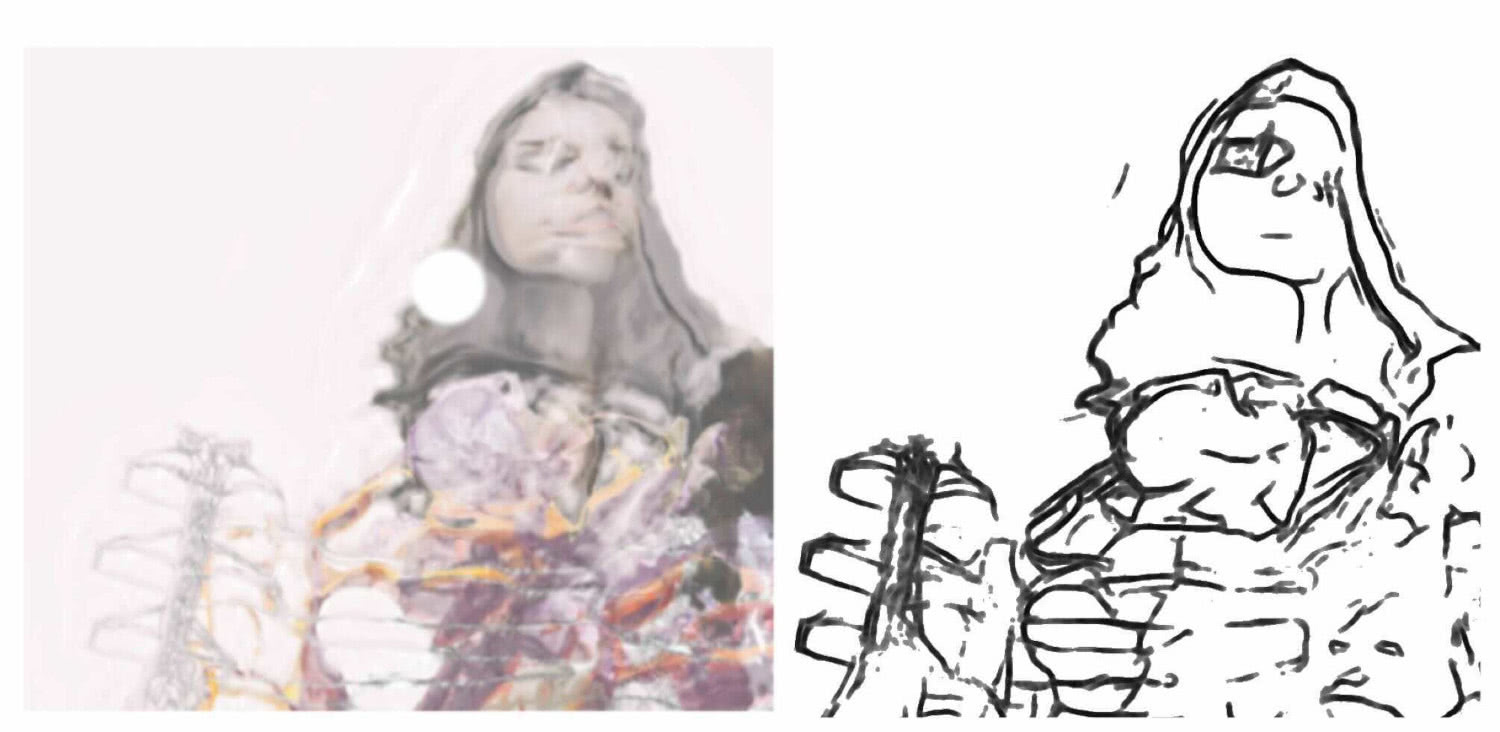
Finally, for comparison’s sake, here’s a before-and-after image showing the line application:

The image on the left doesn’t have the mask with the lines applied yet
Step 9: Increasing size
Next, working with Gleb, we selected the final pieces, taking into account the reference objects, color palettes, compositions, and so on. I wrote a script to collect them into one folder and I also kept the corresponding content for each work related to the applied colors, crops, glitches, and lines.
After all this, we needed to increase their sizes to be able to print them. For a 1x1 meter print, we needed a 10,000x 0,000 pixel resolution—but we only had 2,500x2,500. To get such super-high resolutions, we used Real-ESRGAN. It’s a great tool that’s based on a generative network and it works optimally with almost any image. It divides a picture into 10x10 pixel patches and works with each of them separately, which saves precious video card resources. Since it’s a generative network, it combines different interpolation methods to enlarge an image (e.g., bicubic and linear) and then learns how to finish drawing the pixels.
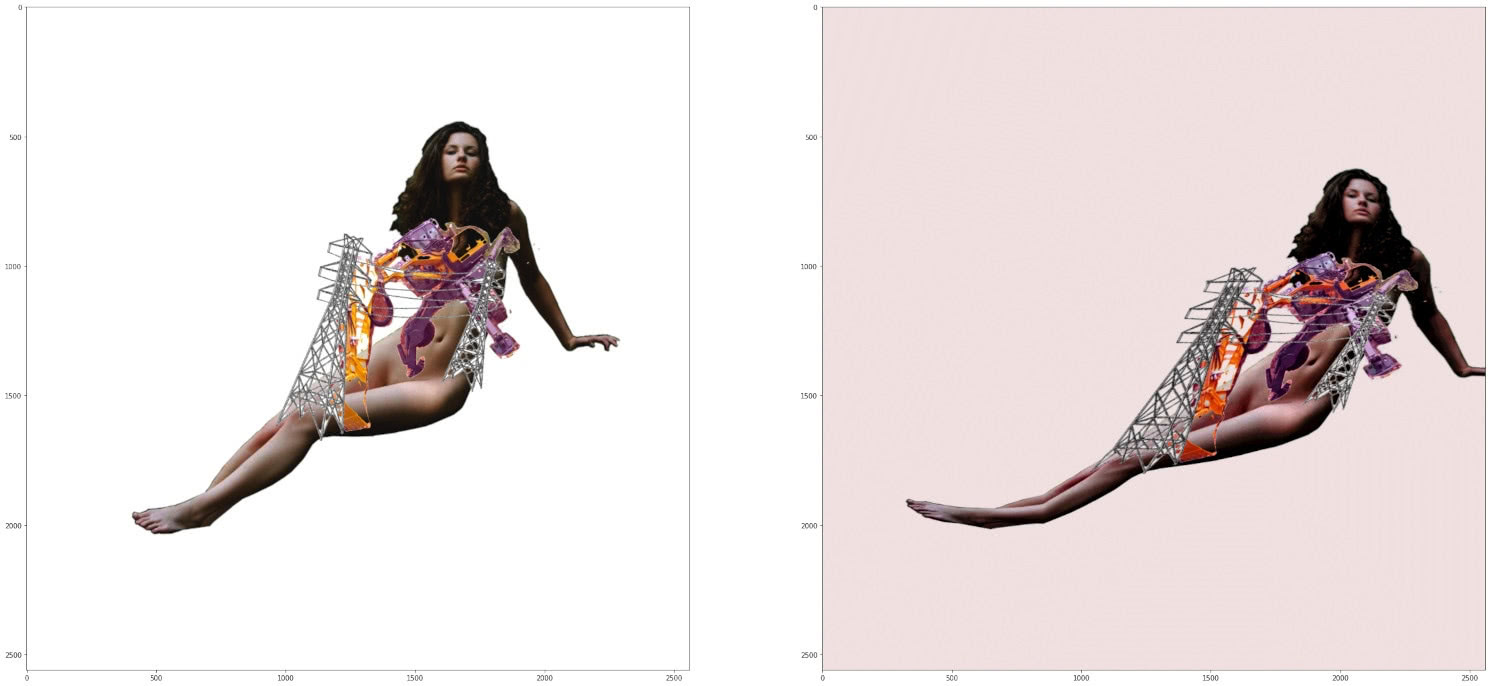
Here is a side-by-side comparison featuring the final image:

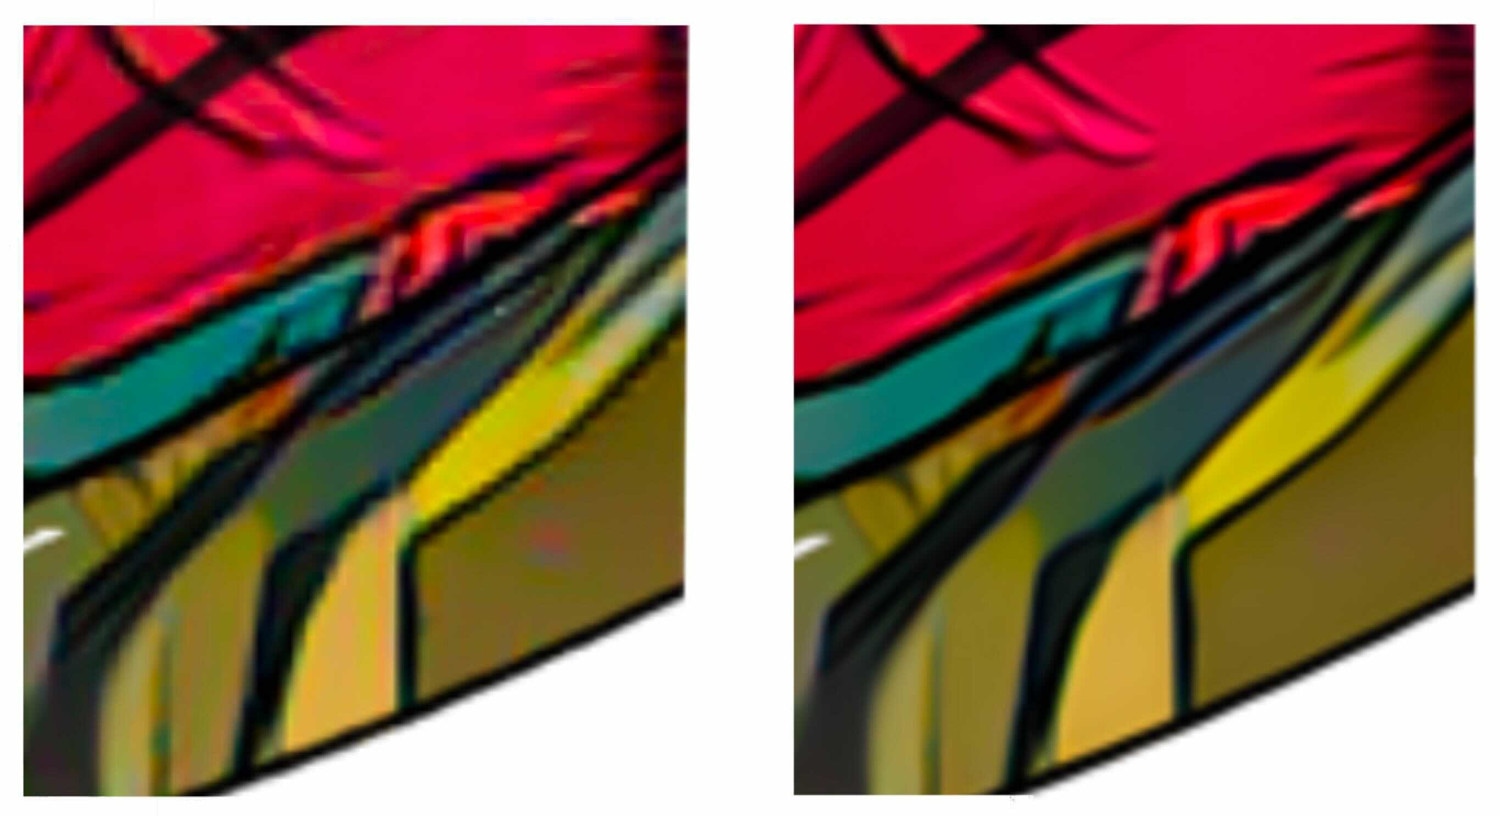
On the right is the crisp, super-high resolution image we needed for printing
With this, we now had the desired picture quality—no color transitions or pixelization. Instead, we see vibrant, luscious colors—exactly what we wanted.
Step 10: The artist’s turn
Before this project, Gleb had to dedicate a large amount of time to coloring, handling backgrounds, working with glitches, and so on. With our SunGaz system, the emphasis shifted towards a deeper analysis of the images themselves.
In terms of the image creation process prior to this point, the coloring step was the most difficult with regards to resources. I managed to write scripts to generate everything automatically for everything else. But, since each coloring took from 10-20 minutes each, we could not afford to process all 7000 images. Accordingly, we only chose about 100 pieces to move forward from this stage.
This was Gleb’s turn to step in and act as a mediating designer between the neural network and the viewers themselves. He confessed that this project had brought him a new kind of artistic pleasure. The energy that had previously been expended dealing with the technical necessities behind image creation had been all but eliminated, leaving him more energy for pure creativity.
Do we need human artists?
Over the course of this project, it became clear that a neural network cannot completely replace a human creator. A human being is the spark, the vessel of inspiration behind the art, and a machine is just a tool of the artist. During the training process, we calibrated and developed the network’s skill and the result was a kind-of symbiosis involving the artist and the tool (much in the same way that an artist interacts with brushes, canvases, and paints in the real world).
Still, while a neural network cannot replace a person, it can expand an artist’s potential by simplifying some of the entry points to the craft: you don’t need to undergo years of training to be a creator. Rather, you can begin honing your ability to let your own capacity for fantasy guide you from the outset.
Less time wrestling with technical problems means more time for creative action and results like this
And, of course, it’s also worth mentioning that during the creation of this project there were practical benefits for the Evil Martians team. Martin Engineer Alexy Gaziev tried out dozens of libraries that were new to him, read countless articles, and learned some interesting tricks for training networks and working with huge amounts of data. We also deployed a cluster of machines to AWS, which were used to speed up the last couple steps of picture processing. In fact, shortly after the completion of this project, he ended up using the lion’s share of the knowledge he had gained in his next Martian project.
As for the SunGaz project itself, the works are currently being exhibited in Krakow, and further exhibitions are also being planned for Europe and Russia.

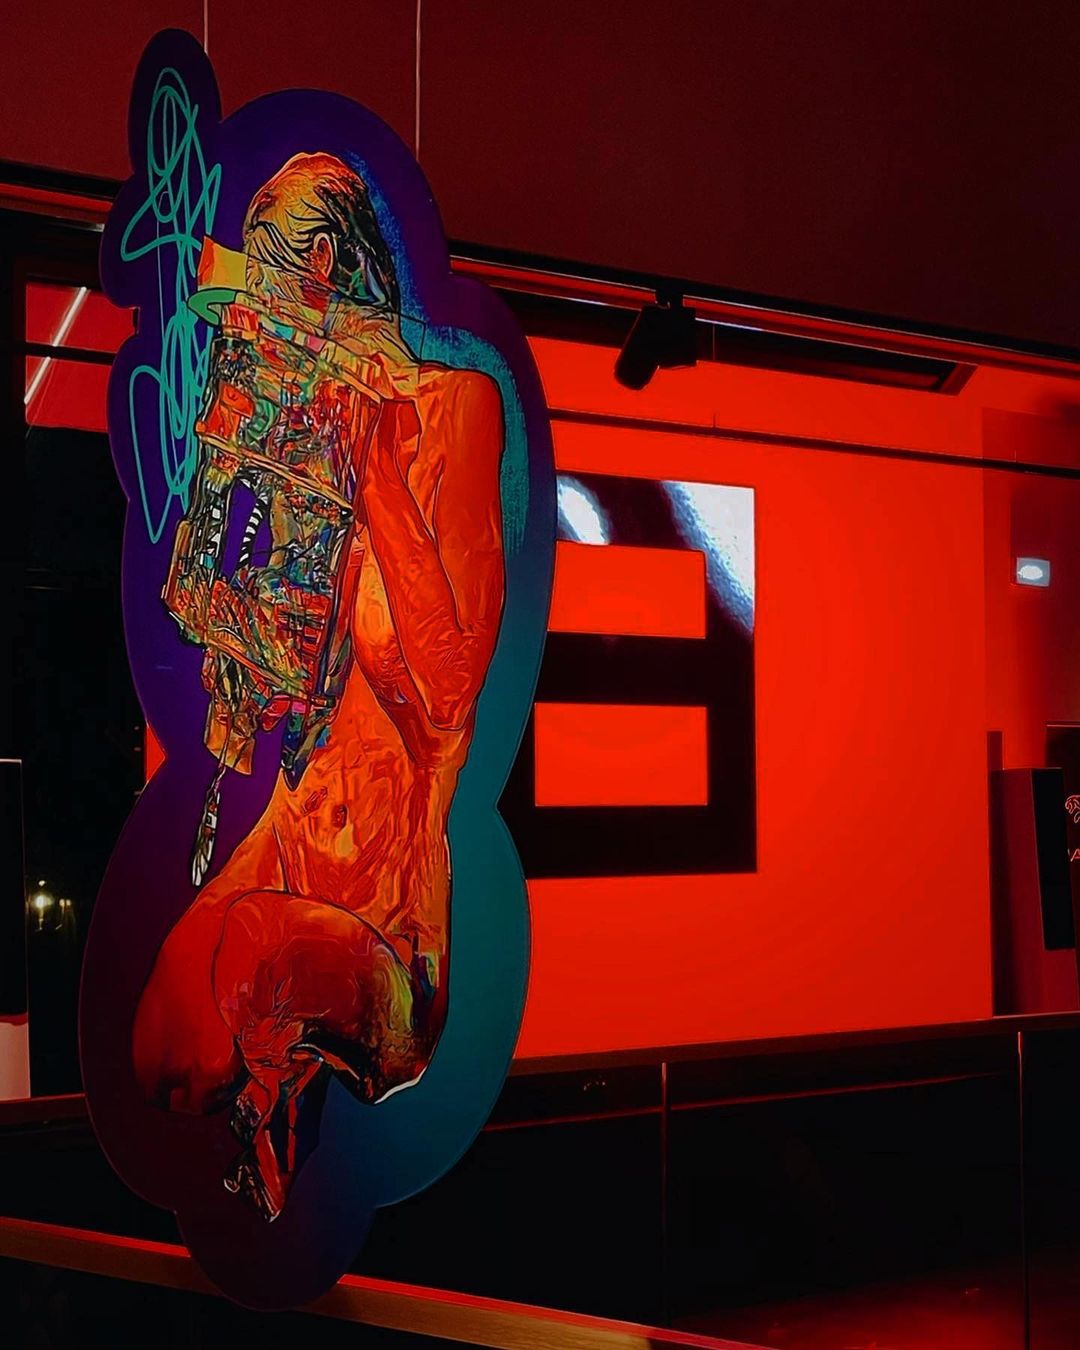
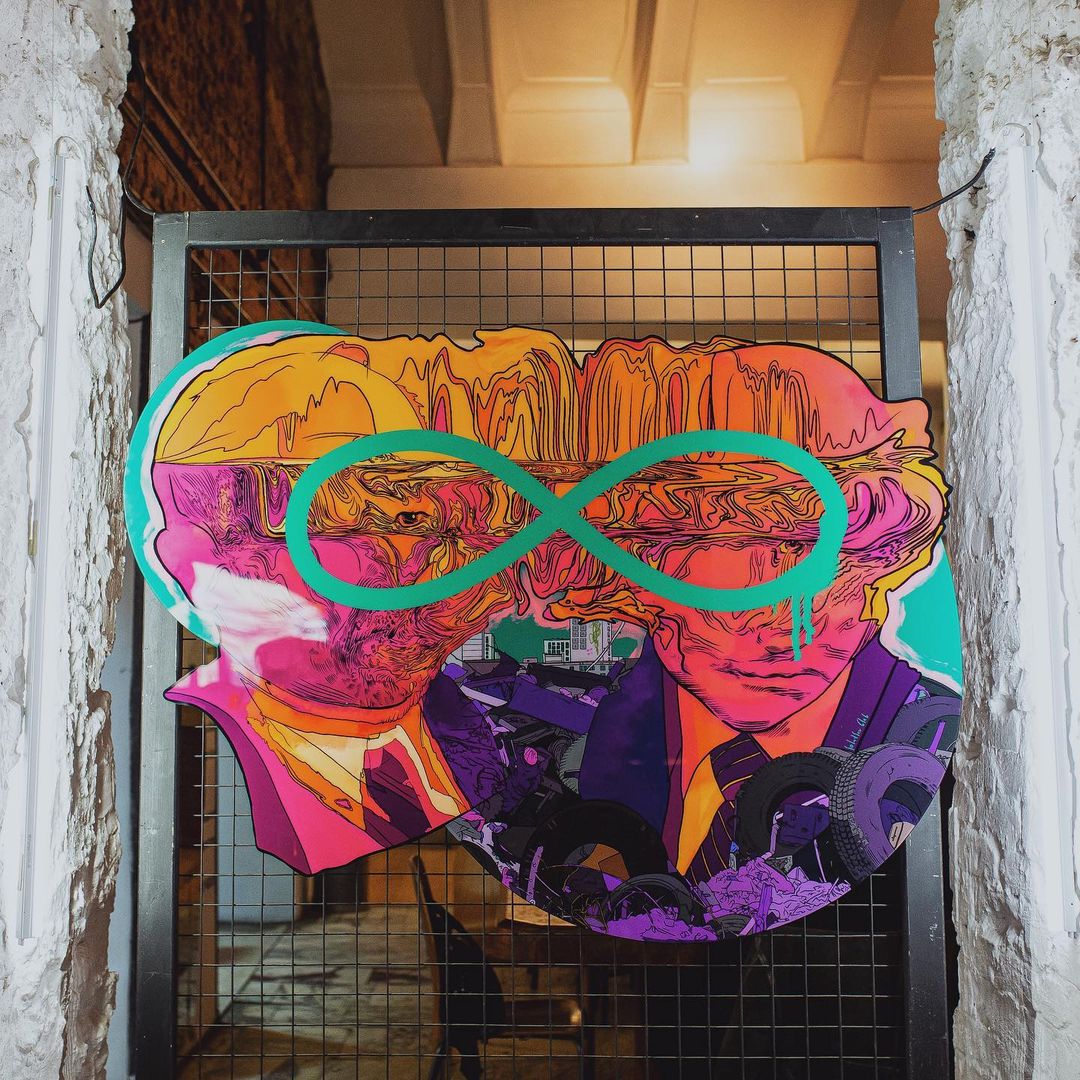
A finished SunGaz piece on display in Krakow, Poland
For his part, after wrapping things up with SunGaz, Gleb Solntsev received another request to create artwork, and we decided to do so while utilizing parts of this project. This is how the virtual posters and illustrations for the play “Bukowski” at the Gogol Center were born. Plus, several other possible future collaborations are also in the pipeline.

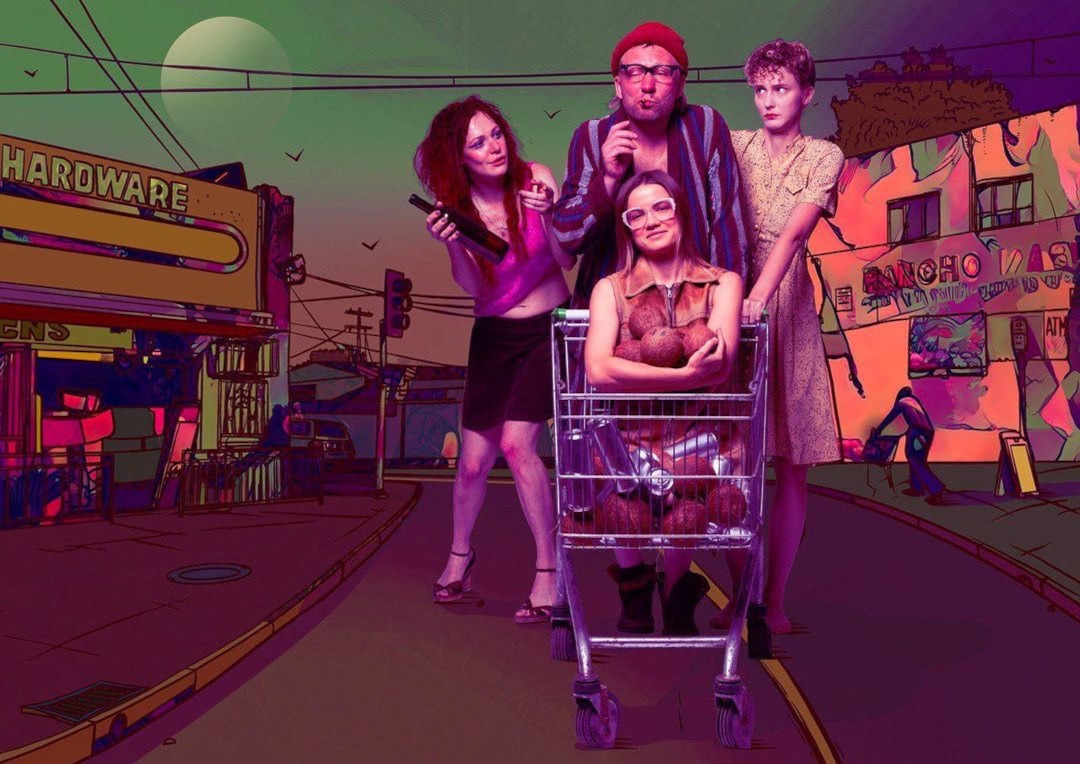
Illustration for Bukowski (visible in the background)
All in all, it was a magnificent success, and working on this project made for an insanely exciting two months. We plan to continue working in this direction, creating art objects on the forefront of machine-artist interaction, and as we’ve documented here, so far, we’ve found the results to be remarkable.