Super GitHub Pages: budget frontend staging, with Storybook and more


Translations
Setting up a staging environment is an essential part of the web development process; developers can try new features, collaborate, optimize, and perform thorough testing and bug-fixing. Various options exist, but, if you have a small project with a tight budget, this article will show you how to set up staging without breaking the bank. Or, what if you just want some practice, for example, to deploy your pull request to another web domain? This article will show the way.
There are several options available for implementing a frontend staging environment. One way is through the use of web application hosting services that offer one-button deployments, like Vercel or Netlify. However, this option is only available if you’re a client of the hosting service. What if your application isn’t hosted there? Another option is to configure staging through cloud services like AWS, Google Cloud, or Heroku. While this option provides a lot of flexibility, it may require a considerable amount of effort, expertise, and customization.
But, for smaller projects who cannot afford additional expenses, there are still some simpler ways to implement the staging environment. In this article, we’ll consider one of the simpler ways to create a staging branch for the frontend part of your project using GitHub Pages. This process involves the automatic propagation of branches with certain changes and deletion when merging to the main branch. By using this method, you’ll get a clearer idea of the changes made to your project and who made them. I personally used Storybook for this purpose, but feel free to use any tool that suits your needs and preferences.
Setting up the basics
First, create an empty branch in your project—this is where the magic will happen. Once you’ve done that, go to the repository settings and under Pages, enable GitHub Pages for the branch you created. Note that in my case, I’m dealing with the storybook-pages branch.

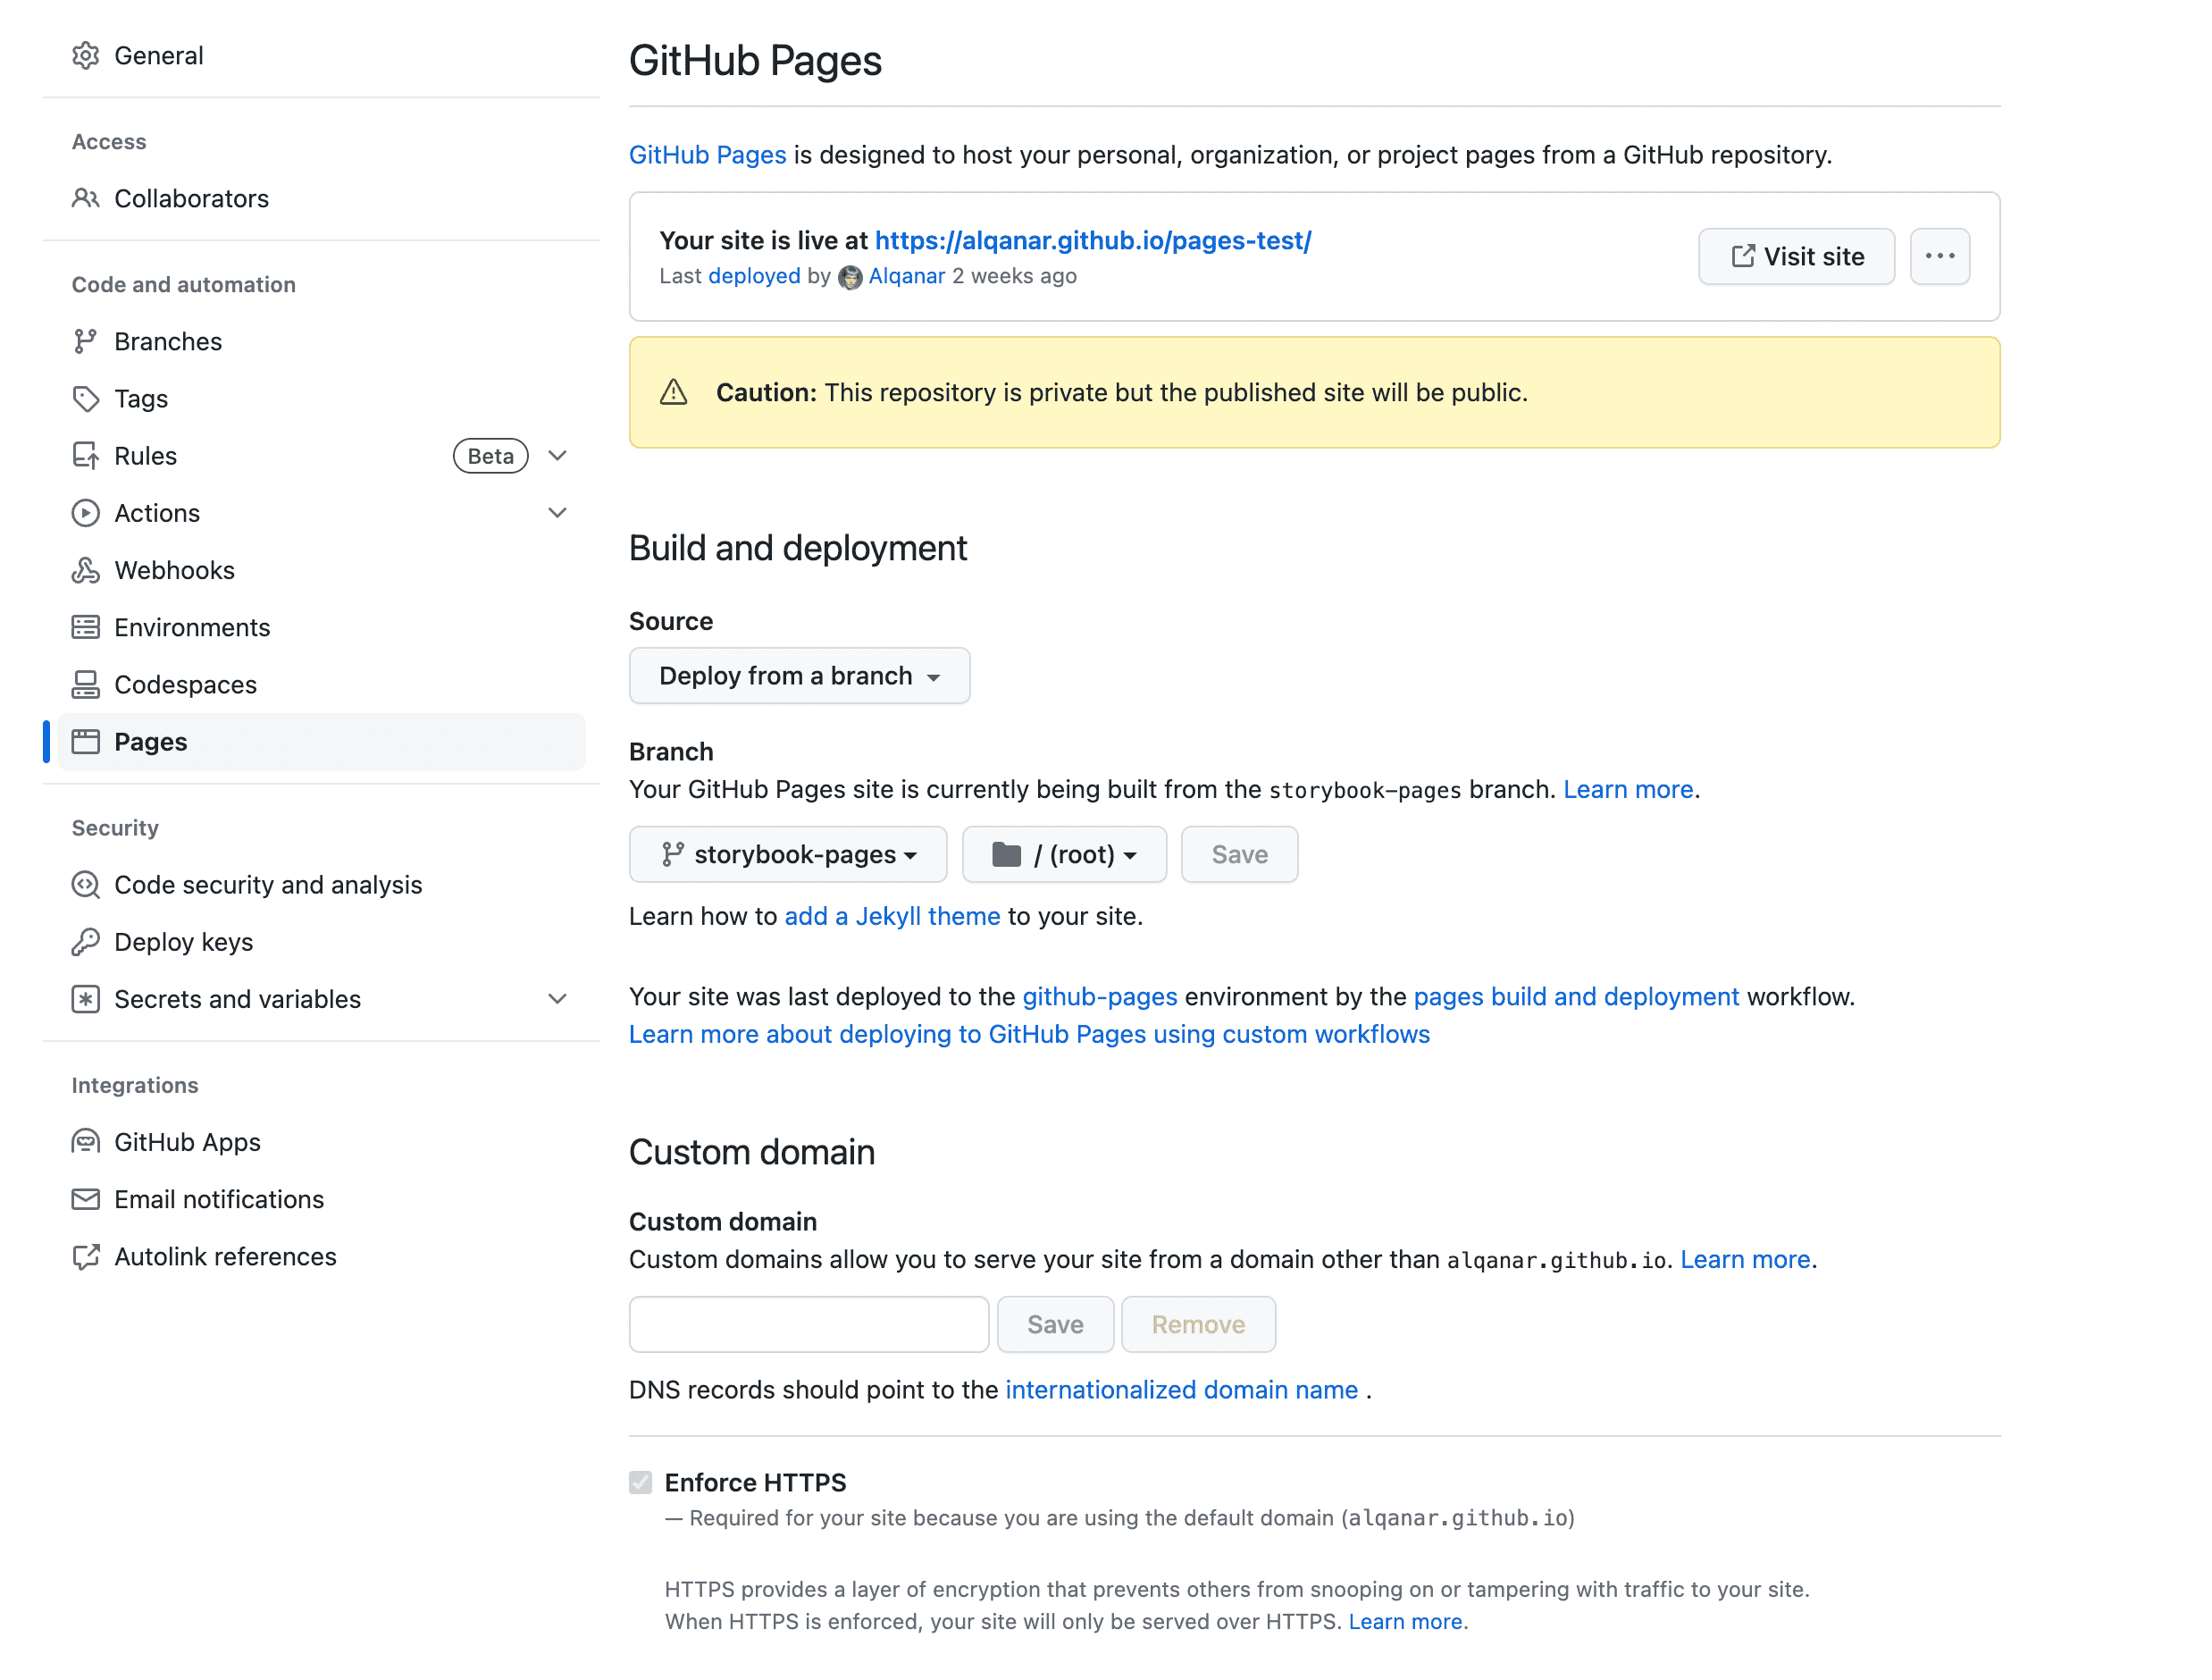
Enabling GitHub Pages for the created branch
If you need to activate Custom domain for your purposes, here’s the full setup guide.
The next step is to create a .github folder in the root of your project. Once you have that, create a workflows folder inside of it, and we’ll then need to add two GitHub Actions files. The first file will be responsible for deployment, and the second will be used for branch deletion.
In order to successfully remove Environments on GitHub, it is necessary to obtain a Personal Access Token. To generate this token, go to your account settings and select Developer settings. From there, select Personal access tokens to create a new Fine-grained token.

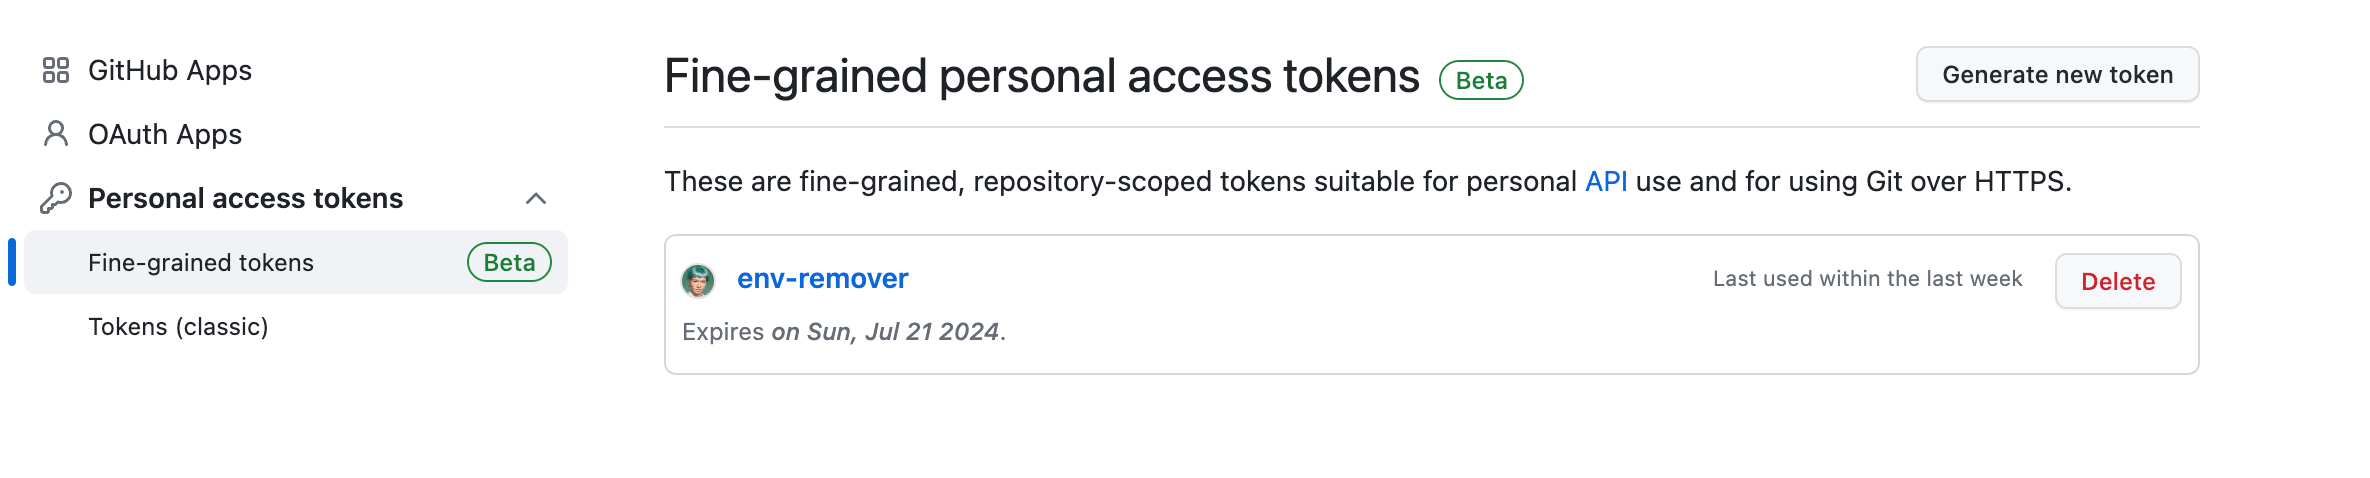
A fine-grained token
When generating a new token, it is important to specify its validity period, which can be up to one year from the creation date. Additionally, you must specify the permissions that you wish to grant the token. To delete Environments, the token must have access to read metadata, as well as read and write administration and deployments. During token creation, you also need to select the repository in which you want to delete the Environment.
Tip: When creating any token, grant it only the necessary minimum permissions. Also, create a separate token for each repository to keep digital hygiene.


Token permissions
It is important to note that obtaining a Personal Access Token is a crucial step in the process of removing Environments on GitHub. Without a token, it will not be possible to delete Environments and manage deployments effectively. By following the above steps and creating a new token with the appropriate permissions, you will be able to successfully remove Environments and streamline your deployment process.
After creating a Personal Access Token, you need to add it to the repository settings. Go to Repository settings → Secrets and variables → Actions. Then, click on the New repository secret button, specify the name, and add the token itself to the body. Remember the name you saved the token under, as you will need it later.

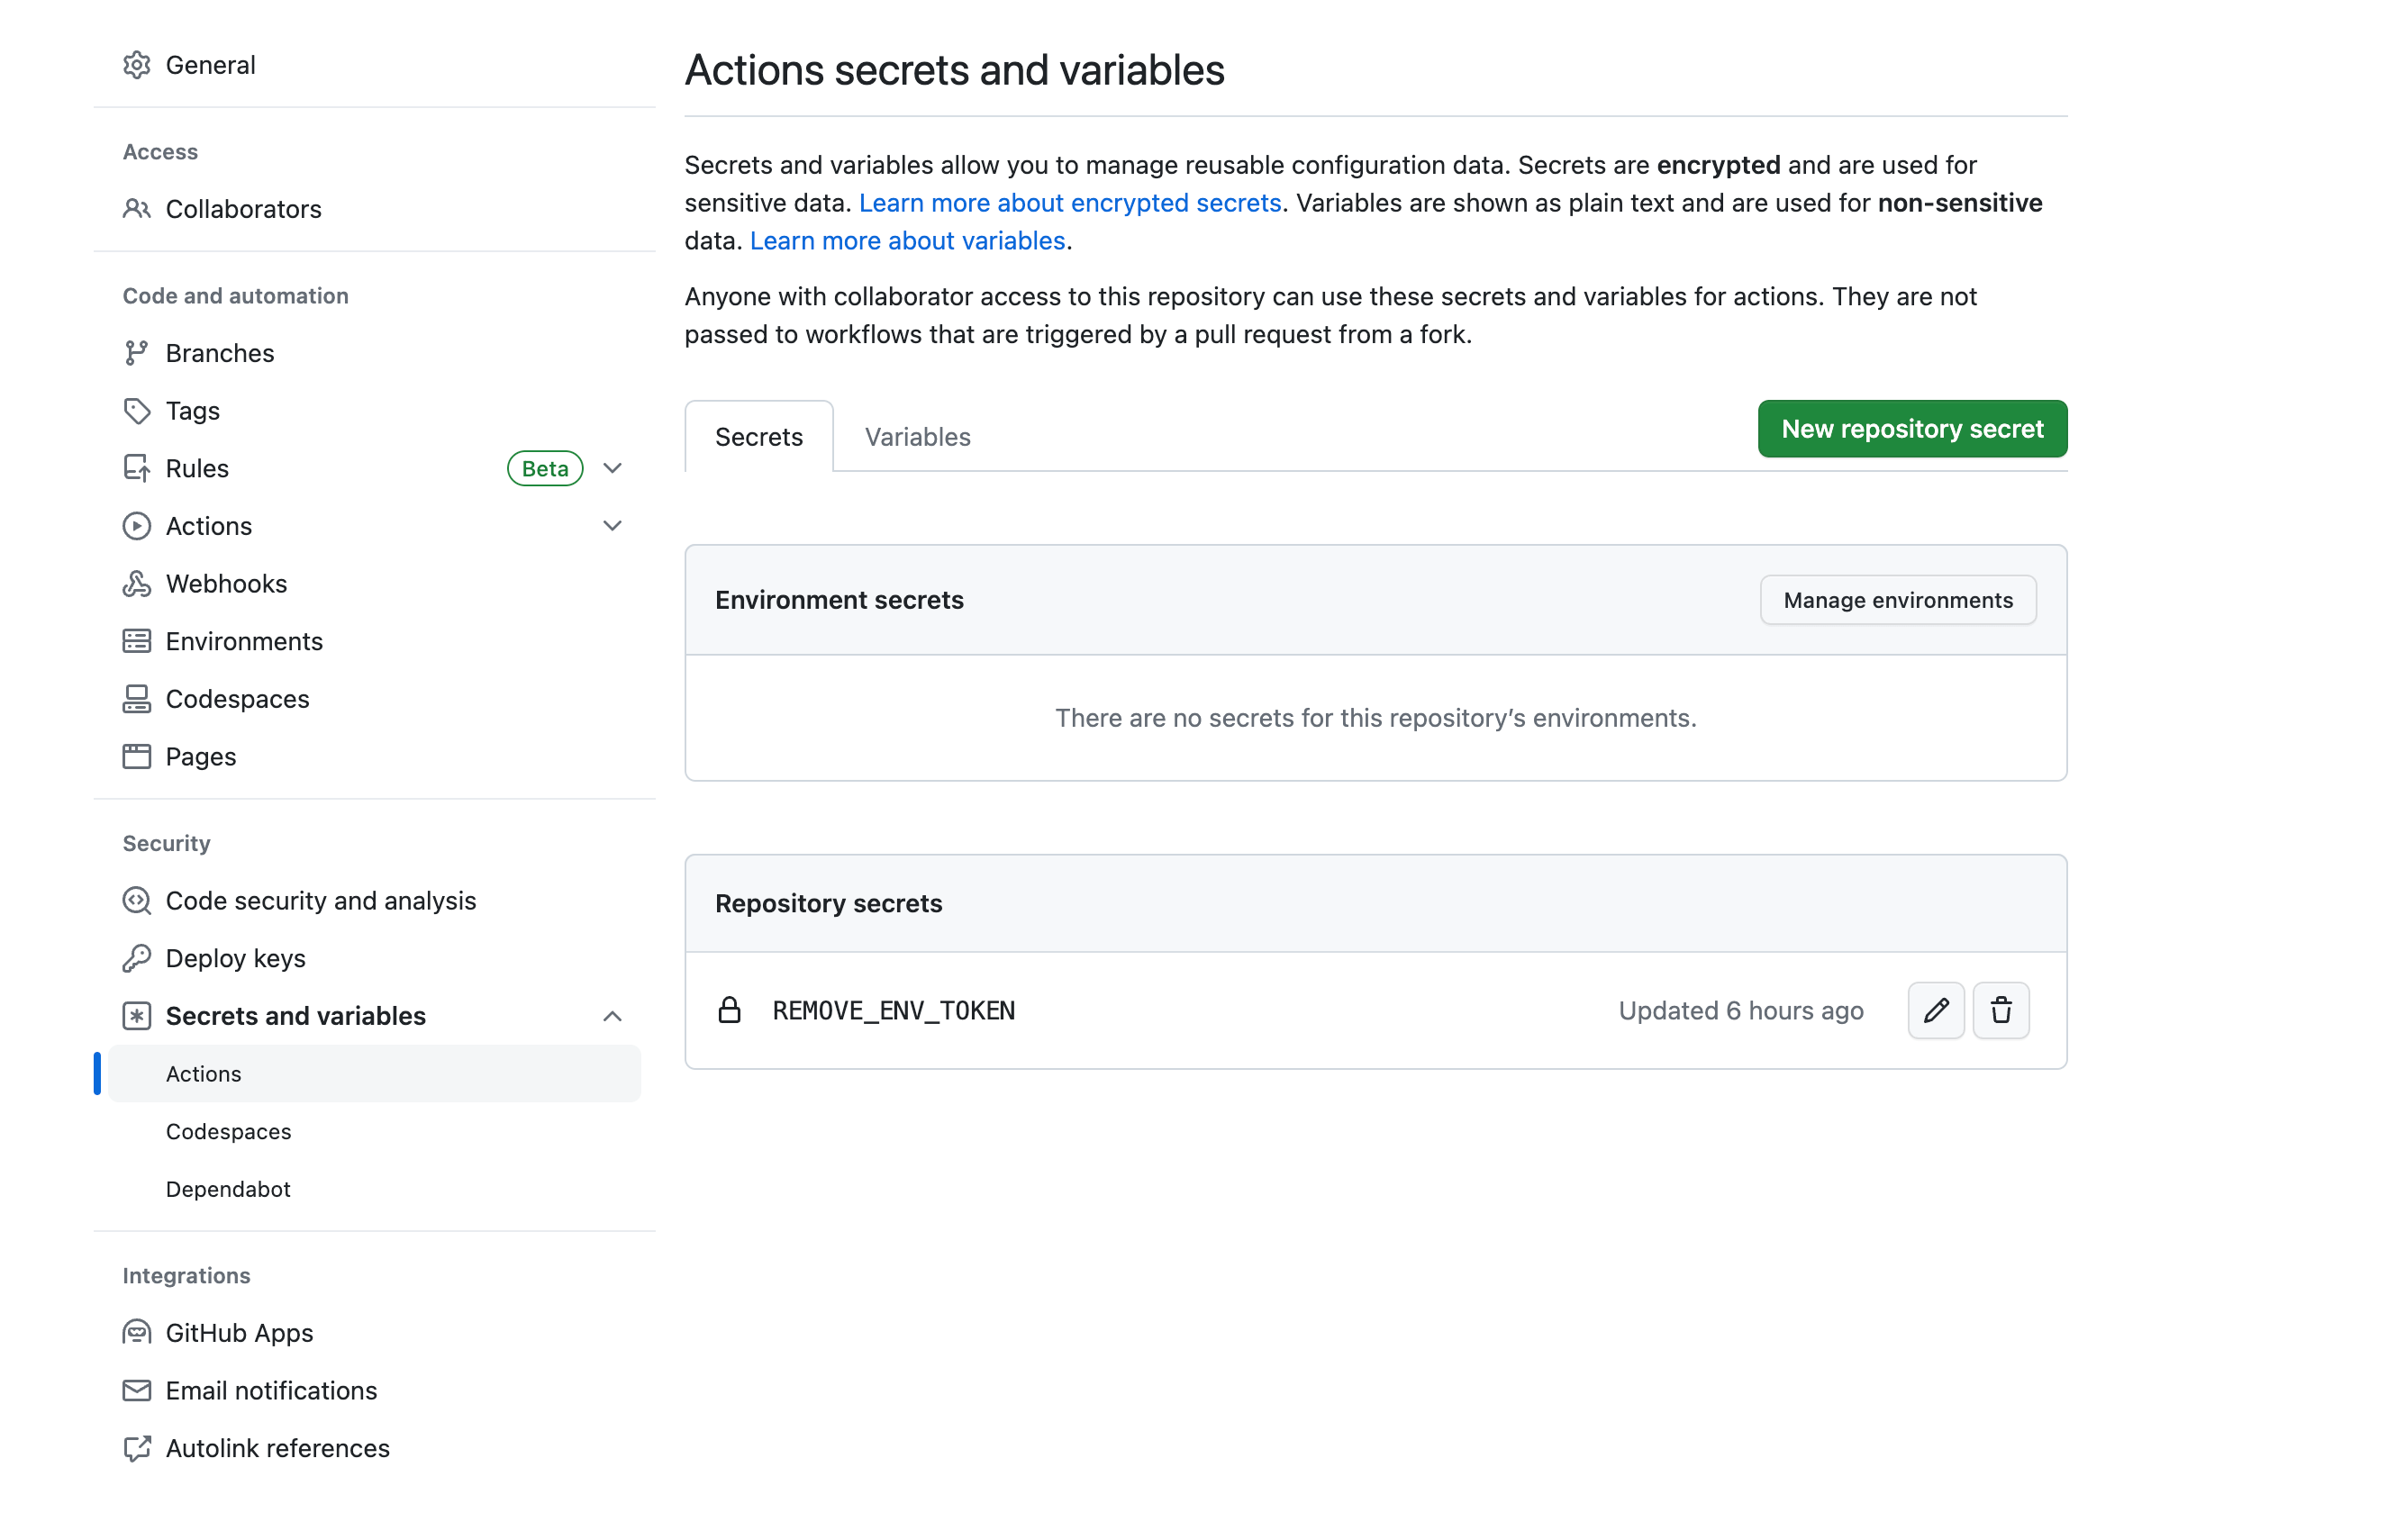
Adding token
Tip: If you have files with underscores in their names in your build, you may find that these files will not be accessible when you deploy them. This means that you will see a 404 error when you request them. This behavior occurs because GitHub Pages does not support files with underscores (source). To solve this problem, you need to create a .nojekyll file in the root of the GitHub Pages branch (in my case, the storybook-pages branch), and then run it on GitHub. This will allow you to bypass Jekyll-specific features of GitHub Pages and deploy files with underscores in their names.
The first file: building and deploying
Create a file called .github/workflows/preview.yml. Let’s take a look at the contents of the first GitHub Actions file:
name: Build and Deploy
on:
  push:
  pull_request:
    types: [reopened]

permissions:
  contents: write
  pull-requests: write
  deployments: write

env:
  BRANCH_NAME: ${{ github.head_ref || github.ref_name }}

jobs:
  build-and-deploy:
    concurrency: ci-${{ github.ref }}
    runs-on: ubuntu-latest
    steps:
      - name: Checkout
        uses: actions/checkout@v3

      - name: Create deployment
        uses: bobheadxi/deployments@v1
        id: deployment
        with:
          step: start
          token: ${{ secrets.GITHUB_TOKEN }}
          env: staging-${{ env.BRANCH_NAME }}

      - uses: actions/setup-node@v3
        with:
          node-version: 18

      - name: Building Storybook
        run: |
          yarn
          STORYBOOK_BUILD_PATH=${{ env.BRANCH_NAME }} yarn run build-storybook

      - name: Create a version mark
        run: |
          touch ./storybook-static/${{ github.sha }}.txt

      - name: Pushing to pages branch
        uses: JamesIves/github-pages-deploy-action@v4
        with:
          branch: storybook-pages
          folder: storybook-static
          target-folder: ${{ env.BRANCH_NAME }}

      - name: Wait for GitHub Pages to be deployed
        uses: mydea/action-wait-for-api@v1
        with:
          url: https://${{ github.repository_owner }}.github.io/${{ github.event.repository.name }}/${{ env.BRANCH_NAME }}/${{ github.sha }}.txt
          expected-status: 200
          timeout: 600
          interval: 15

      - name: Update deployment status
        uses: bobheadxi/deployments@v1
        if: always()
        with:
          step: finish
          token: ${{ secrets.GITHUB_TOKEN }}
          status: ${{ job.status }}
          env: ${{ steps.deployment.outputs.env }}
          deployment_id: ${{ steps.deployment.outputs.deployment_id }}
          env_url: https://${{ github.repository_owner }}.github.io/${{ github.event.repository.name }}/${{ env.BRANCH_NAME }}
Thanks to the deployments GitHub Action, you can easily view the deployment status of your PR. A deployment status bar will be displayed in the PR, and by clicking on the View deployment button, you can open a build of your PR in a new browser window.
Due to some specifics, the link to the deployment will not be active until the root branch deployment is complete. To ensure that the status of the PR deployment is correct, we create the Create a version tag step. In this step, we create a file with the name of the commit hash in the storybook-static folder. This will allow us to wait for the root branch to be deployed, and only then show the status of the deployment in the PR. If you are not using Storybook, you need to create a file with the commit hash name in the folder you specified in folder in the Pushing to pages branch step, i.e., it should be the root of the build directory.


Deployment status page
Note that the links in the env and env_url fields are generated automatically, you do not need to change them.
It is worth noting that the repository page will show all active environments, which will allow you to control the number of them, as well as provide quick access to builds.

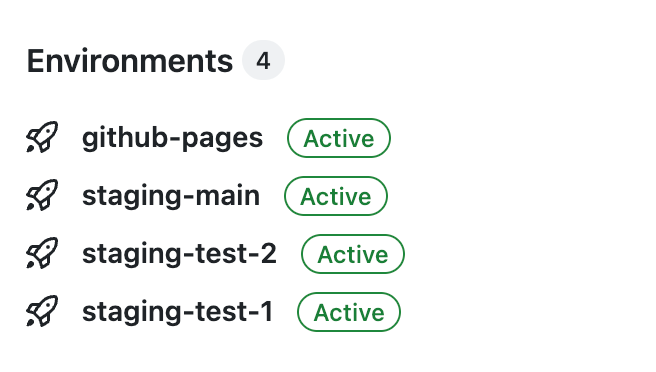
Active environments
It’s important that we use the BRANCH_NAME variable in this file; it will take the name of the branch to which the pull request was made. This is necessary so that we can delete the deployment branch later when the pull request is merged into the main branch.
We also need to use the github.head_ref variable; it will take the name of the branch to which the pull request was made if the pull request was made from the branch, not from the fork. If the pull request was made from the fork, then the github.ref_name variable will be used, and it will take the name of the branch in which the pull request was made. This is needed so that we can delete the deployment branch later when the pull request is merged into the main branch.
If you want the deployment branch to be created only when a change is made to a specific file, add the following code to the on section of the file:
on:
  push:
    paths:
      - 'root/path_to_file'
The second file: deleting a branch
A second file, cleanup.yml, will be responsible for deleting the deployment branch when the pull request is merged into the main branch.
name: Cleanup Stale Pages
on:
  pull_request:
    types: [closed]
permissions:
  contents: write
  pull-requests: write
  deployments: write

env:
  BRANCH_NAME: ${{ github.head_ref || github.ref_name }}
jobs:
  remove_stale_pages:
    runs-on: ubuntu-latest
    steps:
      - name: Checkout
        uses: actions/checkout@v3

      - uses: actions/setup-node@v3
        with:
          node-version: 18

      - name: Create an empty dir
        run: |
          mkdir storybook-dummy
          touch storybook-dummy/.gitkeep

      - name: Pushing to pages branch
        uses: JamesIves/github-pages-deploy-action@v4
        with:
          branch: storybook-pages
          folder: storybook-dummy
          target-folder: ${{ env.BRANCH_NAME }}


      - name: Delete deployment
        uses: bobheadxi/deployments@v1
        if: always()
        with:
          step: delete-env
          token: ${{ secrets.REMOVE_ENV_TOKEN }}
          env: staging-${{ env.BRANCH_NAME }}
In the token field, you should specify the name of the token you added in the “Actions secrets and variables” section of the repository settings. Remember I’ve asked you to memorize a token name?
With this file, we create an empty folder in the storybook-pages branch and push it to the branch with the name of the branch to which the pull request was made. This will delete the deployment branch.
To build Storybook on the correct branch, set the following variables in the .storybook/main.js file:
const { STORYBOOK_BUILD_PATH } = process.env;
const REPO_NAME = 'YOUR_REPO_NAME';

An example with the repo name
In the method that connects your configs (your project’s config and Storybook’s config), use the ViteConfig method and write the following code:
if (configType === 'PRODUCTION') {
  config.base = `/${REPO_NAME}/${STORYBOOK_BUILD_PATH}`;
}
This tells Storybook to create a folder with the name of the branch where the pull request was created.
Trying it out
Once you have finished setting everything up, the next step is to create a pull request. Just select the option to create a new pull request and fill in the required information. Once the pull request has been created, you’ll notice that a comment with a link to the branch’s deployment build has been added to your pull request. This link will allow others to view your changes and provide feedback as needed. And that’s it! Overall, this process helps to streamline collaboration and ensures that all team members are up to date with the latest changes.

At Evil Martians, we transform growth-stage startups into unicorns, build developer tools, and create open source products. If you’re ready to engage warp drive, give us a shout!