How to make next-level Figma plugins: auth, routing, storage, and more


We’ve already learned how to build a simple Figma plugin for designers from scratch. Here’s how we built a full-featured frontend application-style plugin right inside Figma, along with tool recommendations and useful tips!
In this post, we’ll talk about the process of building a large Figma plugin, and we’ll use one of our real client cases to explain this process. Even though we’ll talk about a specific case, you’ll be able to extract a lot of guidance from this for your own potentail plugin project.
First, let’s give a little backstory explaining the catalyst for doing this in the first place. Our client, Playbook, had reached out to us to help them build a complex Figma plugin. Playbook is a cloud storage platform for creative files, making it easy to organize, share, and collaborate on your work.

Many Playbook users are designers who work in Figma, meaning they need to upload their assets from Playbook into Figma on a regular basis. In order to make this experience more seamless, Playbook needed to build a Figma plugin. (And, of course, we also helped with Slack and Discord integration.) With the broad strokes of the requirements in mind, let’s move on to the more definitive outcomes that would shape the actual development of the plugin.
Preparing to build the plugin
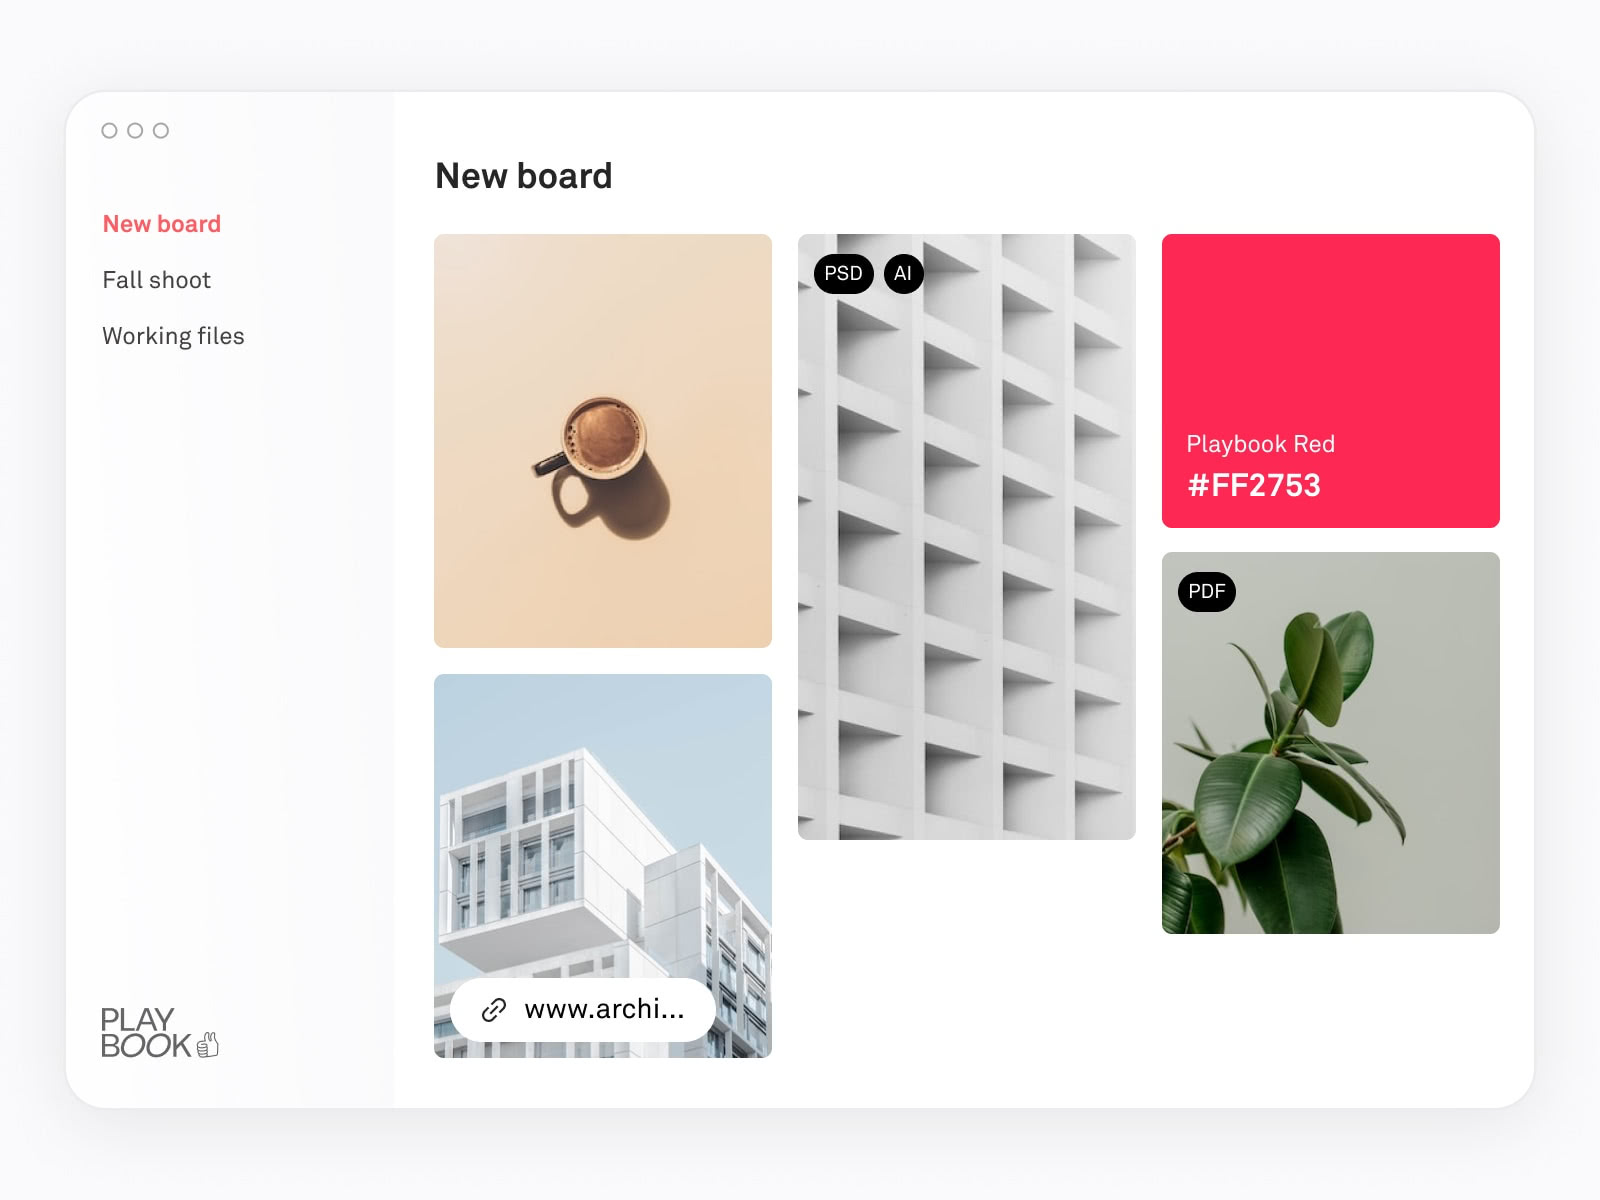
The initial concept for the Playbook Figma plugin was centered around making it easier to use Playbook images in Figma and FigJam without switching between apps or downloading and re-uploading the images. But what would that actually entail for development? Essentially, they wanted to build a plugin that would be a simplified version of the web app: the login page, timeline view (all the files in chronological order), nested view (a file system-like structure with directories called boards and sub-boards), and the search page.
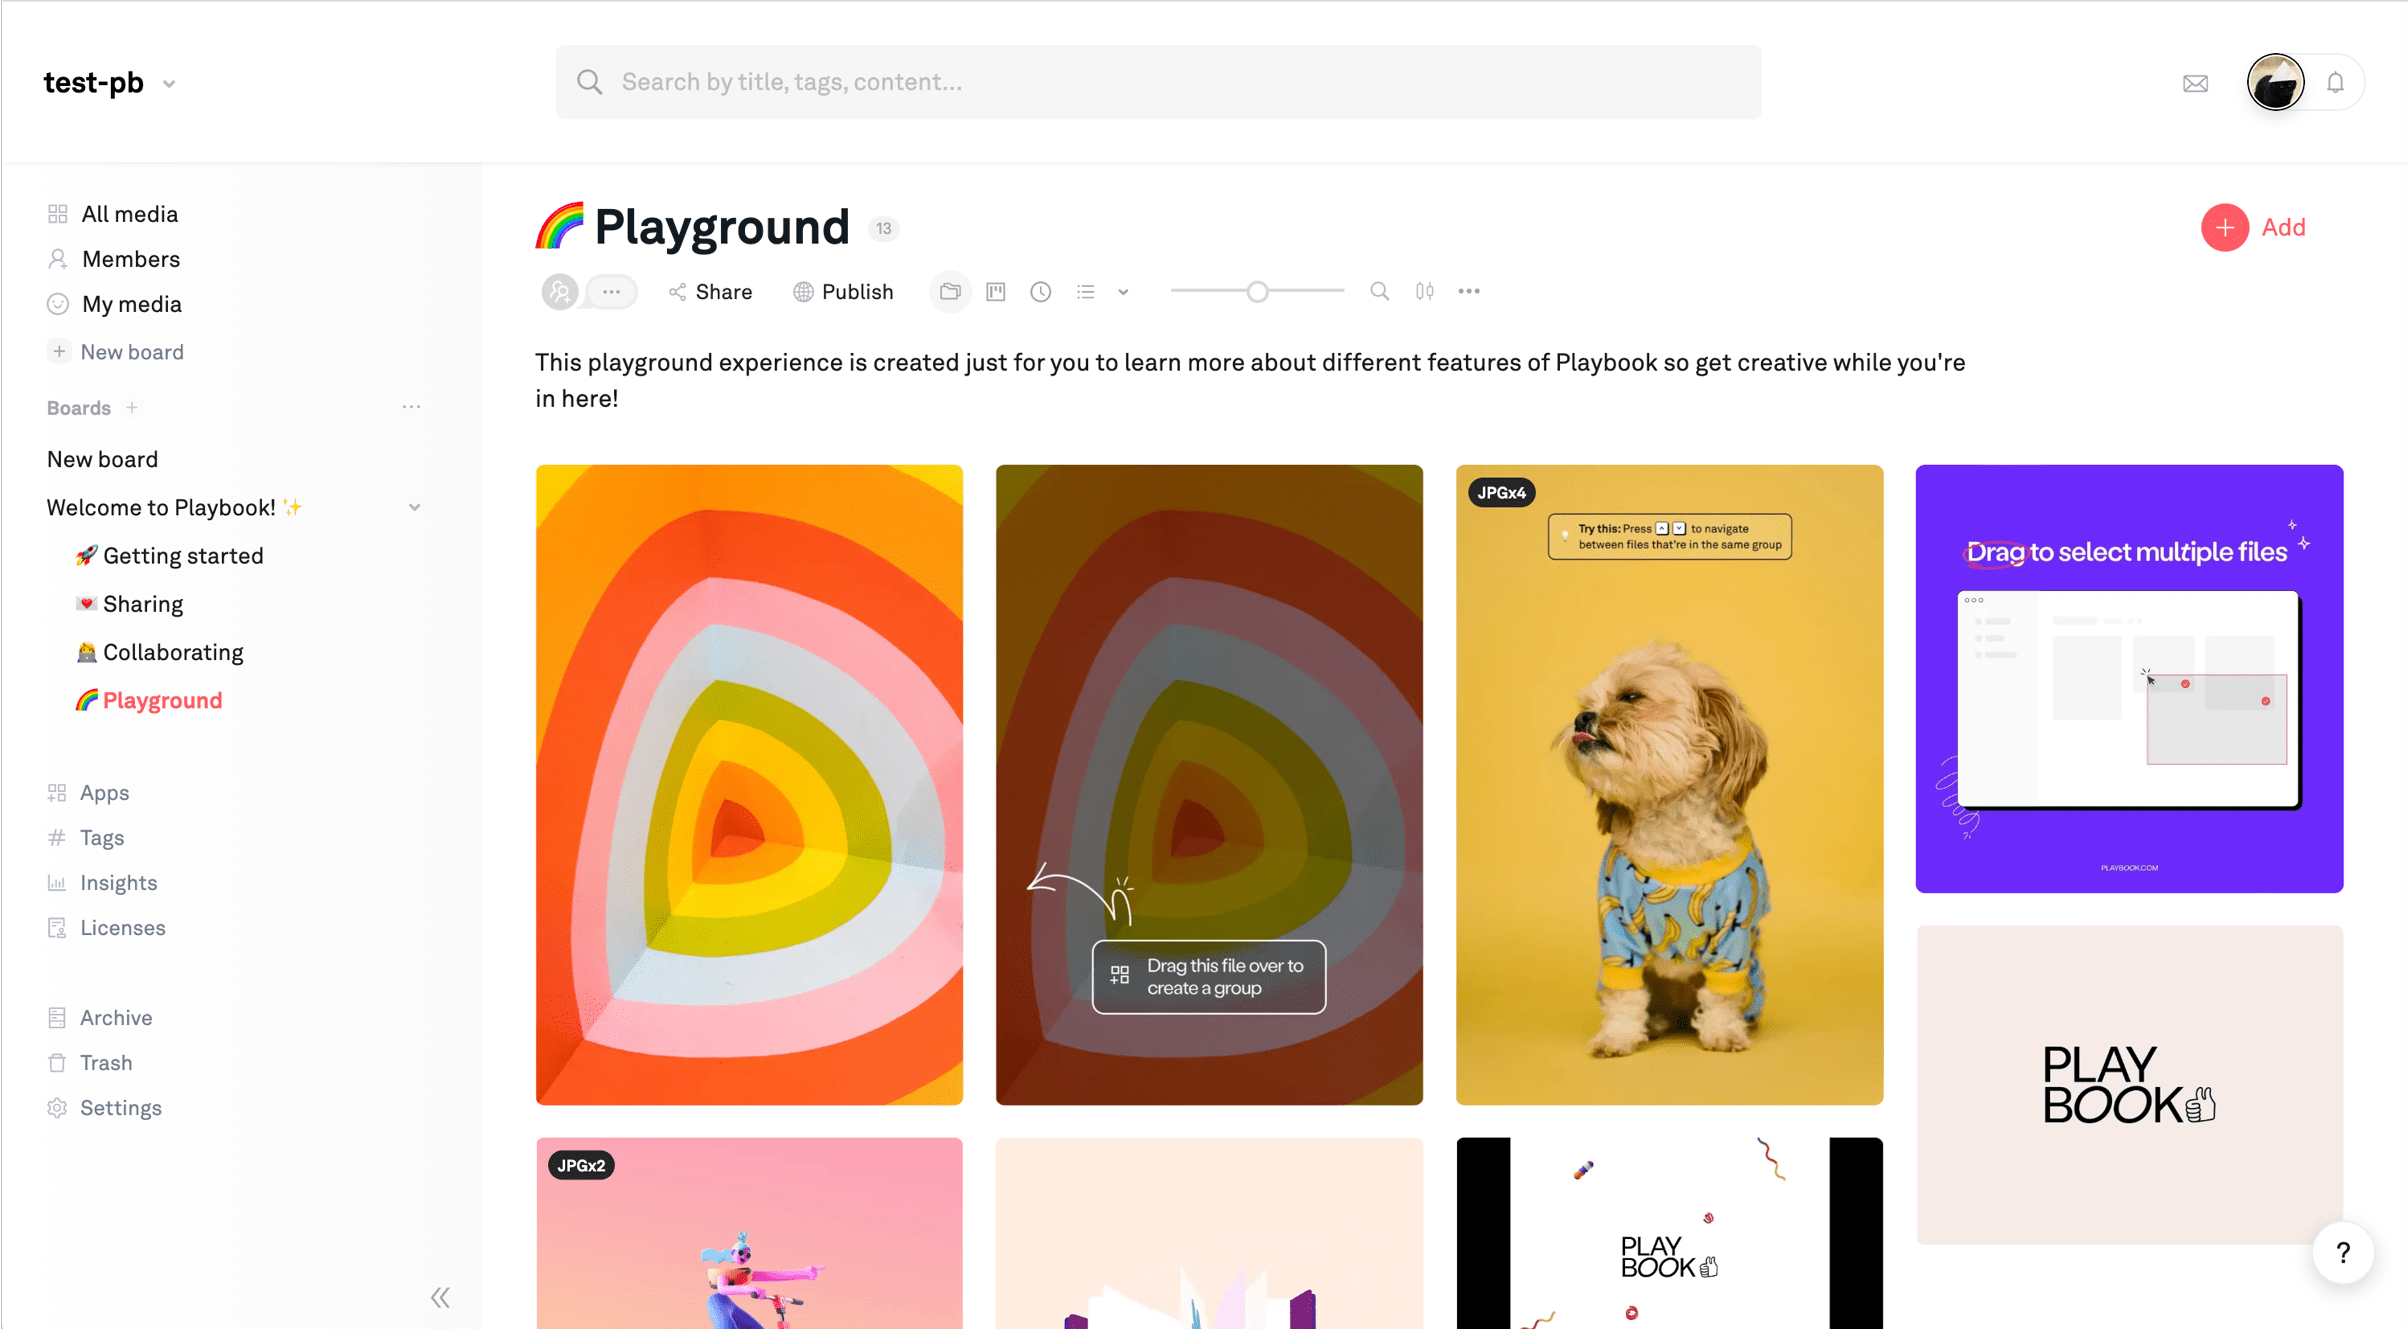
Here’s how the page of the main Playbook web application looks:

In the end, we determined this initial iteraction of the Playbook Figma plugin should allow:
- Logging in to a Playbook account
- Switching between your Playbook organizations
- Viewing all of a Playbook organization’s images (with pagiantion)
- Viewing a Playbook organization’s boards and the ability to browse them (with pagiantion)
- Searching images by title, description, or tags (with pagiantion)
- Pasting by click or drag-n-drop your images into Figma and FigJam
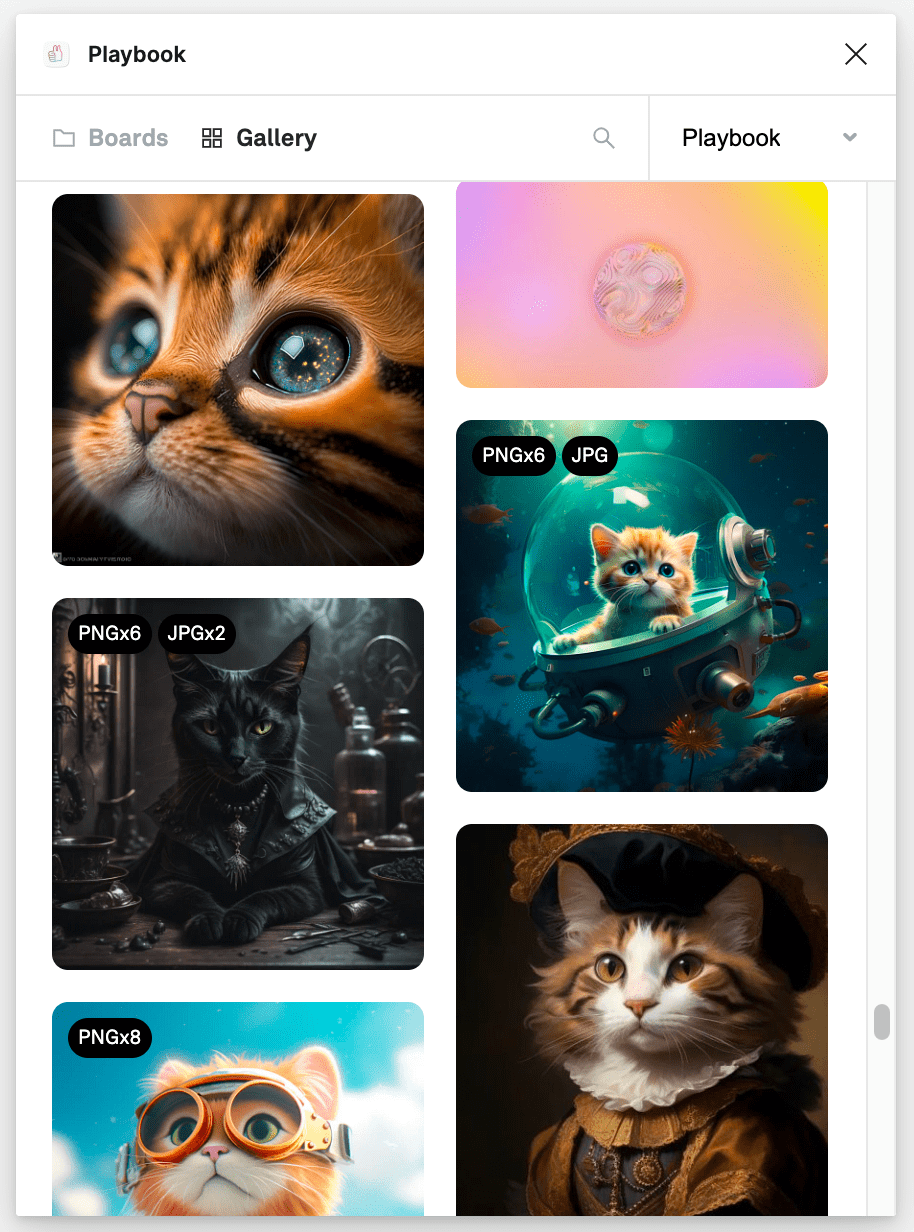
And here’s how minimalistic the plugin turned out to be:

(Other feature ideas included the ability to export from Figma to Playbook, asset filtering and video support, but in order to keep things simple and fast for the first version, we proposed to postpone those features until future releases.)
Figma plugin limitations
Figma has a well-documented API for plugins. Coupling this with our experience, we understood some limitations to keep in mind when developing the plugin’s frontend and backend. Let’s examine the relevant ones.
First, Figma plugins run in a sandbox inside a desktop Electron app (or web application with a minimal browser environment) so they can’t use cookies, IndexedDB, localStorage, History, or some other browser APIs.
Fortunately, we have figma.clientStorage for similar purposes.
Another point: all Figma plugins technically consist of one JS and one HTML file (more on this later). There is no deployment process, so all the code is inspectable which means there’s no way to safely use secrets.
Additionally, you can’t use any static assets and must inline everything or fetch from the server.
In light of the previous two points, if you need to set up the authentication for your service, the OAuth process is different from other environments.
And some more points:
- CORS should be allowed for all API calls (add the
Access-Control-Allow-Origin: *header to your server config) - The only allowed image formats for pasting are PNG, JPG, and GIF
- The maximum image size is 4096×4096px
- CORS should be allowed for images, too
- Plugins should have a way for users to contact a developer for a support (like an email address or a link to a help center)
- A plugin should show appropriate notifications if a user is offline and the plugin won’t work offline
Finally, it’s recommended to match a plugin’s design with the design of Figma’s UI (there are no strict guidelines here, but it’s a very good idea to make it look seamless).
Backend
Despite any limitations, at least we knew that we could use network requests in the plugin! So, development started with the backend.
While the main Playbook web application uses GraphQL API with Apollo on the frontend, the plugin was designed to be a smaller, simplified app, so we decided to create separate REST API endpoints for the Figma plugin (and other third-party app plugins that Playbook may wish to build in the future).
The new REST API has a limited amount of endpoints just for the plugin (mostly GET requests to display desired data, some with pagination). Additionally, a portion of data was serialized specifically for the Figma plugin: we filtered out non-image assets, resized them, transformed images to Figma supported formats, and included only image previews with proper sizes distinct from the main app.
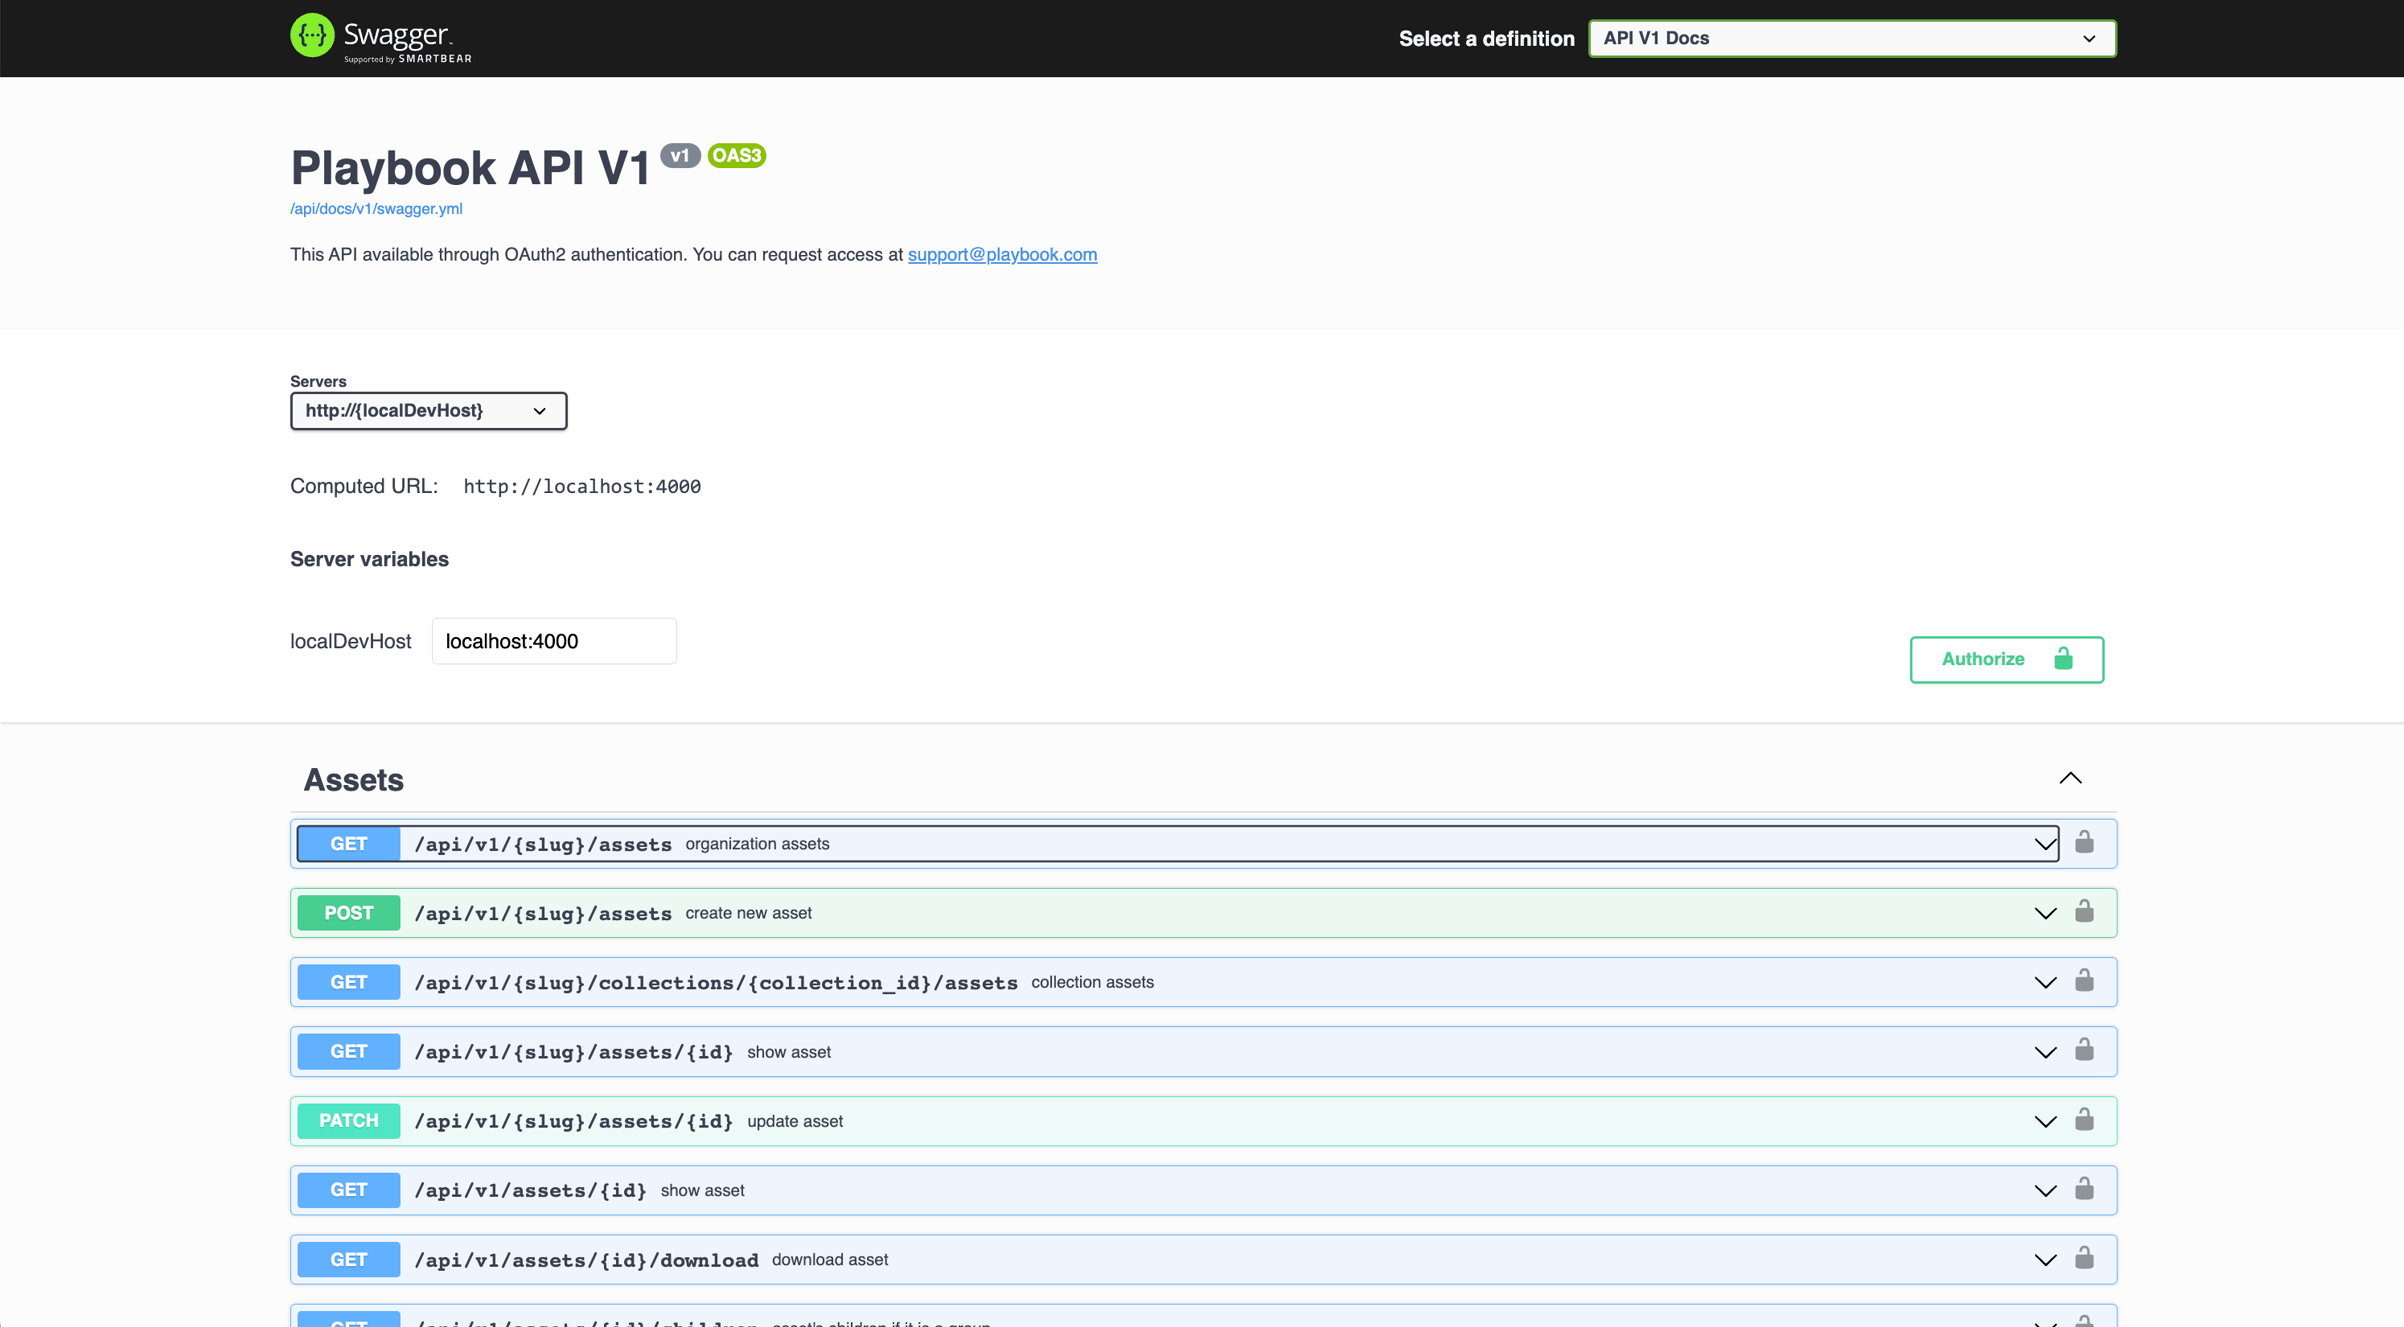
To document the API and create a maintainable scheme, we used rswag. When you describe API operations, it auto-generates API Swagger files and exposes them as YAML endpoints. It also provides the Swagger UI with a page where all endpoints are listed in a nice, human-readable way (and where they can be tested right away).

And it’s great for type freaks too! On the frontend, we used swagger-typescript-api to auto-generate API requests from the generated Swagger YAML scheme. In the resulting file, all the params and results are fully typed with TypeScript, making it super handy to call them from the app in one line, and for keeping the frontend endpoint scheme up to date with the server API in one command.
Figma plugin basics and structure
As Figma runs as both an Electron and web app, that is, in a browser-like environment. So Figma plugins are basically web applications too, with access to the Figma API. As we’ve already noted, they run on the main thread in a sandbox and have restricted access to regular browser APIs.
To build a plugin, we must separate the UI code that will render some elements on the screen from the plugin code that will be connected to the Figma API. The UI code can’t directly access the Figma API, while the plugin code can’t manipulate the DOM or use browser APIs.
To pass any data between these parts, we should use the postMessage method and watch for the message event in both of them.

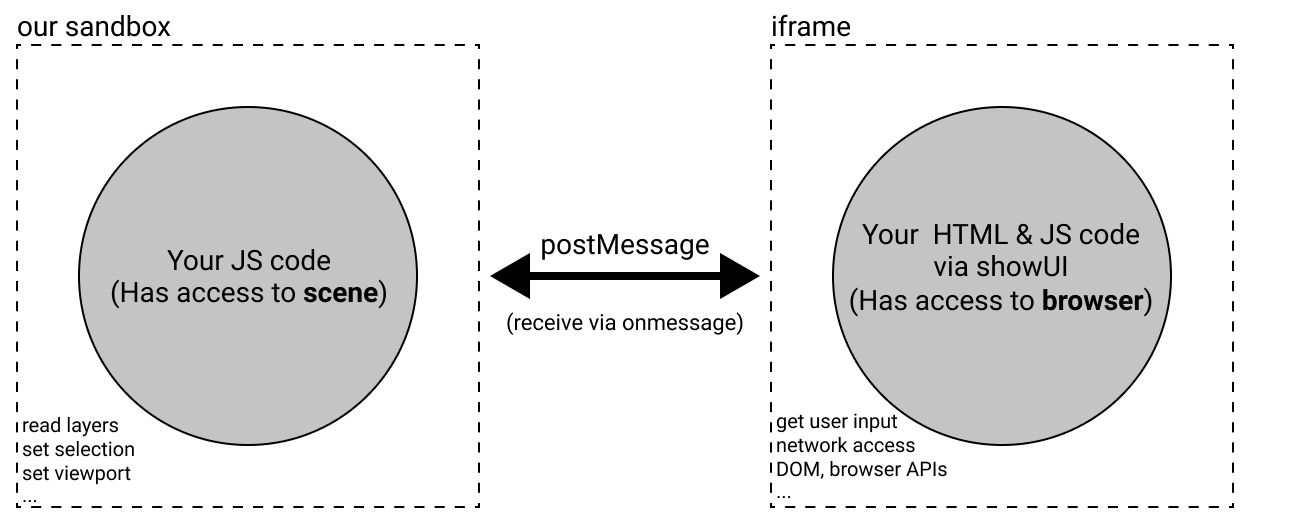
A vizualisation from Figma documentation
In the UI code, we can create a plugin interface that will render inside a plugin <iframe> after a figma.showUI() call.
Developing the plugin
Note: to quickly create and start working on a new Figma plugin, check out the Plugin Quickstart Guide. You’ll generate a nice boilerplate project which will looks familiar for every frontend developer, with package.json, TypeScript, docs, and some example code already included.

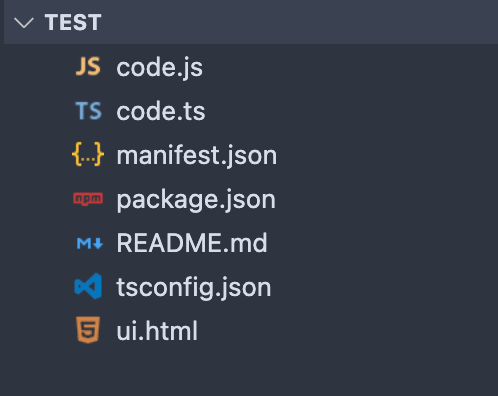
Inside manifest.json, let’s note some items: main for the plugin code (code.js by default, compilated from code.ts) and ui for the interface code (ui.html by default). When you build or publish a plugin, Figma will only use 3 files: manifest.json, code.js and ui.html. But this doesn’t mean we’re forced to write all the app’s business logic inside the two enormous files! We can still maintain appropriate frontend app structure and use any bundler we wish. Just remember that the result should have one JS file with the plugin logic and one HTML file with the user interface.
For our Playbook plugin, we used good old Webpack with the help of InlineChunkHtmlPlugin to include the bundled interface JavaScript code into the ui.html file.
Note that it’s not possible to include any static assets with the plugin. So all the images, icons, fonts and other files should be inlined in ui.html or requested from the server.
Keeping in mind the limitations that we’ve already described, we can build a plugin using almost any frontend stack. We wanted to keep it simple and small (to load fast), so we settled on:
- Preact—3KB alternative to React
- TypeScript
- Webpack as a bundler
- Nano Stores to manage the state
- Memory router from react-router
- CSS Modules and PostCSS
- Linters: Prettier, ESLint, Stylelint. Plus, Lefthook to eliminate any chance for errors on pre-commit
- Github Actions (to run linters & tests)
- Testing: Jest, @testing-library/preact, @testing-library/jest-dom
- Masonic to render perfect masonry layouts with React
The OAuth process with a Figma plugin
If you need to authenticate the user with OAuth from inside a Figma plugin, the process will be a bit different from a regular web or native application.
Besides the fact that we can’t store secrets anywhere, we also don’t have window.opener after window.open (as it opens a browser window while the plugin runs in a sandbox) and we can’t send an access token with a redirect locally like from a native app (for security reasons). You need to have a special authentication page for your app publicly available on the web. To make the process secure, the recommendation is to use a Proof Key for Code Exchange (PKCE).
The 3rd-party service authentication example is described in the Figma docs here.
We ended up with this OAuth flow for our Playbook Figma plugin:
- Create an OAuth2 app on your server for the plugin. We used
Doorkeeperfor that. We’ll need to use theuidof this application asclient_idto identify the Figma plugin so we can trust the authentication requests with thatclient_id. - Additionally, we need to host a special web page for OAuth on the client side and make it public.
- From the plugin we should check if we’ve already stored an access token in
figma.clientStorageand see if that access token is valid by calling any small endpoint (like fetching the current user’s data). If no errors, we use the stored access token and skip the rest. - Before starting the process of granting the authorization code, we need to generate a random string called
code_verifierand a matchingcode_challengefrom the plugin. We used the pkce-challenge library for that. - The plugin makes a POST request to the server with
client_idin the params to receiveread_keyandwrite_key. - If we received the keys, the plugin opens the OAuth web page in a browser using
window.open, with params includingclient_id,write_key(as astateparam) andcode_challenge. - Users log in into the app (or skip this if they have already logged in).
- If the app is trusted, make a POST request from the web page to the server with the same params to allow authentication. Show a success state (see the image below).
- In the meantime, the plugin polls the server with
client_idandread_key. While the previous steps are ongoing, the server answers with 202, after that we getaccess_grant(only once). - The plugin finally makes a POST to the server with
client_id,access_grant(as acodeparam) andcode_verifierand getsaccess_tokenin the response. - Store the
access_tokentoken locally infigma.clientStorage. - Use
access_tokento fetch any data from the server (in the request body or as a URL parameter).

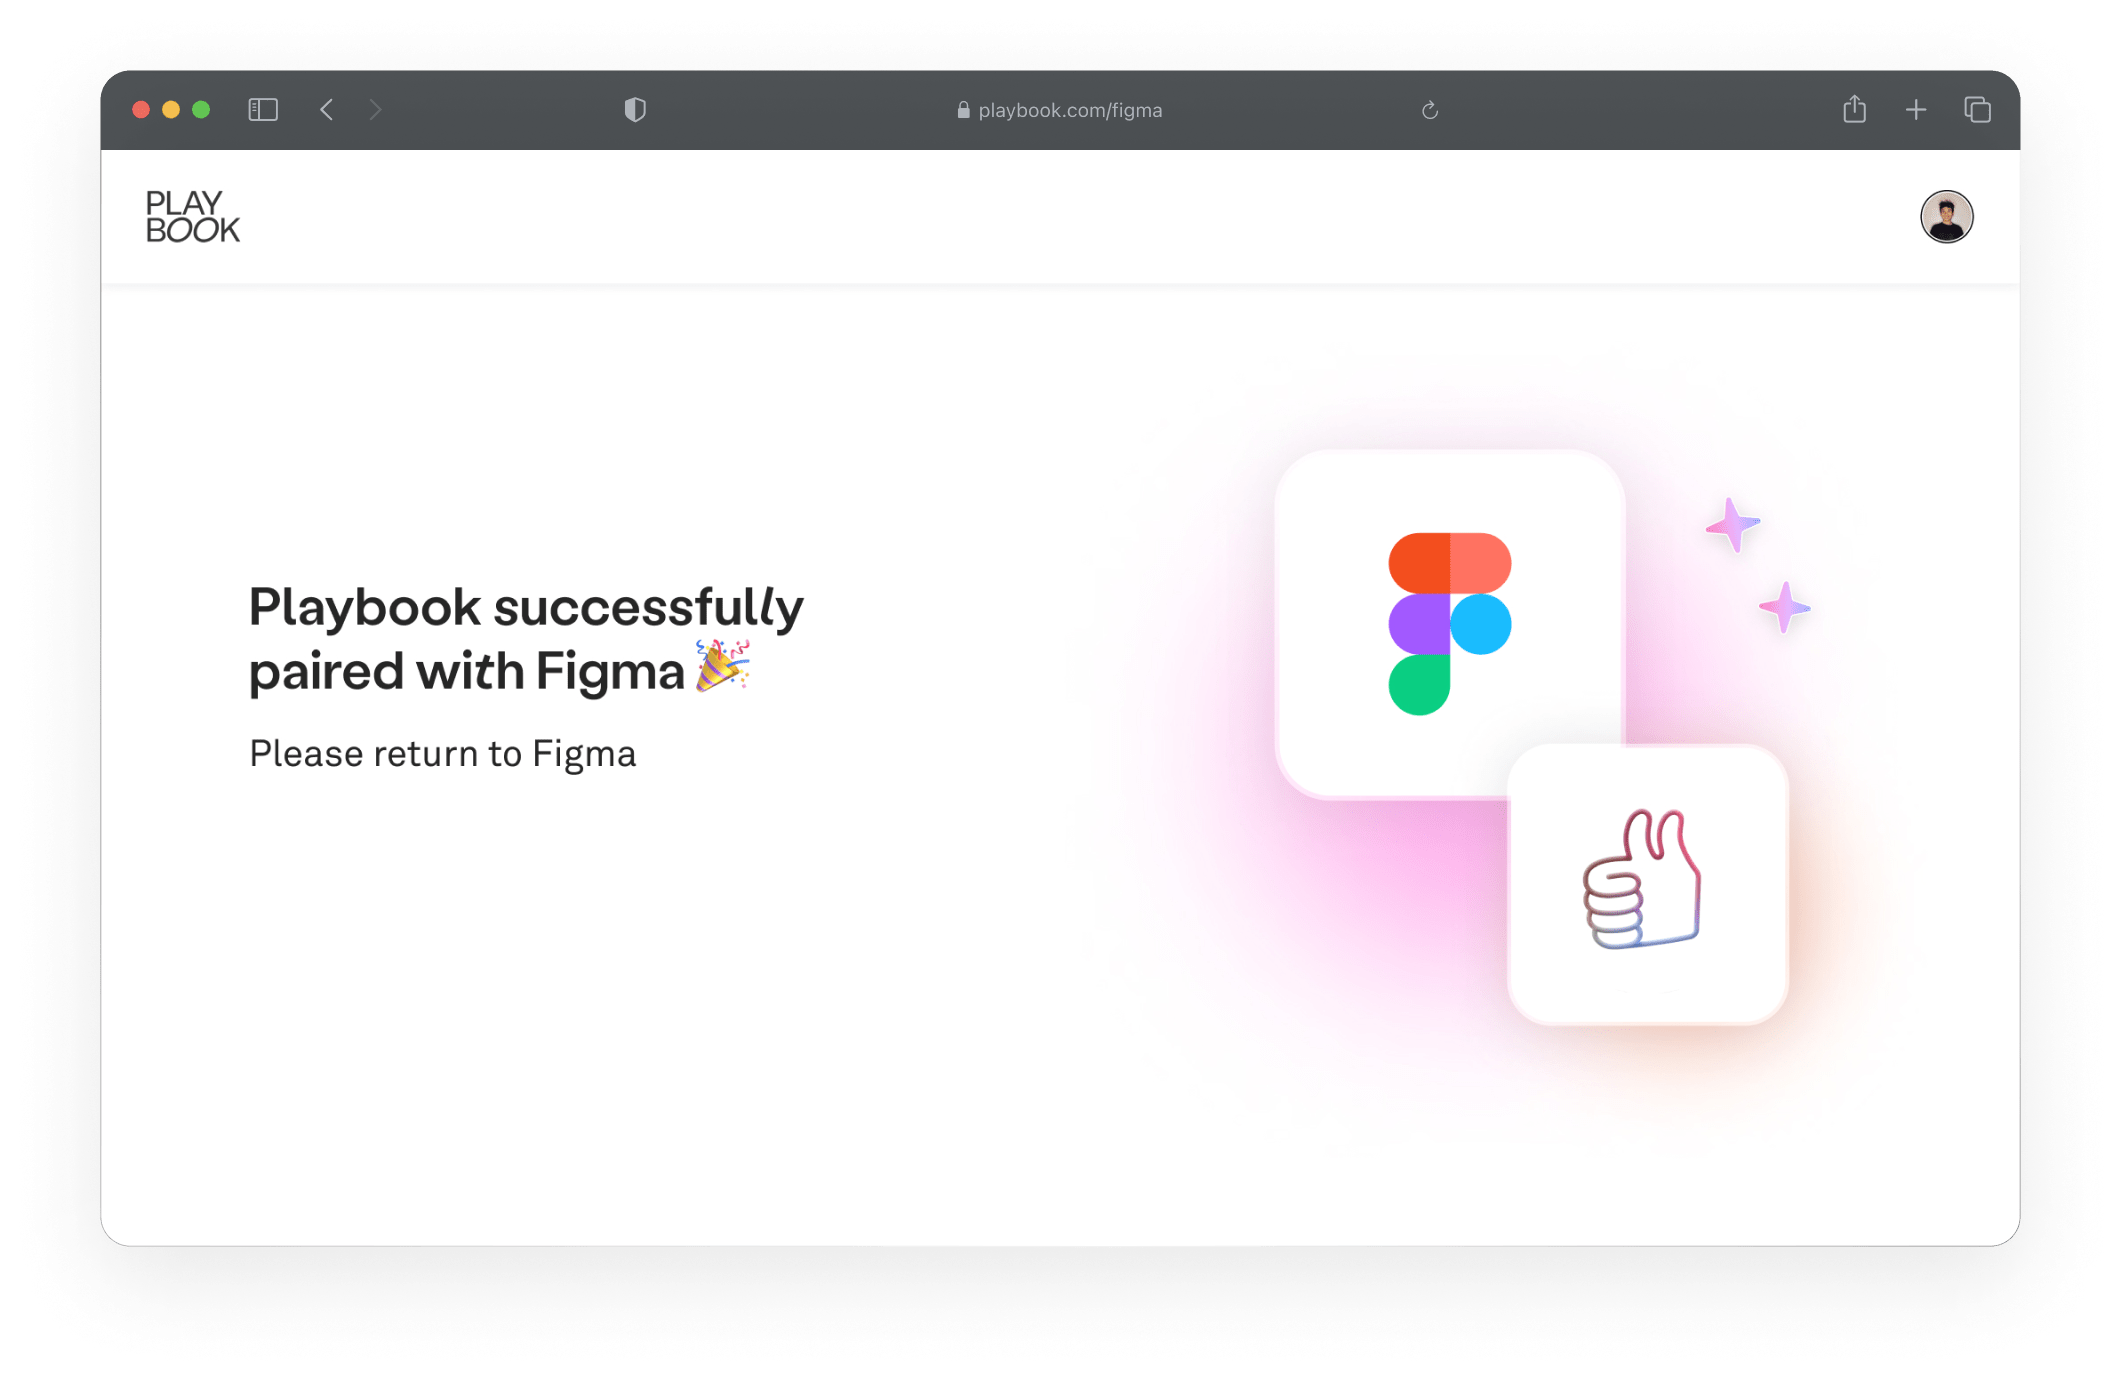
OAuth page in Playbook web app to authorize Figma plugin
The entire OAuth flow must happen in the UI part of the plugin, except for the actions when we read or write figma.clientStorage.
Communication between plugin entry points, and using clientStorage
In order to save the access token so users are not forced to log in every time they open the plugin, we should save it to figma.clientStorage. But this is only available in the plugin code (the main entry point), while we receive the token from the UI. Accordingly, we should use messages to pass it between our entry points.
After we’ve received accessToken, let’s send it from the UI entry point to the plugin:
// login.ts - UI authentication code
window.parent.postMessage(
  {
    pluginMessage: {
      message: 'SAVE_ACCESS_TOKEN',
      accessToken,
    },
  },
  '*'
);
The plugin should receive that message and save the accessToken to the clientStorage:
// plugin.ts
figma.ui.onmessage = async (message) => {
  if (message.message === 'SAVE_ACCESS_TOKEN') {
    await figma.clientStorage.setAsync(
      'ACCESS_TOKEN',
      message.accessToken
    );
  }
};
Next, we need to add a reverse message for the case where we already have a token in storage:
// plugin.ts
const accessToken = await figma.clientStorage.getAsync('ACCESS_TOKEN');

figma.ui.postMessage({
  message: 'GET_EXISTING_ACCESS_TOKEN',
  accessToken: accessToken || null,
});
We’ll watch for that message in the UI code (remember, we’re using React):
// App.ts - UI App wrapper
const handleAccessToken = (event: MessageEvent) => {
  if (event?.data?.pluginMessage?.message === 'GET_EXISTING_ACCESS_TOKEN') {
    const token = event?.data?.pluginMessage?.accessToken;
    // Check if that token works
    // and save it to use with network requests
  }
};

React.useEffect(() => {
  window.addEventListener('message', handleAccessToken);
  return () => {
    window.removeEventListener('message', handleAccessToken);
  };
}, []);
The latter is to inform UI with the same message for the case when we received a new token (to use the same handleAccessToken handler):
// plugin.ts
figma.ui.onmessage = async (message) => {
  if (message.message === 'SAVE_ACCESS_TOKEN') {
    await figma.clientStorage.setAsync(
      'ACCESS_TOKEN',
      message.accessToken
    );

    figma.ui.postMessage({
      message: 'GET_EXISTING_ACCESS_TOKEN',
      accessToken: message.accessToken,
    });
  }
};
You can include any arbitrary data in a pluginMessage. There is also a special case in the Figma API for drop events from the UI with its own scheme:
// UI code
window.parent.postMessage(
    {
      pluginDrop: {
        clientX,
        clientY,
        items: [], // Array of Files
        dropMetadata: {}, // Any additional data
      },
    },
    '*'
  );
pluginDrop triggers a special figma.on('drop') event in the plugin. You can manipulate dropped files and the drop coordinates (absolute and relative) within this event’s handler. For instance, with the Playbook plugin, you can transform pasted images to Figma Nodes and insert them to Figma canvas.
Dealing with routing
Our plugin design called for adding several screens:
- Login page
- Board view
- Gallery view
- Search page

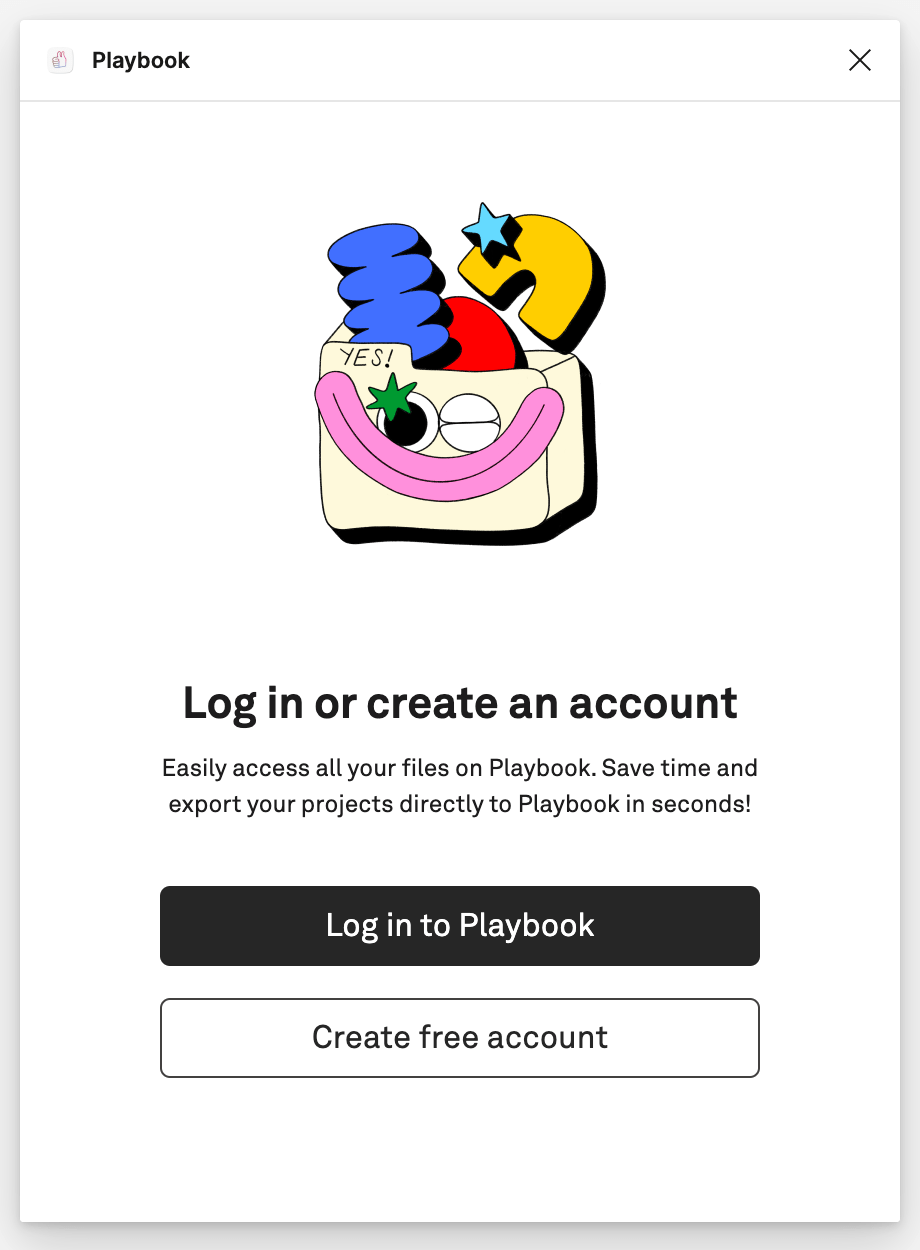
Login page

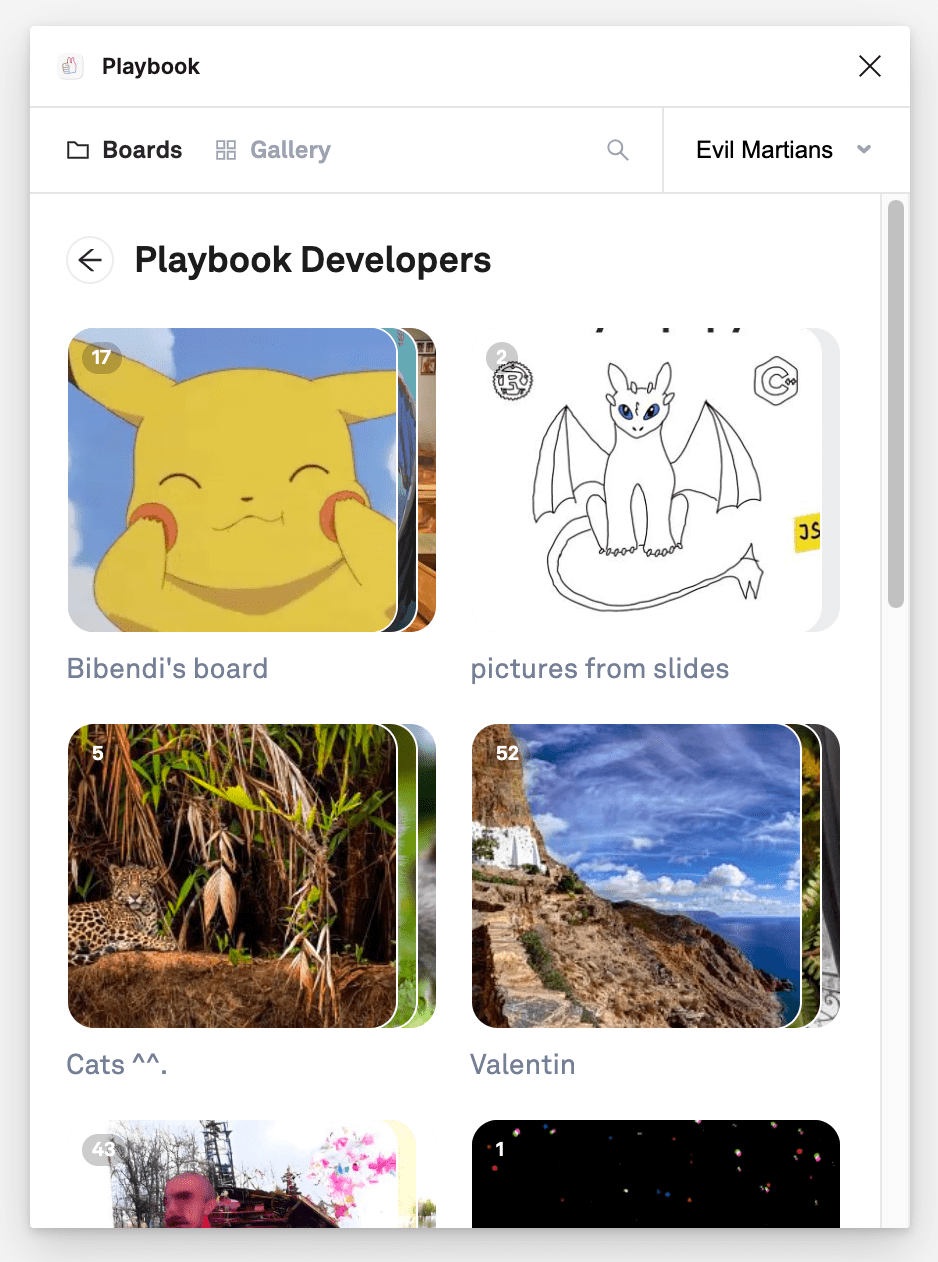
Boards page (nested view)

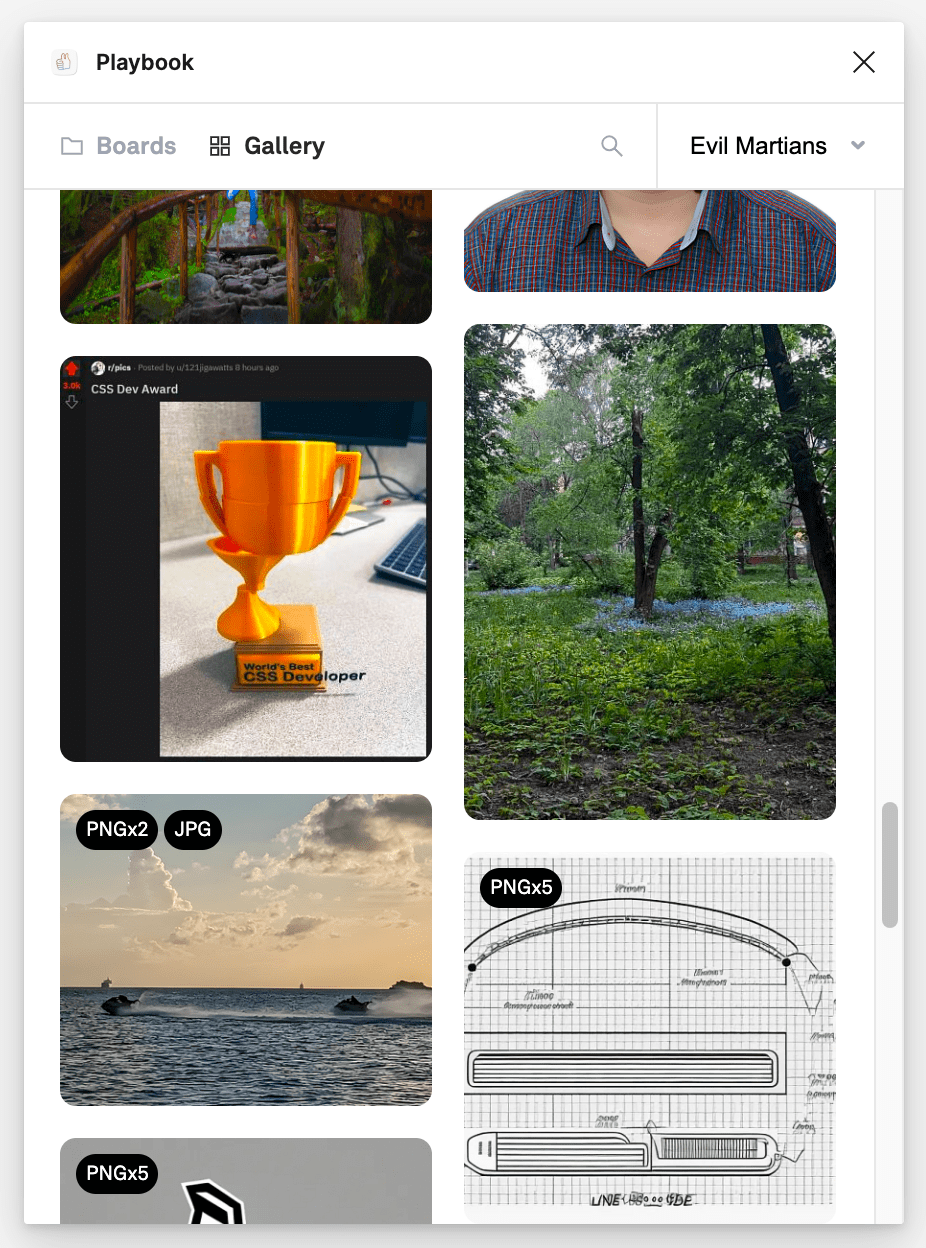
Gallery page (timeline view)

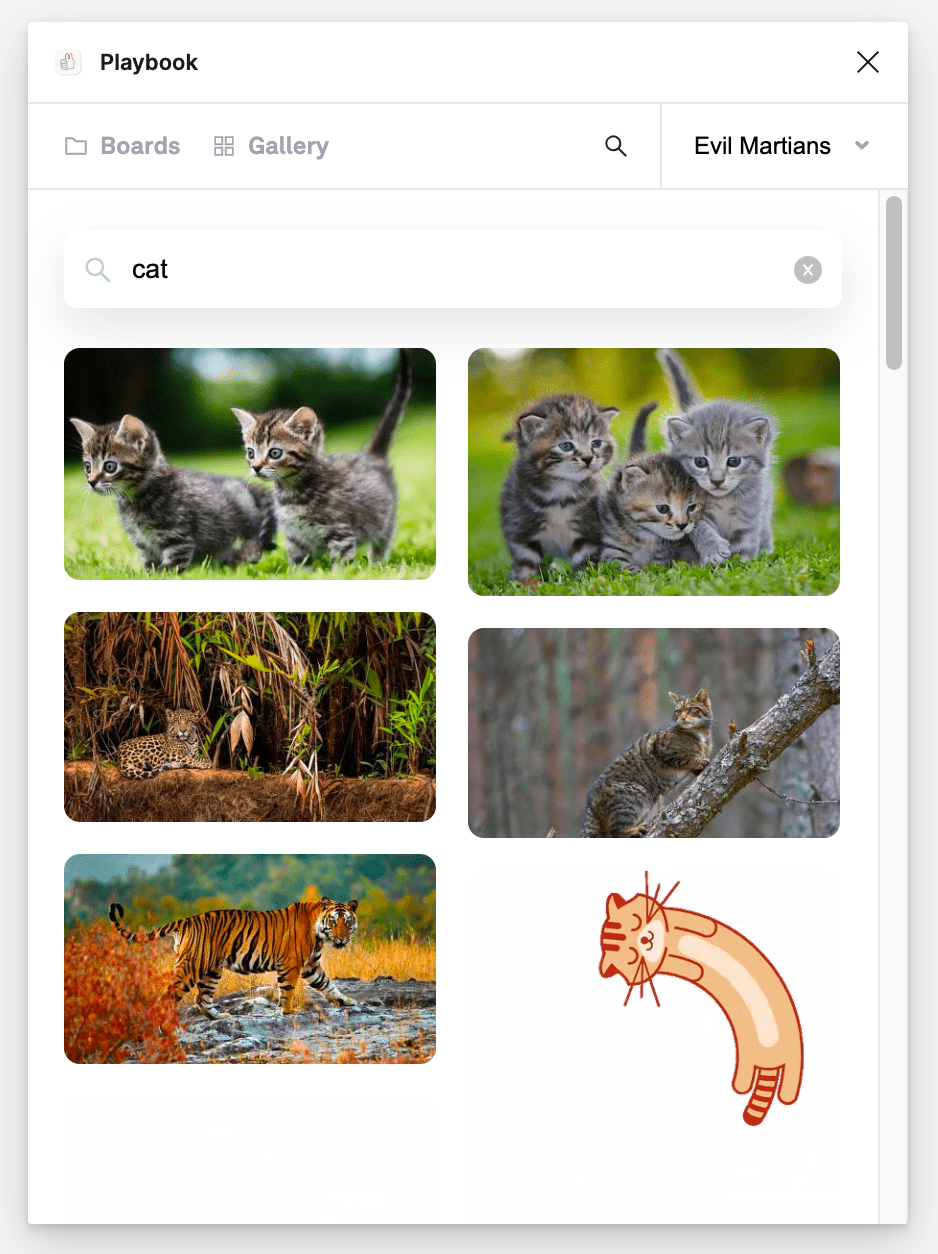
Search page
We needed to develop some kind of routing to switch between frames. Since Figma plugins run in an iframe, we can’t use the History API from there, therefore standard routing tools won’t work. This can be solved in a several ways:
- Hosting the plugin UI on a different website and opening it from inside the iframe
- Finding a router that doesn’t use browser history
- Writing our own mini-router
We decided to go with the second option, and we found Memory router from react-router. It stores and manages a history stack in memory and can be used in any non-browser environment, including with plugins, extensions, tests, and Storybook.
MemoryRouter supports the same features from BrowserRouter that most developers are accustomed to: NavLink, Outlet, manual navigation, redirects, generic errors, and loading states.
Incorporating Nano Stores
As our Figma plugin UI part has grown into a full-fledged frontend application, the obvious step was to choose the suiting state manager for it. Also, dividing UI components and the business logic is a modern good practice for any frontend application. For a React (or Preact) app, this means that your React components should render only the pure interface, getting all the data from the store, so that you have almost no state hooks and no complex logic in the components.
This kind of approach has many advantages, including isolated testing for app logic, the possibility to isolate screenshot testing without mocking, further reusability of the business logic, and ability to change the UI framework if you want. For instance, in our case, if we decide to build a Playbook plugin for some other app, like Canva, we could reuse the logic from the stores and just rewrite the UI and API logic.
For the Playbook plugin, we used the Martian open source library Nano Stores. This was the perfect state manager for us, and an exact fit for our project: super tiny (yet powerful), fast, simple to test, and it supports Preact.
The stores are easy to use in the components with one hook, and it’s clear how to subscribe stores to each other’s data. Writing specific state helpers (for example, we made our own wrapper for all the paginated fetches) is also straightforward.
Further, Nano Stores only requires one file per store—so you don’t get all distracted by the intricate architecture. In our case, we managed to keep all of the business logic in several stores, and achieved a 100% test coverage for it without any struggle.
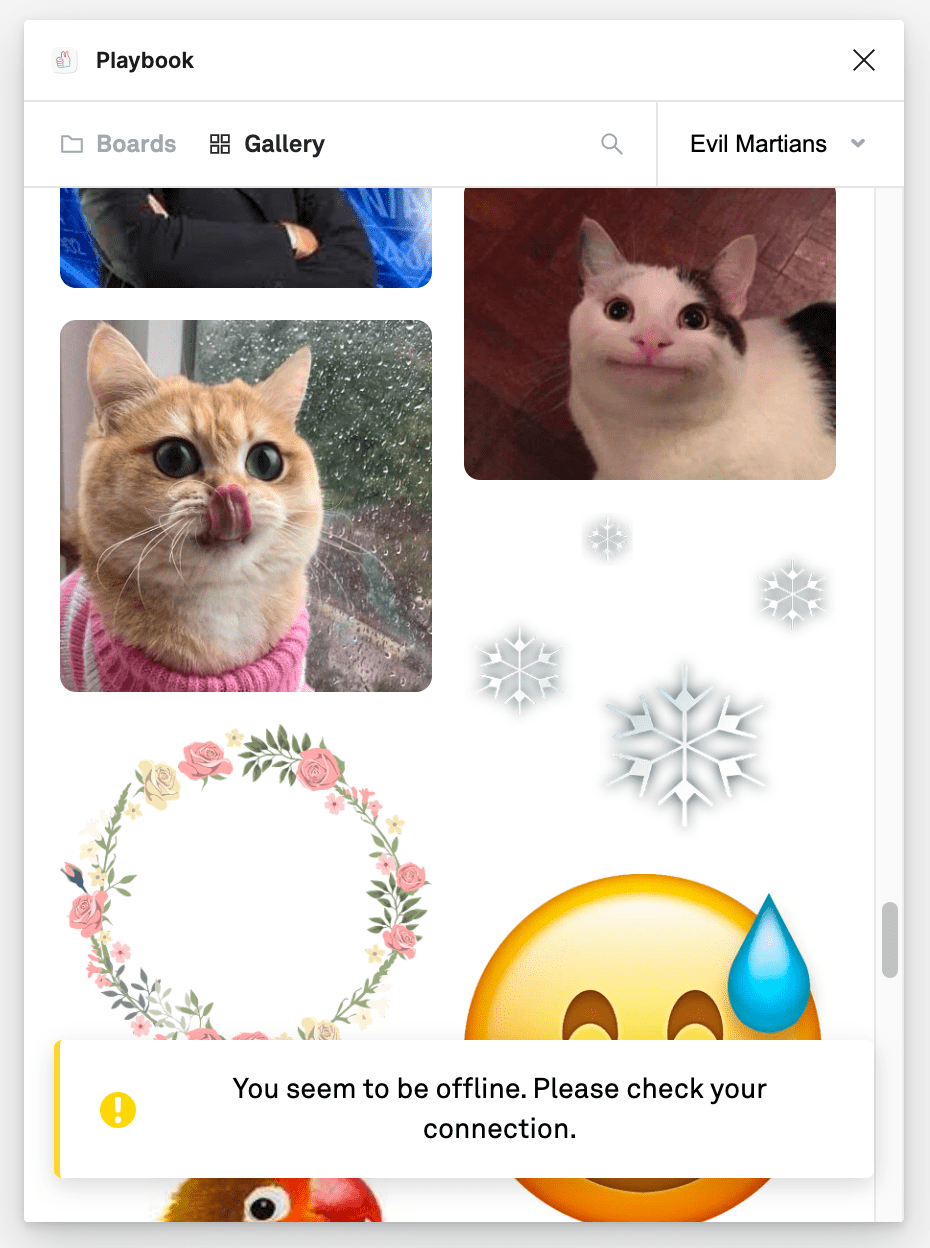
Offline warning
The Playbook Figma plugin only works with a stable network connection because it fetches data and images from the Playbook server. So, to fit the Figma plugin review guidelines, we needed to provide a corresponding warning when the network is unavailable, and thus, we can’t load anything.
Fortunately, from inside the plugin iframe, we still can watch for the window’s online & offline events. Therefore, we simply decided, not to block the app view, but to show a warning toast after 3 seconds with no network connection, and to hide it 1 second after the connection has been restored.

The simplified code for that might look like this:
const OFFLINE_TIMEOUT = 3000;
const ONLINE_TIMEOUT = 1000;
const message = 'You seem to be offline. Please check your connection.';

export const useOffline = () => {
  const showWarning = () => {
    // Double check in case the connection restored after the timeout
    if (!navigator.onLine) {
      showWarning(message);
    }
  };

  const hideWarning = () => {
    // Double check in case the connection lost after the timeout
    if (navigator.onLine && hideToastRef && hideToastRef.current) {
      hideWarning()
    }
  };

  const handleOffline = React.useCallback(() => {
    setTimeout(showWarning, OFFLINE_TIMEOUT);
  }, []);

  const handleOnline = React.useCallback(() => {
    setTimeout(hideWarning, ONLINE_TIMEOUT);
  }, []);

  React.useEffect(() => {
    showWarning(message);

    window.addEventListener('online', handleOnline);
    window.addEventListener('offline', handleOffline);

    return () => {
      window.removeEventListener('online', handleOnline);
      window.removeEventListener('offline', handleOffline);
    };
  }, [handleOffline, handleOnline]);
};
Analytics and error reporting for a Figma plugin
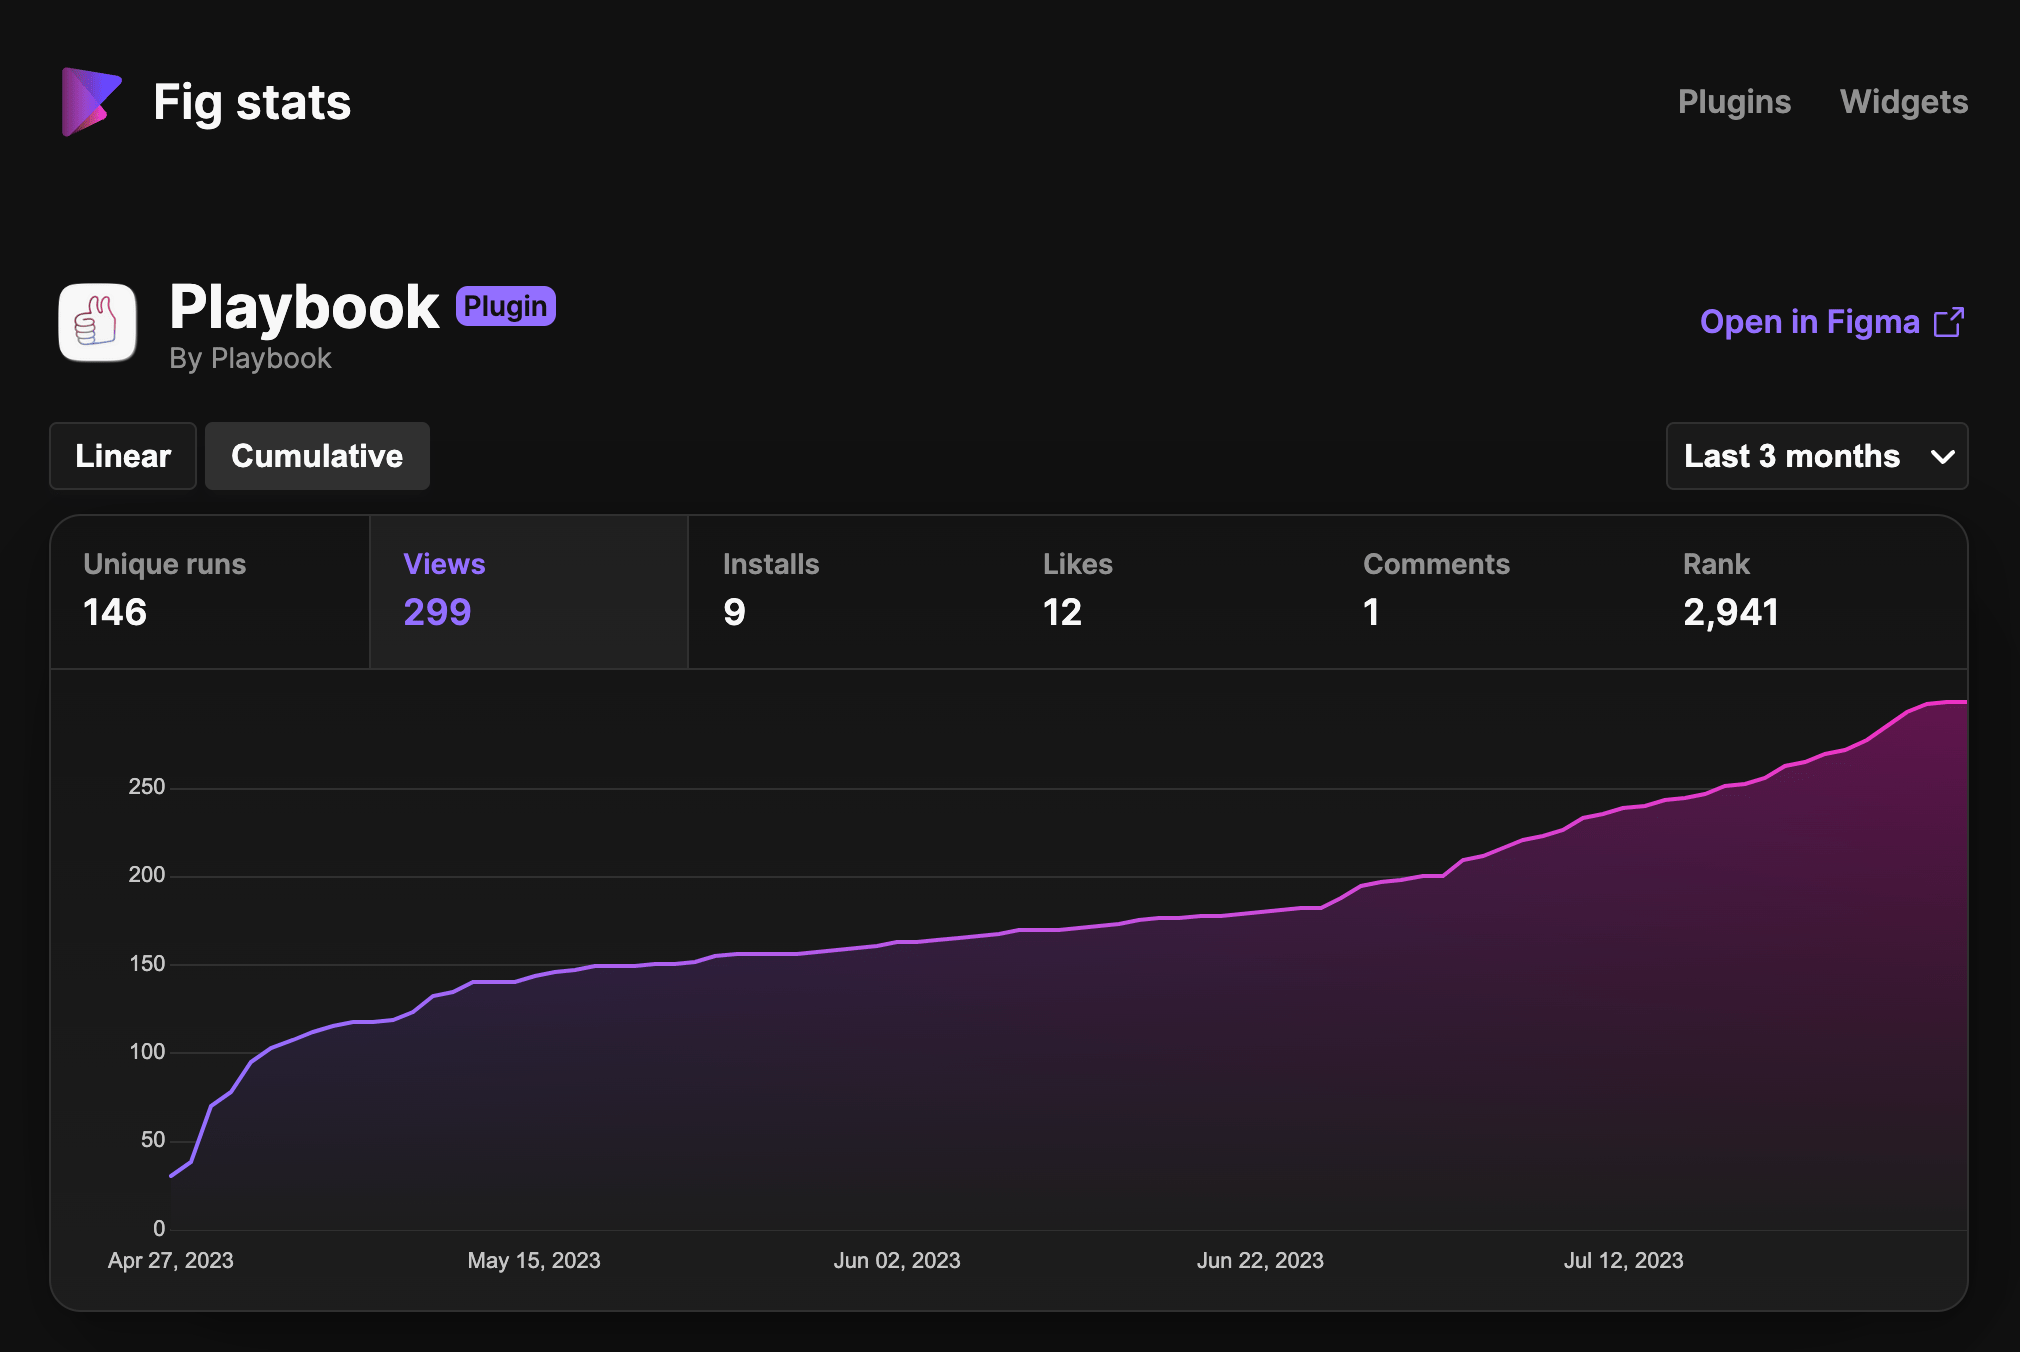
Figma maintains public plugin statistics: you can see the download and like count right on the plugin page in Figma community.
There is also a cool free tool that helps keep track of public plugin statistics called Fig Stats. It collects daily data on runs, views, installs, likes, and comments on all published Figma plugins and widgets. Plus, this data is represented in beautiful, interactive charts:

You might recall that due to the peculiarities of Figma plugins, we can’t use cookies in them. So, most of the complex product analytics solutions, like Google Analytics or Amplitude, technically wouldn’t work for us. We were also trying to save those kilobytes, so we decided to only keep analytics on the server side, counting the API requests.
We used Sentry for error reporting, just as in the main Playbook application. To keep the bundle size small, we used only @sentry-browser (the plain JavaScript version) without tracing, React, or react-router integration. With that package, the error stack trace still remain informative and the app is not over-complicated. Notice that, because of plugin limitations, you can’t use Sentry in the plugin main entry, only with the UI portion of the plugin.
Publishing your Figma Plugin
After the plugin development process is finished, you should once again go through the Figma plugin review guidelines. If all the requirements have been met, you can publish it to the Figma Community so it will be available in the public.
Before submitting a plugin, you need to prepare marketing information for the Figma Community page, including the plugin name, icon, tags and images. Figma will review the plugin and approve it or ask for some fixes before publication.

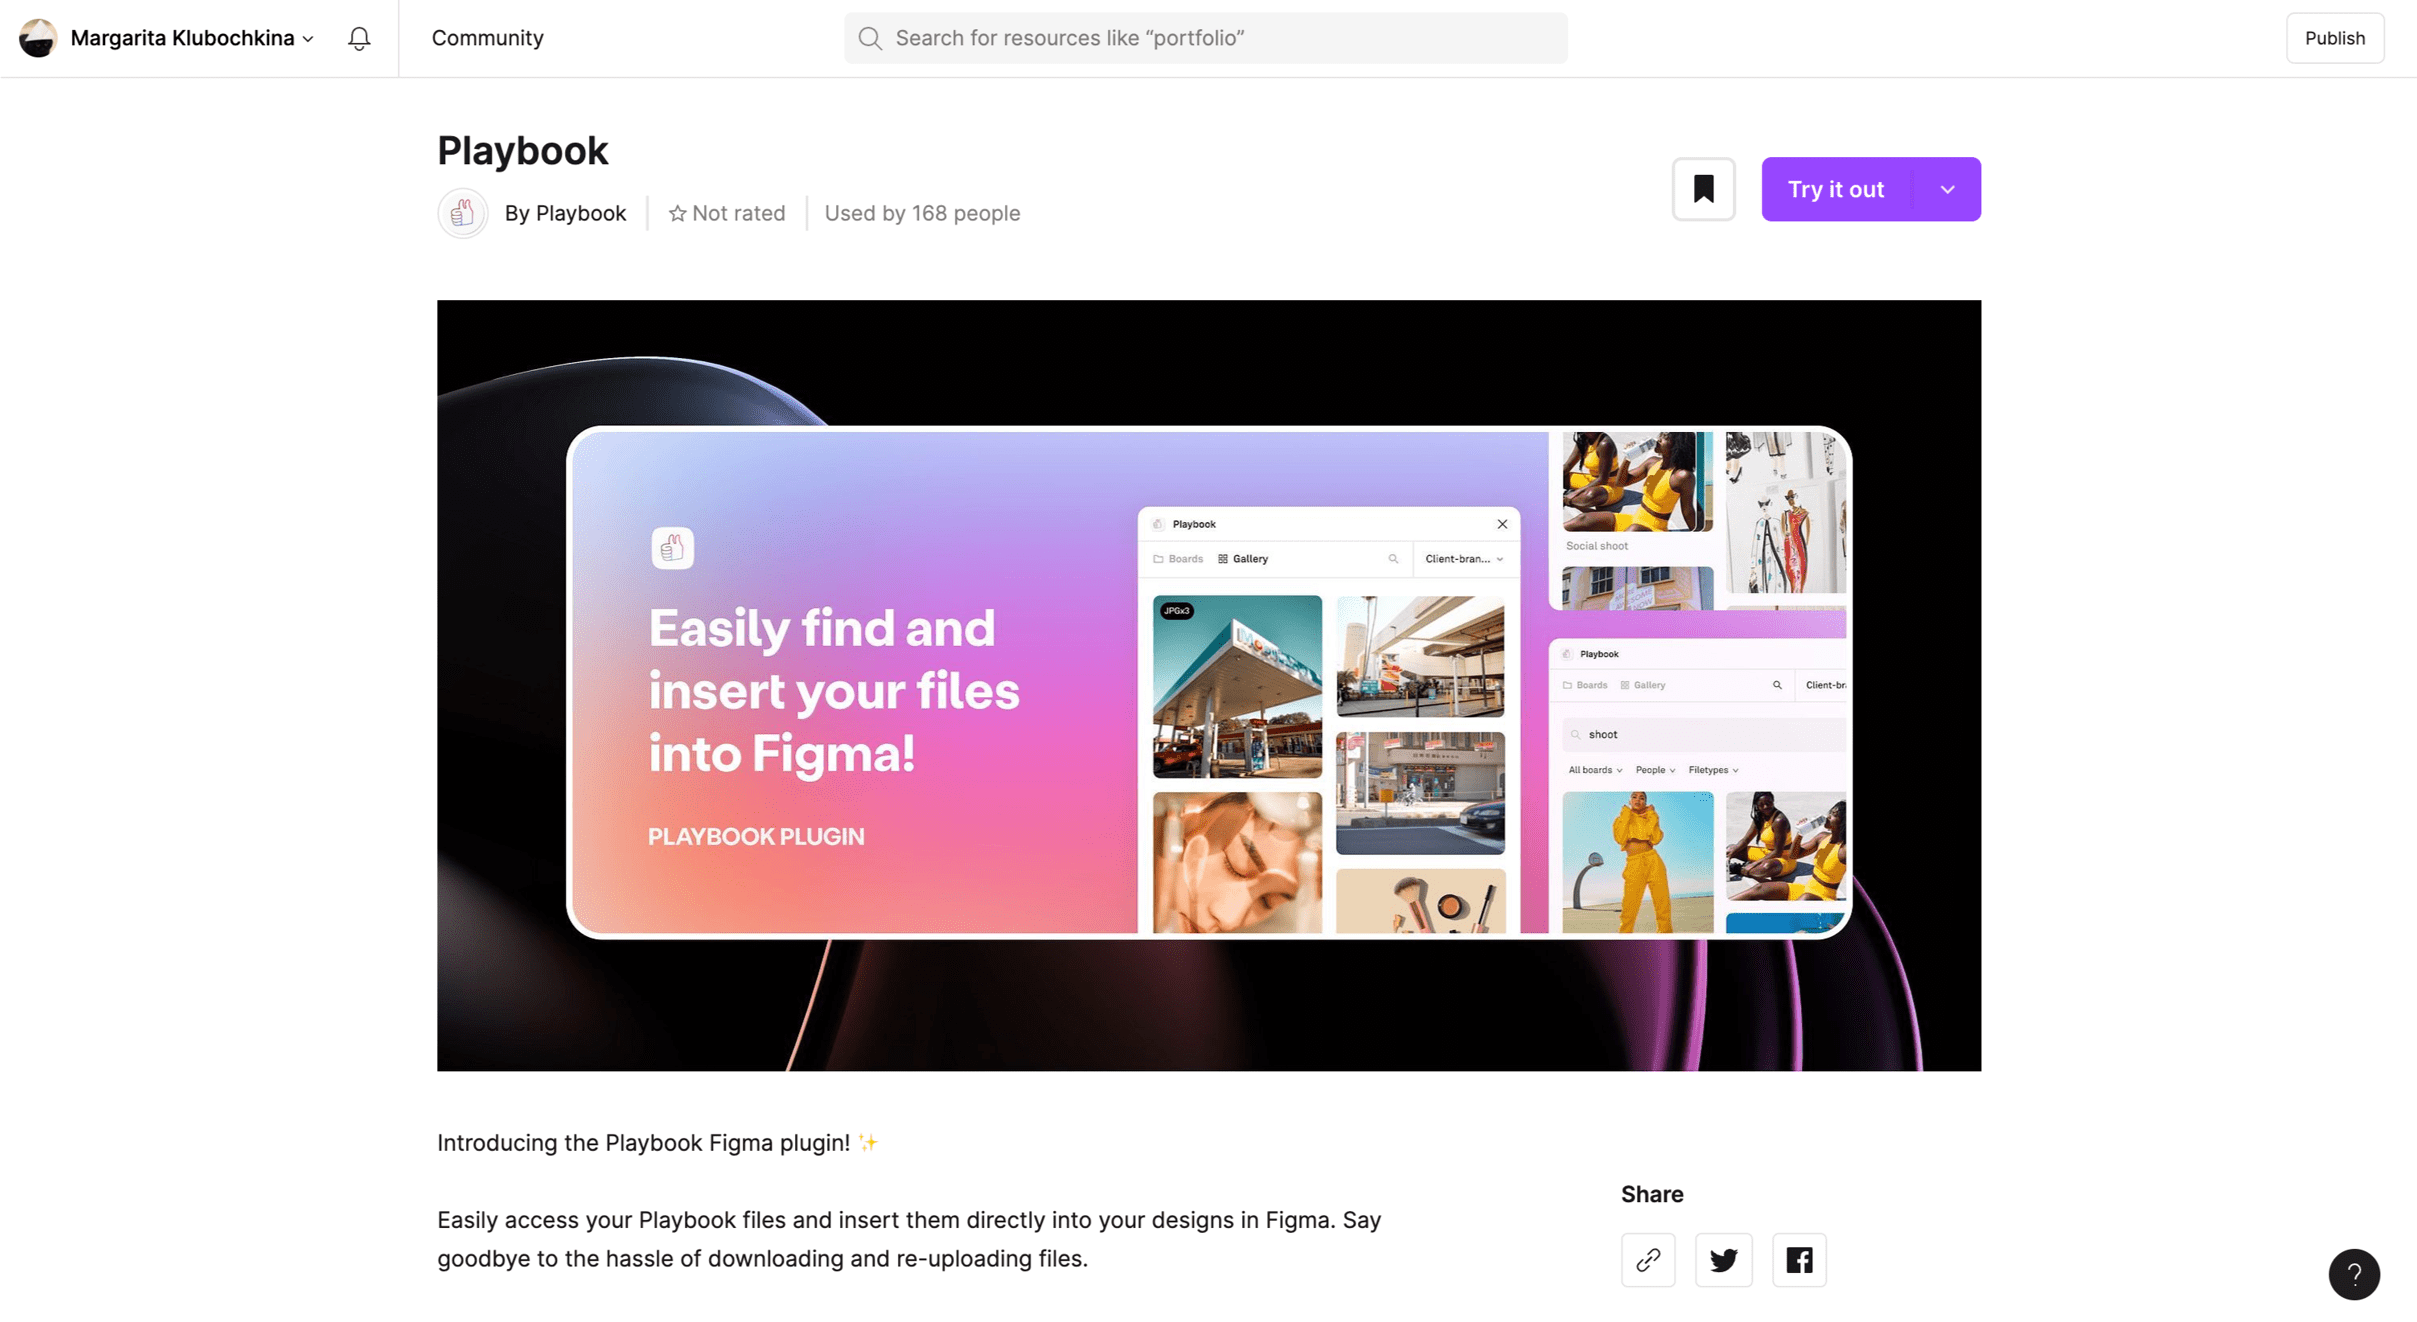
Playbook plugin community page
You can also publish a plugin privately. For instance, this could be done with the intent only use it internally within a particular organization.
Private plugins don’t need to be approved by Figma. Since we can develop plugins only from the macOS or Windows desktop app, this also can be useful if you wish to test a future public plugin in a Figma browser app—there could be some minor UI bugs, for example, with Safari. But note that private publishing is supported only for the Organization and Enterprise plans which are expensive, so if you’re not ready to use them, you can test the browser bugs only after publishing your plugin in public.
The final version of a Figma plugin has to be built and published from a developer’s local computer. Here’s a final checklist for when you’re ready to publish:
- Don’t forget to pull the latest
mainGit branch - Run all linters and tests (if any), to ensure there are no errors
- Clean up all the output directories to avoid collisions
- Build your production bundle (if you used a bundler) or compile TypeScript
- Run your plugin from the Figma desktop app to check the production build (“Plugins” -> “Development” -> Your plugin)
- Navigate to “Plugins” -> “Development” -> “Manage plugins in development” -> Your plugin -> Hit “Publish”
- In the following modal, fill in all the required data
- Click “Submit for review” and wait for the good news!
After a successful review, the plugin will be published and its listing will appear in Figma Community. You can share a link, or it can be found using its name or keywords. If you publish a private plugin, it will immediately appear in the organization’s plugins list and be available to all the members of your organization.
Wrapping up
So, that wraps up the complete journey of making a complex Figma plugin. Hopefully you’ve found it useful! One more note: if you’re looking for the ideal cloud storage solution for creatives, we do recommend you give Playbook a shot. Plus, our Playbook Figma plugin will help you easily use your files in Figma!

At Evil Martians, we transform growth-stage startups into unicorns, build developer tools, and create open source products. If you’re ready to engage warp drive, give us a shout!